Jellies are X’s favourite dessert – while most of the time I just make konnyaku jelly to satisfy his jelly cravings, I decided to try my hand at making my own gelatin-based jelly as I had leftover canned pineapple cubes and syrup left from my Sweet and Sour Pork.
Jump to: Step-by-Step Photos · Recipe
Jellies can be made with different types of setting agent – gelatin, agar agar (kanten), konnyaku and ice jelly powder. Gelatin is a translucent and flavorless food derived from collagen obtained from cows or pigs; agar agar (kanten) is made from seaweed (or algae); konnyaku is derived from the corm of konjac, a type of flower; and ice jelly powder derived from the seeds of a variety of fig. All of them will yield different textures in the jellies, with ice jelly powder yielding the softest texture.
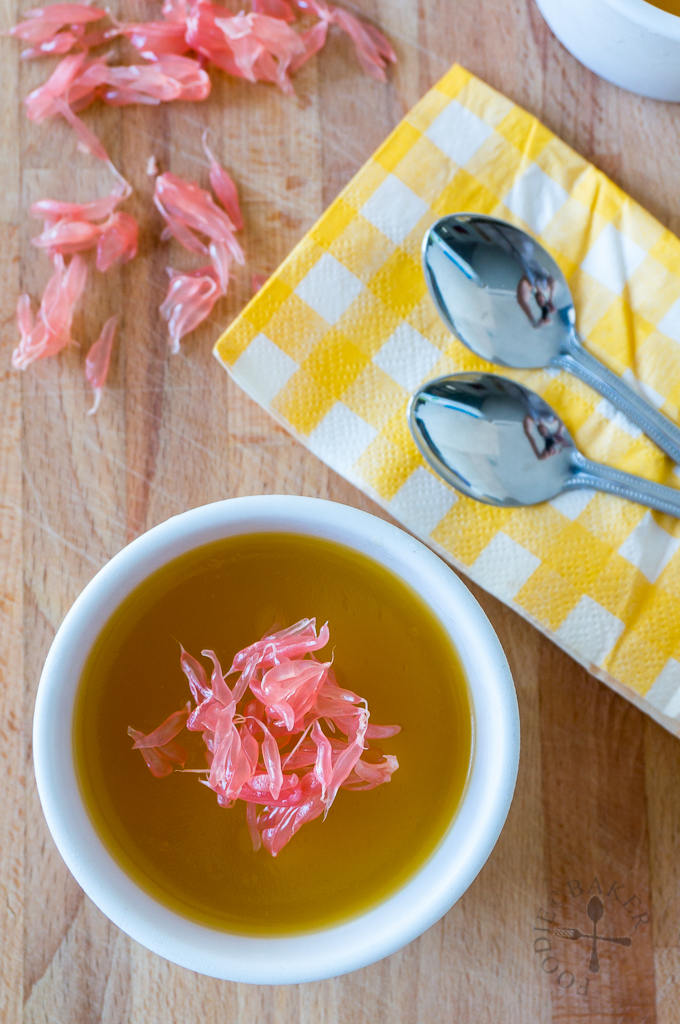
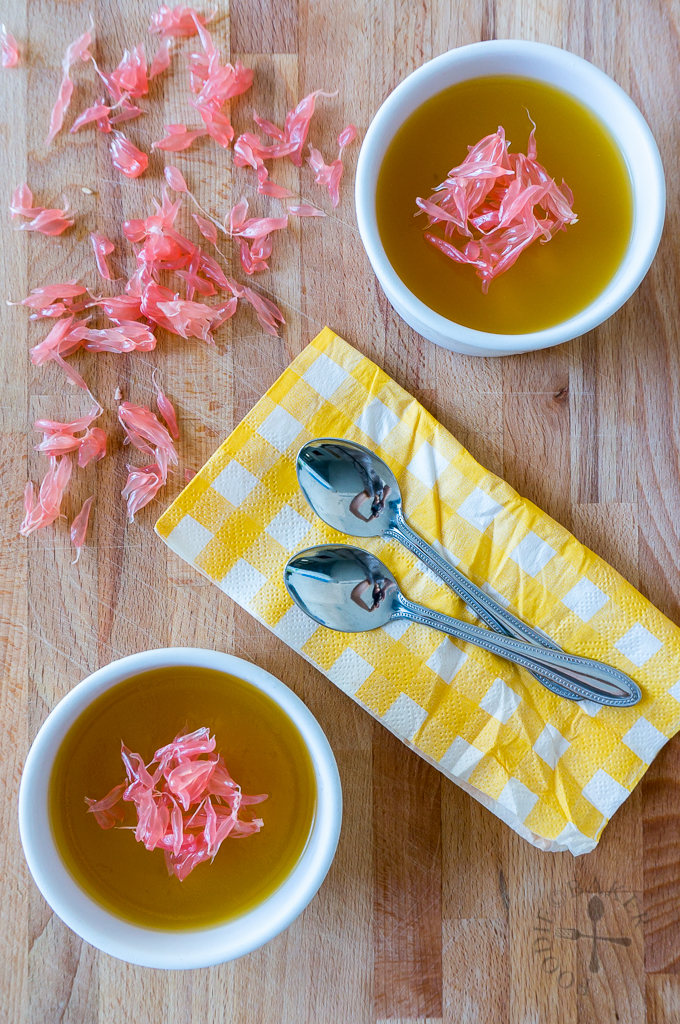
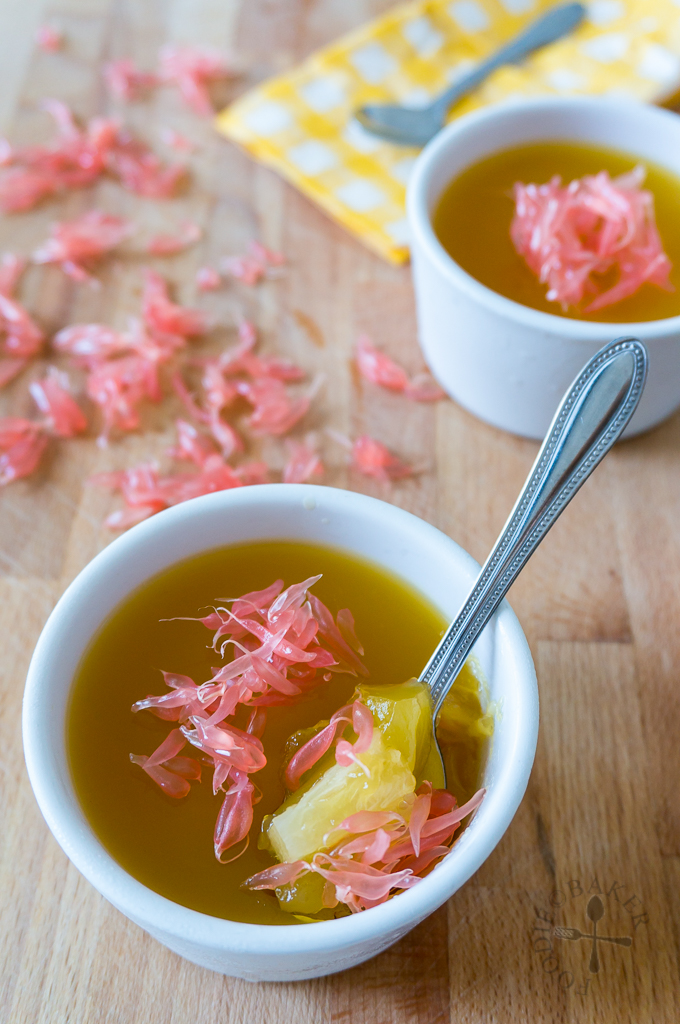
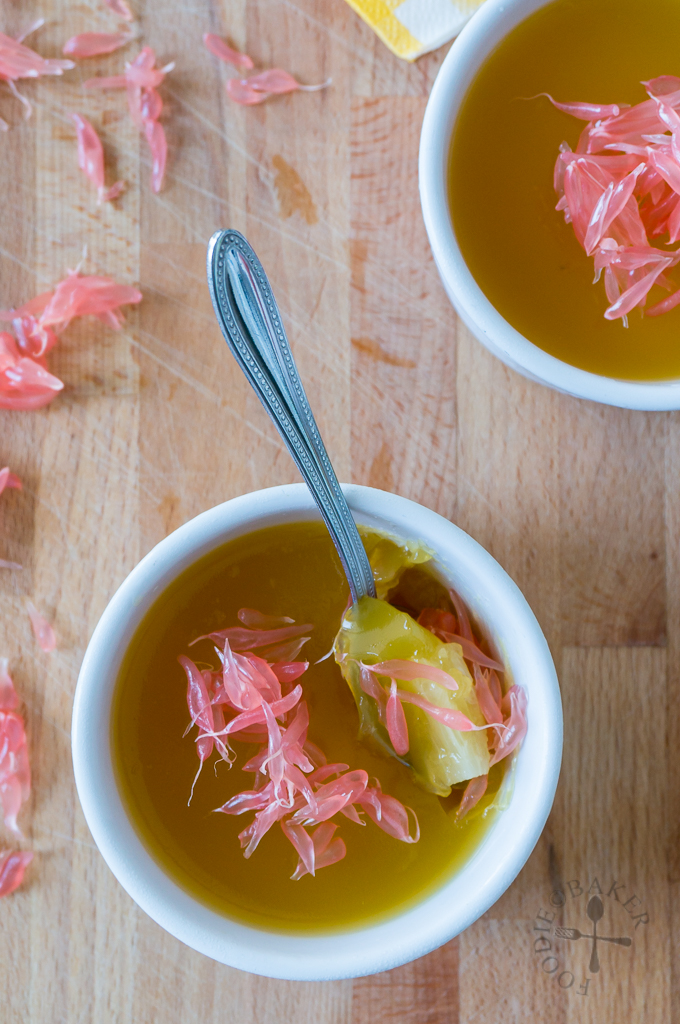
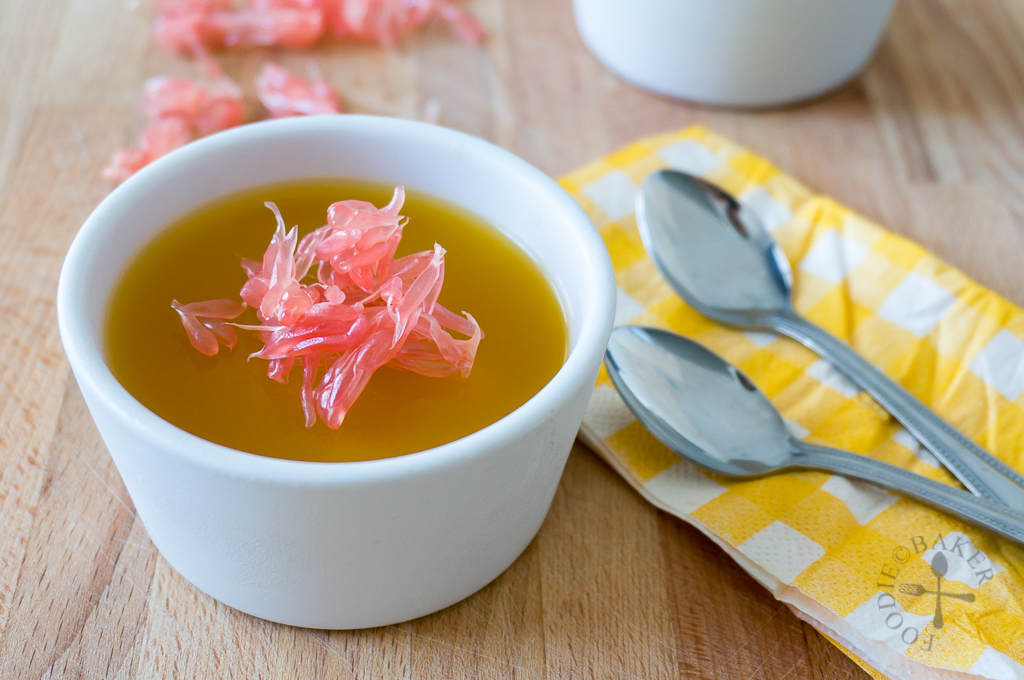
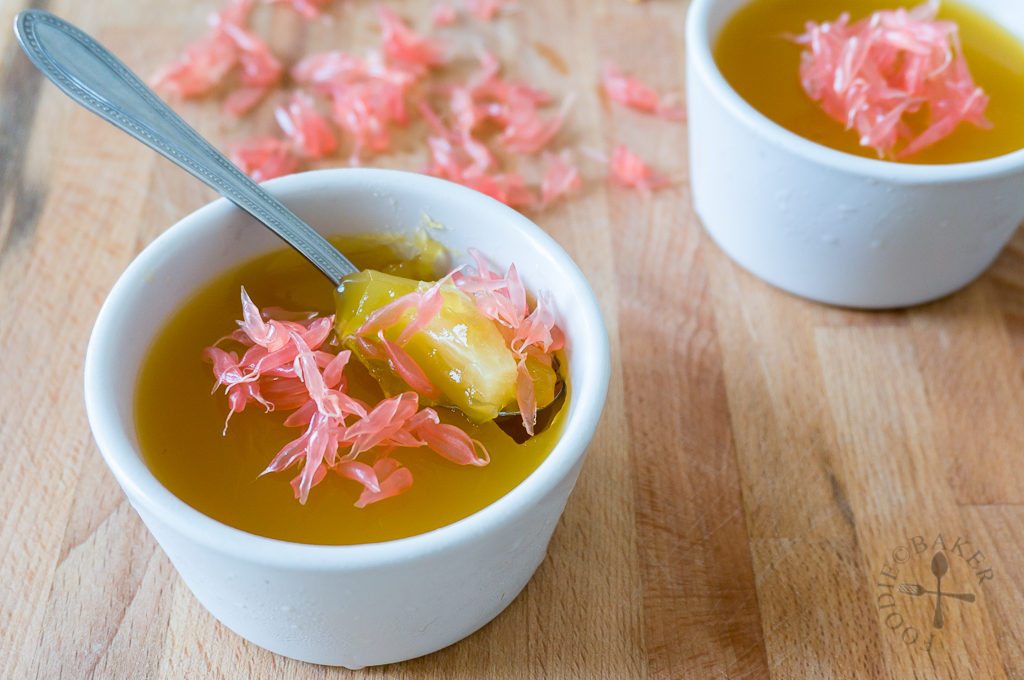
For this gelatin-based juice jellies, I used mango juice (so that I can take part in the Little Thumbs Up event), but I’m sure any fruit juice will work well in this recipe. The canned fruits can be swapped with fresh fruits too, so the variations are practically endless. (I’ve included how to make your own sugar syrup at the end of the recipe.) The first time I made this, I used a tad too much gelatin, so the jelly was too firm for our liking and it’s not sweet enough for X. So for the second attempt, I reduced the gelatin and added in a bit more sugar – yielding a softer and sweeter jelly, perfect for X’s tea-time or after-dinner dessert. I saw pomelo for sale the day before at the market and decided to buy one just so I could shred some for garnish (otherwise I think these jellies will look pretty plain).
So if you ever find yourself left with lots of canned fruit syrup, here’s an idea to use them up! Have fun jelly-ing!
Step-by-Step Photos
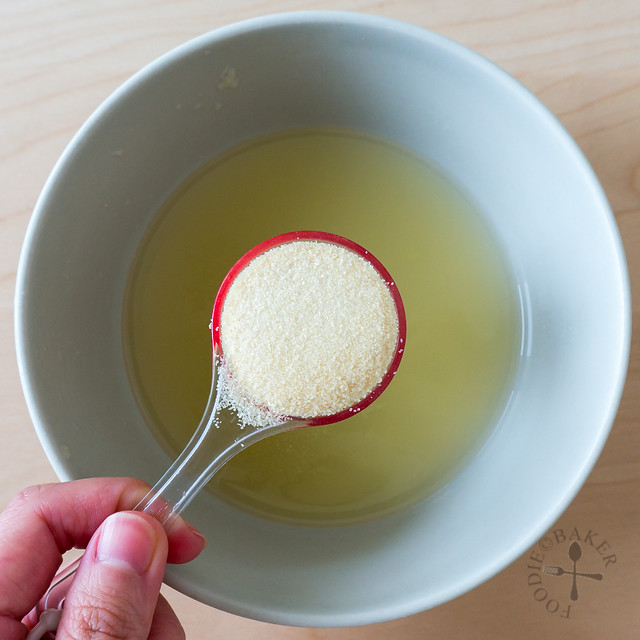 | 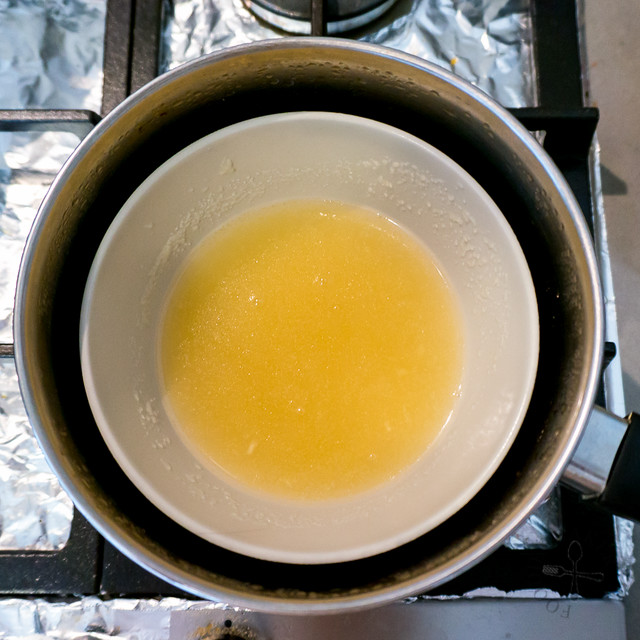 |
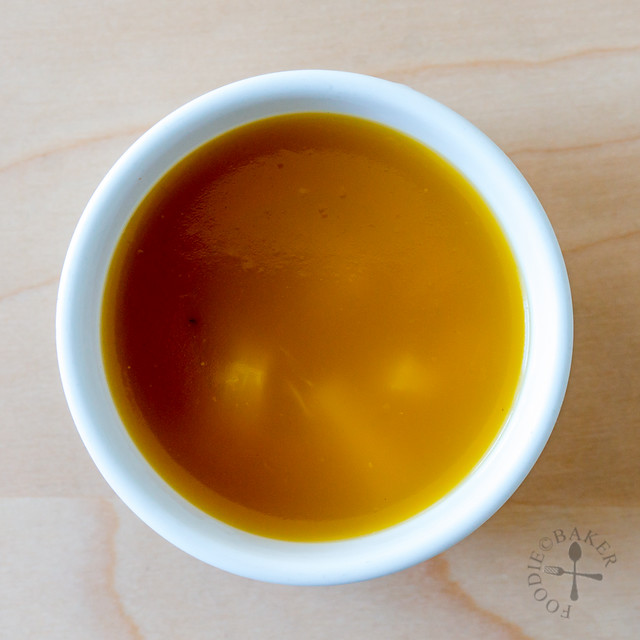
| 1) Place syrup in a bowl and stir in sugar if using. Sprinkle gelatin on top and set aside for 5 minutes for the gelatin to soften. | 2) Heat up the gelatin until sugar and gelatin have dissolved completely and the mixture is smooth. |
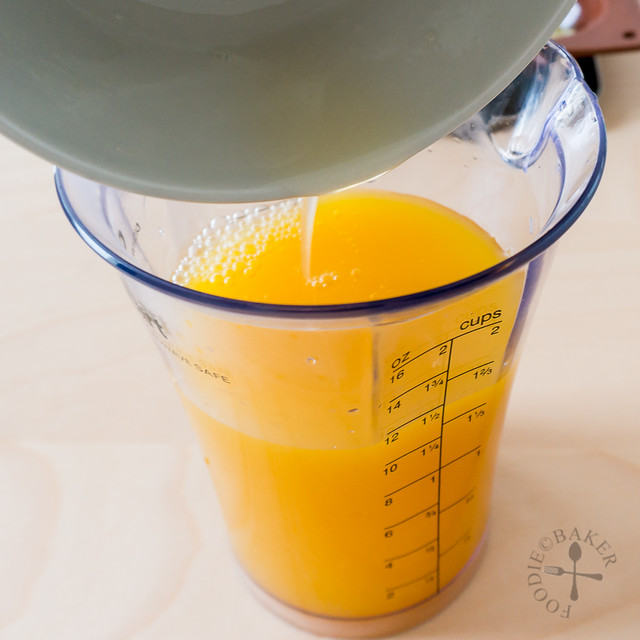 |  |
| 3) Stir syrup mixture into mango juice. | 4) Pour into ramekins, add in fruits and chill for at least 4 hours until set. |

This post is linked to Little Thumbs Up event organised by Doreen from my little favourite DIY and Zoe from Bake for Happy Kids and hosted by Jozelyn from Spice Up My Kitchen at this post.
Mango Juice Jellies
INGREDIENTS
- 1/2 cup canned fruits syrup*
- 1 tablespoon caster sugar, optional
- 2 teaspoons powdered gelatin
- 1 cup mango juice
- Squeeze of lemon or lime, optional
- Canned fruits*
- Pomelo shreds, as garnish, optional
*I used canned pineapples chunks this time round. You can use peaches, lychees, longans or even fresh fruits... whatever you like!
INSTRUCTIONS
- Place canned fruits syrup in a small bowl and stir in caster sugar (it's okay if the sugar did not dissolve). Sprinkle gelatin on top and set aside for 5 minutes for the gelatin to soften.
- Place the small bowl of syrup in a pot. Fill the pot with water until 1-inch up the sides of the bowl. (You can add some water in the pot first then place the bowl in the pot if your pot is small like mine.) Set the pot over medium-high heat. Stir the syrup constantly until the sugar and gelatin have dissolved and the mixture is smooth - you should not see anymore gelatin granules. Remove the pot from heat and remove the bowl from the pot - if it's too hot to handle, just set it aside for about 10 minutes before trying to remove the bowl.
- Place mango juice in a measuring cup. Stir in the syrup mixture and add in a squeeze of lemon or lime if using. Stir well.
- Place four 1/2-cup ramekins on a tray. Pour in the mango juice mixture until 3/4-full. Add in canned fruits.
- Refrigerate the jellies for at least 4 hours. Sprinkle pomelo shreds on top before serving.
NOTES
*Edit 26 Nov 2015: Sorry I accidentally halved the amount of canned fruits syrup and mango juice, recipe is now updated!
Jozelyn Ng says
Hi, Jasline! Your jelly looks so tasty. The pink pamelo and yellow mango jelly looks really delicious! Thanks for linking up with LTU!
Raymund says
I would love this for my dessert now!
Jasline N. says
Me too! I just ran out of them, will have to make them again soon :p
Susan says
The mango jelly with the pomelo shreds on top look like a work of modern art, Jasline! I’ve never tried making jellies myself but would love to try. The mango flavor jelly sounds delicious!
Jasline N. says
It would be even better if I can make the mango jelly using fresh mangoes instead of mango juice, but I’ll have to save the recipe for another time. So happy you like the jellies!
Monica says
My husband and I love mangoes! What a great idea to make your own jelly. I love the chunks of fruit you’ve tucked into them. What a treat to open the fridge and see these. Such fun!
Jasline N. says
Hi fellow mango lovers 😀 This jelly is a great way to use up leftover (canned) fruits, you never know what surprise you are gonna get 😉
Heather @ Sweet Precision says
What a totally unique dish, I love it! I can imagine it is totally refreshing and delicious 🙂 The garnish is what caught my eye from the beginning- great way to finish off the dish!