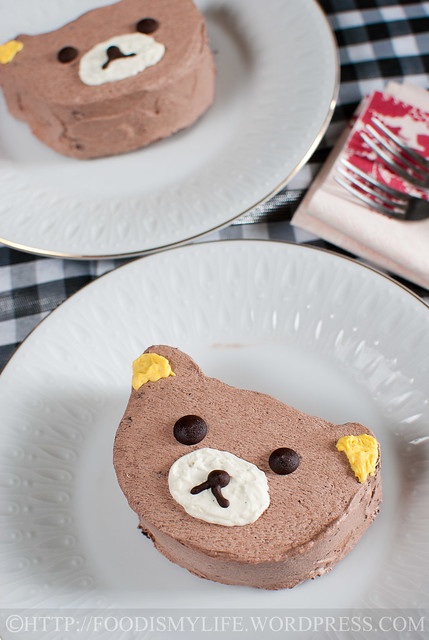
I baked this cake for a friend’s farewell present quite some time ago. As she’s a fan of this bear called Rilakkuma, I decided to try my hand on baking and assemble a bear cake.
The basic recipe is very manageable – chocolate genoise with an Oreo filling, covered with chocolate frosting – however, the assembly proved a little challenging as it wasn’t easy to get the exterior as smooth as I wanted it to be… But I guess overall I did a not bad job… Right? 😉
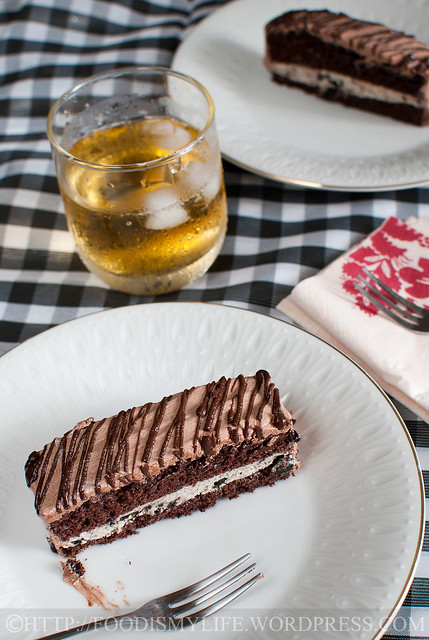
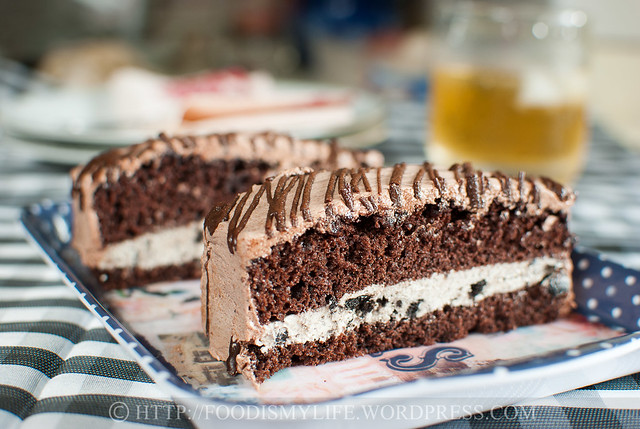
I assembled only 2 bears – each cut out from a 4×4-inch genoise, then the genoise was split into half before assembly. As the original genoise makes an 8×8-inch cake and I was lazy to make 4 bears, I assembled the rest in the simplest way possible, then piped melted chocolate all over as decoration – it’s kinda amazing how a little piped chocolate can enhance the looks of the cake!
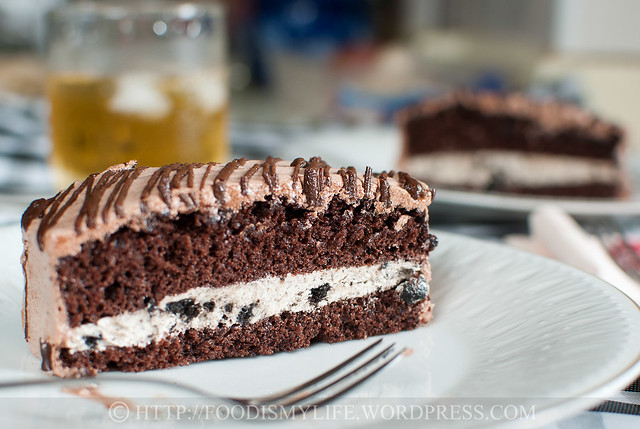
The cake ain’t split evenly… but still delicious nonetheless 😉
And on to the step-by-step photos!
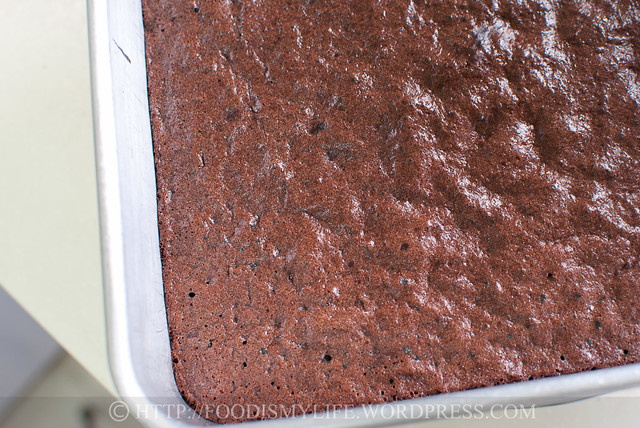
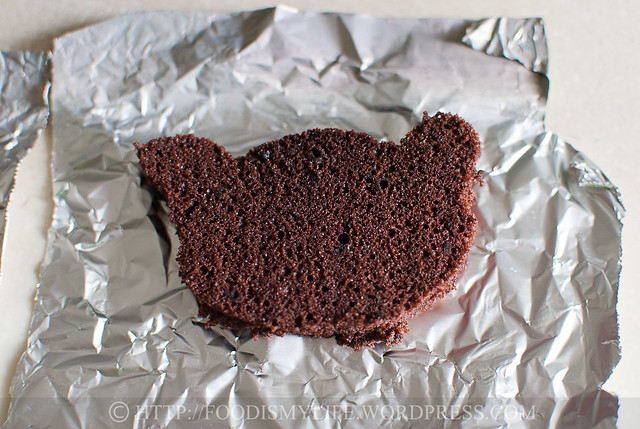
First bake your favourite cake in a 8×8-inch (mine is the genoise) and create a bear template. Let the cake cool completely and use the template to cut out four bears. Split them into half horizontally.
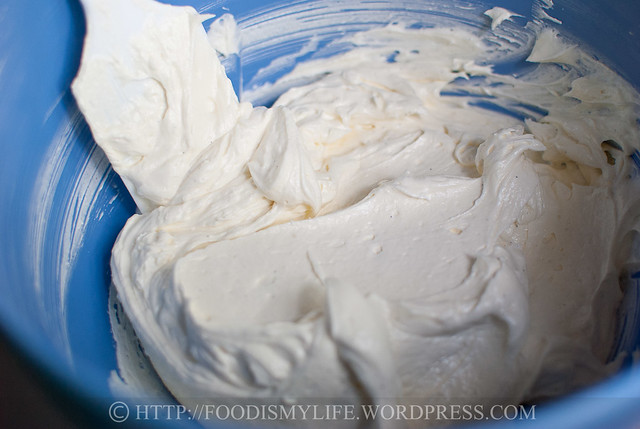
Then make a batch of your favourite vanilla frosting (enough to fill and frost an 8-inch cake).
To the vanilla frosting:
- Scoop a third of the frosting aside and mix it with a few pieces of crushed Oreos.
- Scoop a tablespoon of frosting and colour it yellow. Transfer into a piping bag.
- Scoop two tablespoons of frosting into a piping bag.
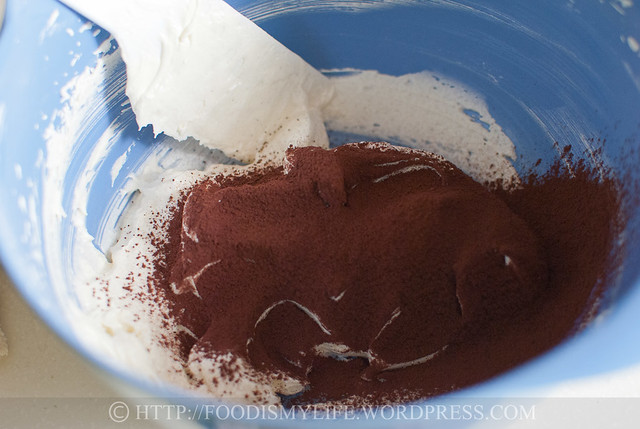
- Add in some cocoa powder to the remaining frosting to turn it into a chocolate frosting.
Grab the bottom layer of your cake…
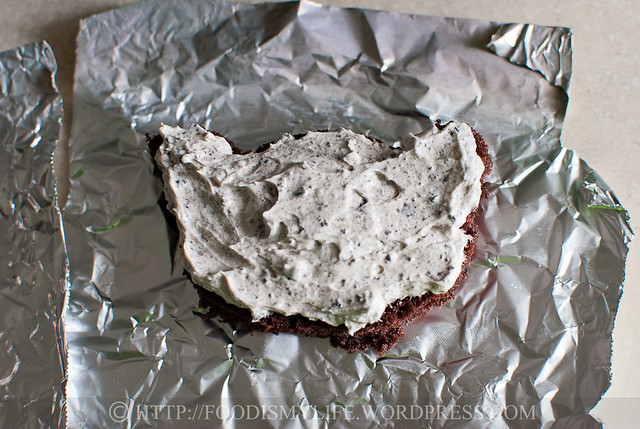
Then spread some Oreo frosting on top.
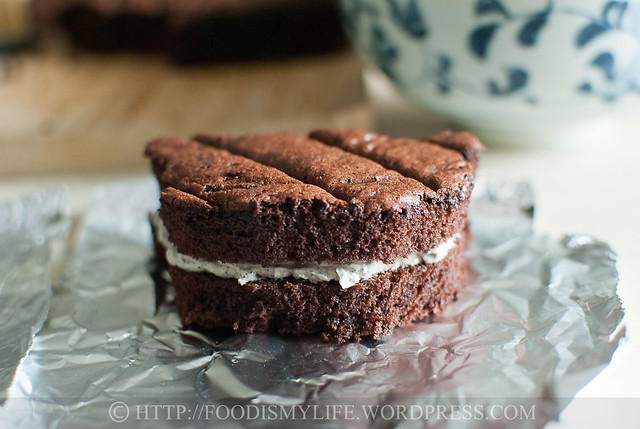
Top with the top layer of the cake.

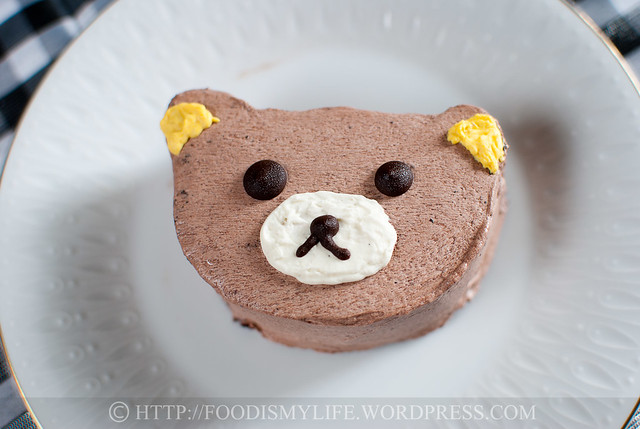
Spread the chocolate frosting all over the cake. Refrigerate until firm then pipe the ears and nose and refrigerate till firm again.
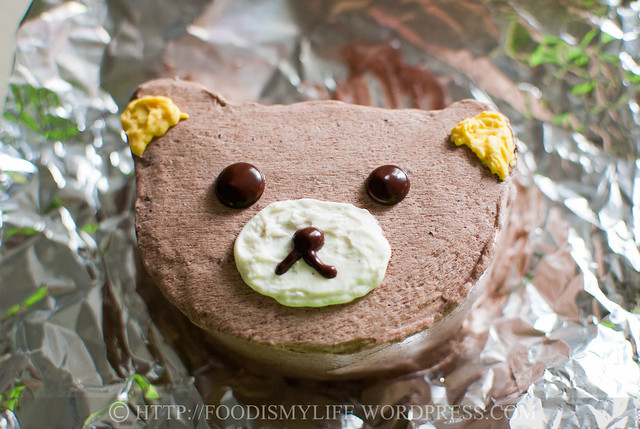
Pipe some cooled chocolate for its eye, nose and mouth!
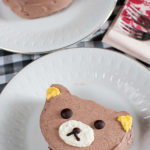
Cuteness~ Rilakkuma Mini Cakes
INGREDIENTS
- 1 chocolate cake, baked into 8x8-inch tin
- 1 favourite vanilla frosting
- Yellow food colouring
- Crushed Oreos
- Melted plain chocolate, cooled and transferred into a piping bag
INSTRUCTIONS
Cake
- Create a bear template on a piece of 4x4-inch paper.
- Cut the chocolate cake into 4 equal squares measuring 4x4-inch squares. Place the bear template on top and cut out the bears. Split the bears half horizontally.
Frosting
- Scoop a third of the frosting aside and mix it with a few pieces of crushed Oreos.
- Scoop a tablespoon of frosting and colour it yellow. Transfer into a piping bag.
- Scoop two tablespoons of frosting into a piping bag.
- Add in some cocoa powder to the remaining frosting to turn it into a chocolate frosting.
Assembly
- Place the bottom layer of one bear cake on a rack or a turn table. Spread a little Oreo frosting then top with the top layer of the cake.
- Use the chocolate frosting and apply a thin layer of crumb coating all over the cake. Refrigerate till firm, about 30 minutes to 1 hour. Coat the cake with a thicker layer of chocolate frosting, smoothing the surface and the sides as best as possible and refrigerate till firm.
- Pipe a little yellow frosting as the ears - use a toothpick to help spread the frosting evenly. Pipe the reserved plain vanilla frosting in the middle. Refrigerate till firm.
- Pipe the eyes, nose and mouth using the cooled melted chocolate and refrigerate till firm.
- Transfer the cake onto a serving plate and serve!
Super Naggy:
[1] Use your favourite chocolate cake recipe and bake it in a 8×8-inch tin. I chose a genoise as it’s light and delicious! Here’s the link to the step-by-step guide in making a genoise.
[2] Use any of your favourite plain, vanilla frosting – buttercream and cream cheese frosting works best. The frosting recipe I used is my Cooked Vanilla Flour Frosting – I added 1/4 cup of cocoa powder to make it a chocolate frosting.
[3] The chocolate should be cool before piping them onto the cake so that it will not melt the frosting.
Happy baking!
Today’s Recipe -Eggless Choclate Cake – articles4friends says
[…] Cuteness~ Rilakkuma Mini Cakes […]
lena says
well done and i dont even think the frosting didnt look smooth as you said..
Jasline says
Thank you! 😀
Jasline says
Thanks for the compliment Janine! The frosting is surprisingly successful! Hope you’ll like it too!
Jasline says
Thanks for the compliment Amelia, have a great week ahead!
Jasline says
It was a cake cute to look at and delicious to eat! 😉 Thanks for the compliment Bobbi!
Jasline says
Awww thanks Raymund!
Jasline says
Thank you! 🙂
Jasline says
Thank you Sibella!
Jasline says
Awww thanks Hannah! I actually took a very long time smoothing the frosting.. haha 😉
Jasline says
Thank you Anuja! It’s really delicious eating the genoise plain! 😉
Jasline says
Thank you Mich 🙂
Jasline says
Thank you Zoe, for the compliments!
Jasline says
Thanks John! Yea that’s why I got lazy after making my second bear… and just made them into simple layered cakes instead 😉
Jasline says
Thank you Natalia!
Jasline says
Thanks Amy, hope you’ll bake one for your sister soon 😉
Jasline says
Thank you Uru! 🙂
Jasline says
Thank you!
Jasline says
Thank you so much for your compliments! 😀
Jasline says
Thank you! I had fun making them 🙂
Dark Chocolate Layer Cake with Caramel Buttercream (aka. cake of doom) | Beautiful Disasters says
[…] Cuteness~ Rilakkuma Mini Cakes (foodismylife.wordpress.com) […]
sarah kim says
SO CUTE! I DIED.
how can you eat them if they’re that cute?!
rabbitcancook says
oh my, the cake looks so cute and delicious. Simply irresistible 🙂
Chris says
So cute ….
Janine says
i was thinking of making a chocolate cooked flour frosting but afraid that it wouldnt taste/look good but now that you’ve done it, i’m definitely trying it out hehe. the cake does look somewhat like rilakkuma so it’s a job well done i must say!
Amelia says
Hi, your cake look so cute, the texture look very moist. Love the topping, yum.
Have a nice day.
Bam's Kitchen says
Those are so darn cute but the cake itself looks just as awesome. I am sure this brought a smile to her face! Take care, BAM
rsmacaalay says
That definitely is 10 out of 10 in cuteness factor
yummychunklet says
OMG, adorable!
Sibella at bakingwithsibella.com says
How super cute!!! Nice job Jasline! 🙂
Hannah (BitterSweet) says
Unreal! Those mini cakes are so spot-on accurate, and of course adorable. That takes some real finesse with an offset spatula and piping bag.
Anuja says
Awww so cute and adorable! Your genoise also looks perfect. Lovely treat for your friend!
Mich - Piece of Cake says
This is so cute, and so moist and delicious! Your friend is so lucky!
Zoe says
You are so sweet baking these Rilakkuma mini cakes for your friend. And of course, you did an excellent job!
girlinafoodfrenzy says
Truly cute and incredibly gorgeous! I know a few little ones who’d love to get their mitts on these 🙂 I’ll be baking for my niece & nephew over Xmas so love anything cute & tasty!
ChgoJohn says
These are such a clever idea! I must admit, though, I do not have the patience to make them. Your idea of creating a mini-cake with the piped frosting is more my speed.
Natalia at Hot, Cheap & Easy says
Adorable!! Really clever and lovely….
Amy says
These are absolutely adorable! I know a little sister who would love these, hehe 🙂
Choc Chip Uru says
These are indeed cuteness and deliciousness overload 🙂
Cheers
Choc Chip Uru
A_Boleyn says
Sweet cakes. 🙂
apuginthekitchen says
How adorable and the cake looks outstanding! And that beautiful vanilla icing, is perfection!
Baby Sumo says
These are simply adorable… and the cake looks so moist!