
After smudging the table-counters, dirtying several table cloths and tea towels and numerous pots, bowls and plates with lots of chocolate and butter, I’ve finally prepared a MasterChef plated dessert for Aspiring Bakers and Cook Like A Star. Phew!
The theme for this month’s Aspiring Bakers is Desserts on a Plate hosted by Swee San from The Sweet Spot while the theme for Cook Like A Star is MasterChef, hosted by Zoe from Bake for Happy Kids, Anuja from Simple Baking and Baby Sumo from Eat your heart out. So I was trying to kill 2 birds with 1 stone (or rather play-cheat by participating in 2 baking events with just 1 recipe) and luckily I found a recipe that fits the criteria on MasterChef website!
I have a full-time job so I bake/cook only on weekends and I bake/cook only in the day as night-time is not a good time for photo taking (I love photos in natural light!) So after baking/cooking and taking of the photos, I have to edit the photos, upload them and get the posts up during my free time at night. Hence I really need to find short-cuts to participate in all the baking events 😉 You’re seeing a bombard of posts these past few days as I’ve been trying to post everything up to meet the dateline! Will try my best to spread the posts out in the future 🙂
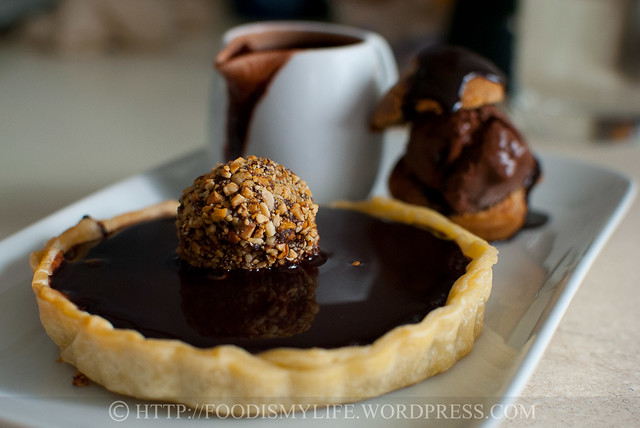
Point-of-view from the Dark Chocolate Tart
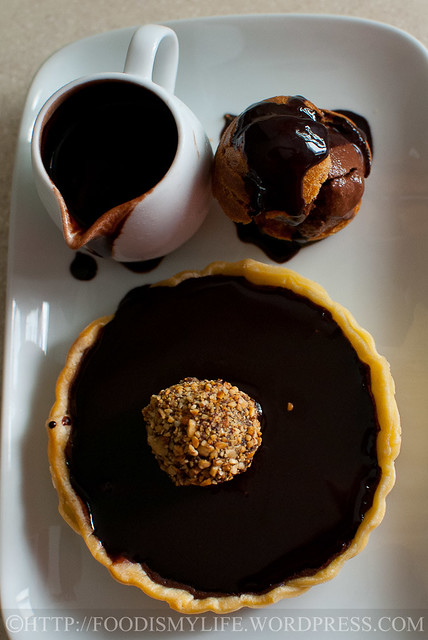
This plated dessert consists of 2 main components: the chocolate tart and the chocolate sorbet. The original recipe also included a macaron which I didn’t have time to bake it so I swapped it with some frozen profiteroles that I made earlier.
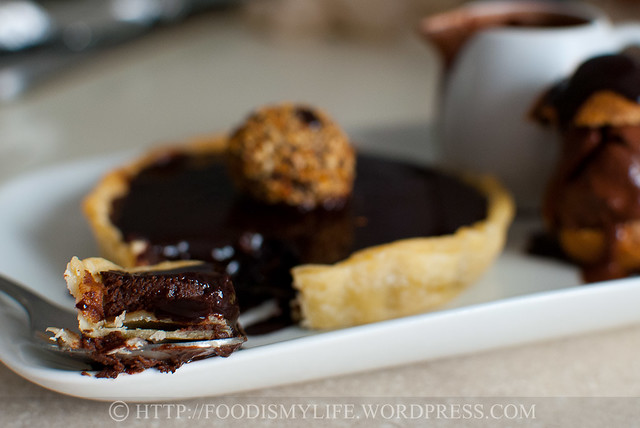
To play-cheat save time, I used store-bought shortcrust pastry which I bought wrongly for the previous Cook Like A Star (Jamie Oliver). I don’t really think the crust is very suitable for this tart, as it’s pretty flaky, and a little too buttery for my liking. A crumb crust shell would probably work better here (or imagine a digestive biscuits crust!) Ah well, that’s what I get for trying to save time…
The filling is mainly made of dark chocolate (I used Varlhona) so it’s rich and intense. It’s pretty easy to make, just have to melt the chocolate then whisk in everything together. Paired with the bitter-sweet chocolate sauce – the overall tart is very dark, rich, and extremely intense – so if you’re not a fan of dark chocolate, do swap the dark chocolate with milk or semi-sweet chocolate.
The cake ball on top is made using left-over cake mixed with frosting, then rolled into balls, dipped into chocolate and then into toasted peanuts. I didn’t have any mint to garnish the tart with, so I decided to use the cake ball instead :p You can actually see how shiny the chocolate sauce is – the reflection of the cake ball can be seen!
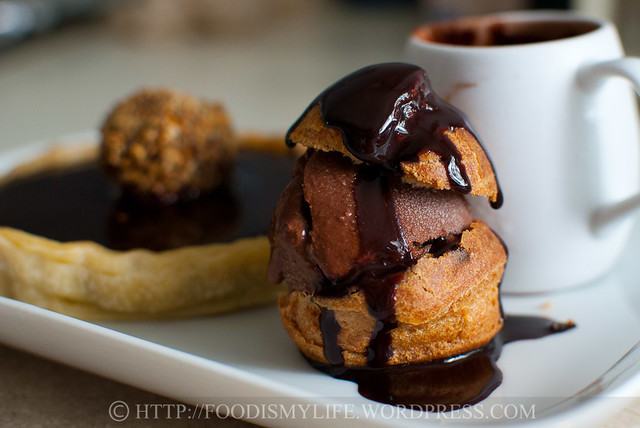
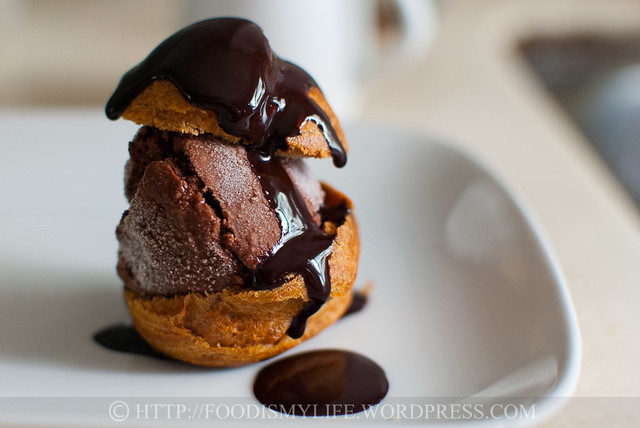
Point-of-view from the Profiterole filled with Dark Chocolate Sorbet
The sorbet is even easier to make – only 3 ingredients is needed – chocolate, water and sugar. Again, as dark chocolate is used, it’s extremely rich. Luckily my profiterole is not very huge in size so I needed only a small scoop.
Overall it’s a very rich and intense dessert – I couldn’t finish the tart (4-inch in diameter) by myself, partly because it’s too rich. So I’d recommend making the tart smaller (about 3-inch in diameter). I’ve adjusted the recipe below – this recipe makes a lot of tarts, so I think if you’re not making for 10 people, you can scale it down further.
The recipe is not complicated – it’s a combination of different components. However, execution wise may be a little challenging as it requires proper planning – so I think it’d be good to plan ahead and split up the work over the course of several days. I made everything (except for the profiteroles) in 1 day, which resulted in lots of dirty utensils, pots, pans, kitchen cloths and t-shirts (the melted chocolate “flew” when I accidentally whisked it too hard) – so do plan properly so that you won’t end up with a messy kitchen like me! 😉
On to the step-by-step photos!
P.S. Step-by-step photos for Profiteroles and the Chocolate Sauce are already covered, so I’m skipping straight to the step-by-step photos for the sorbet and the tart!
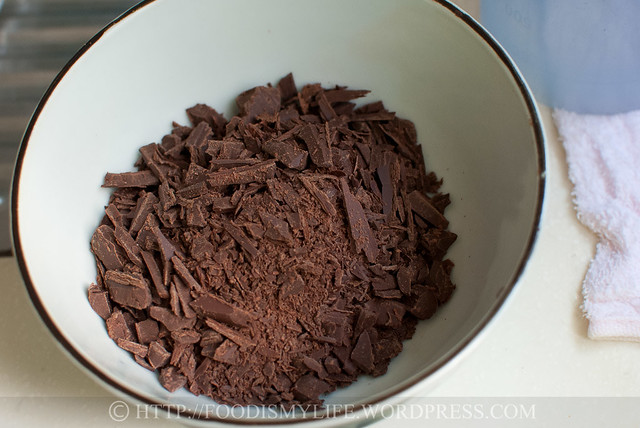
For the sorbet: grab some good-quality dark-chocolate and chop them as finely as you can.
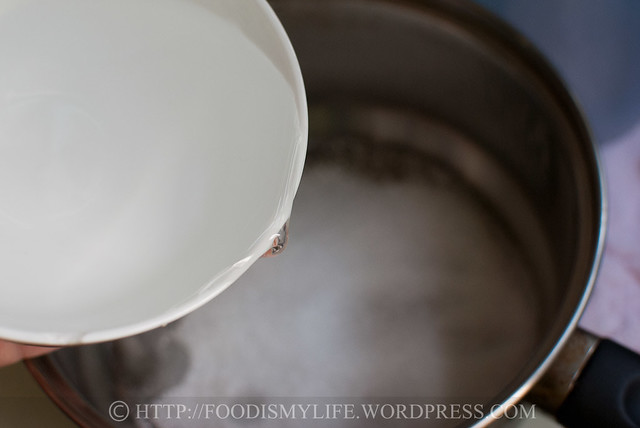
Pour some water into some sugar and bring them to a boil.
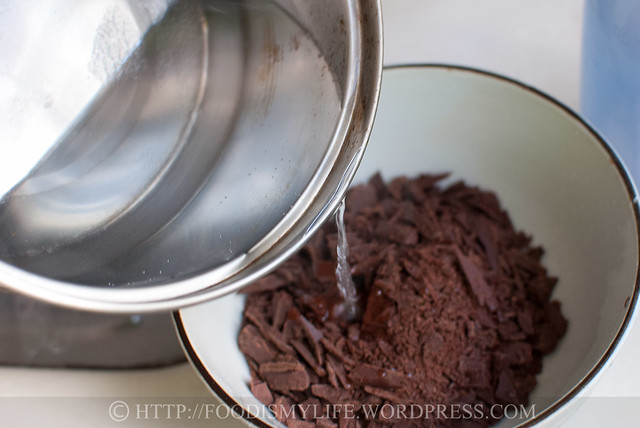
Pour it over the chopped chocolate. Don’t worry about the chocolate seizing up, when there’s sufficient hot water, the chocolate will melt!
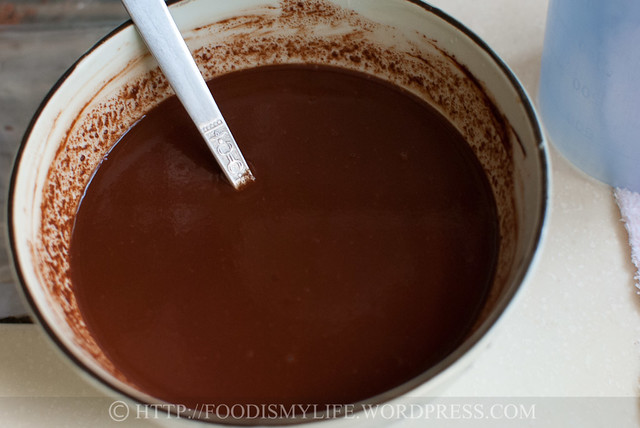
Stir until the chocolate has completely melted.
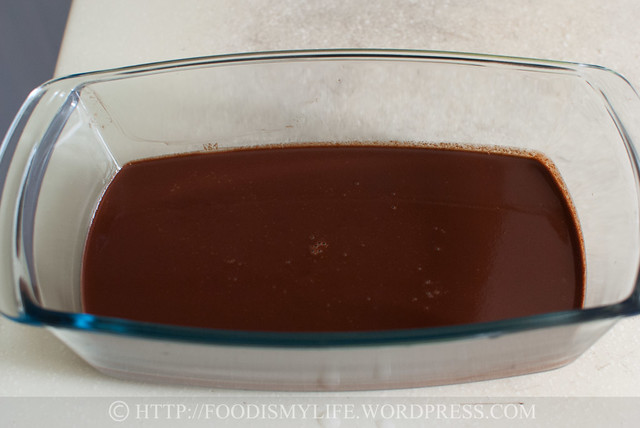
Strain the mixture into a large container (so that it freezes easily and faster).
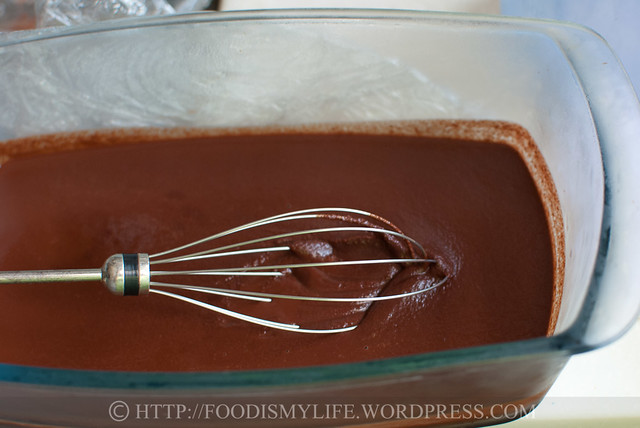
Whisk the mixture every 30 minutes of freezing for 4 times. Then transfer into a small container and freeze till firm.
Here’s a snap-shot of the chocolate sorbet before we move on to the tart!

For the tart: measure some semi-sweet chocolate (or milk chocolate), butter and dark chocolate in a bowl.
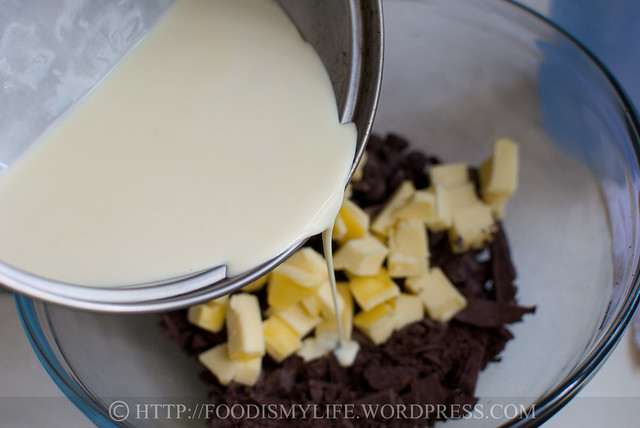
Pour almost-boiling heavy cream over the mixture. Stir to melt and let cool slightly.

Whisk in the 1st egg.

Followed by the 2nd egg.
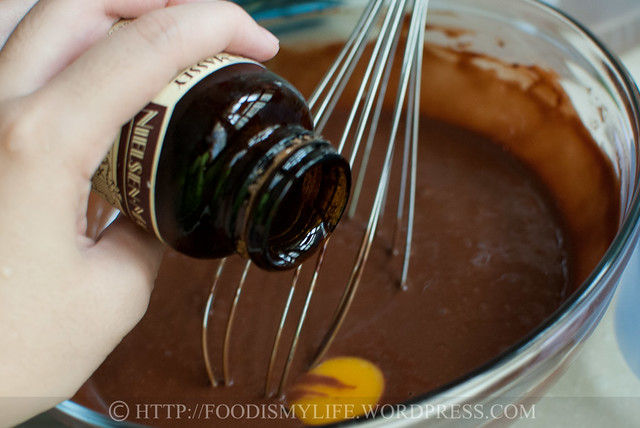
And then another egg yolk and some vanilla extract / paste. It’s gonna be a very, very rich tart!
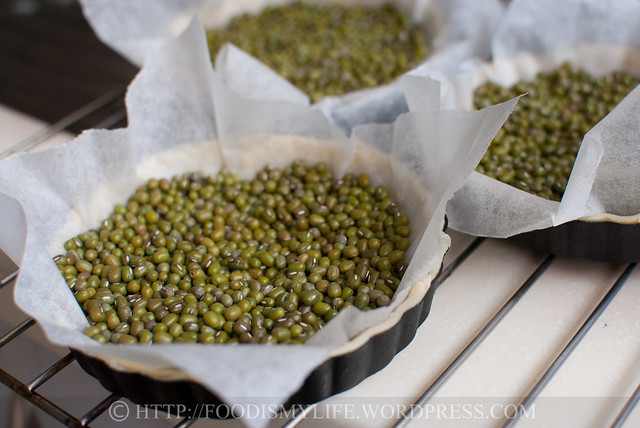
Blind bake some tart crust! (I used beans as my pie weights.)
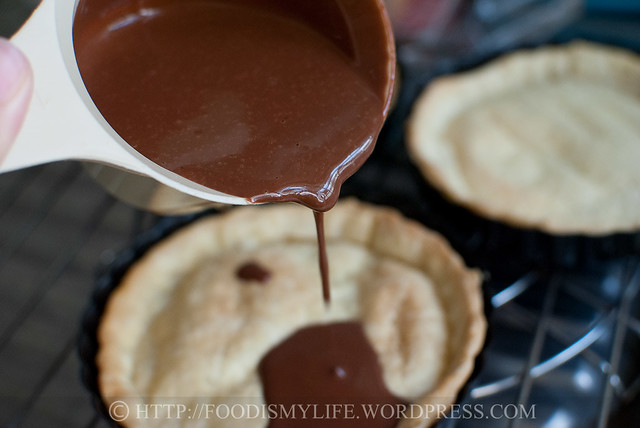
Pour the tart filling into the pie crust and bake until set.
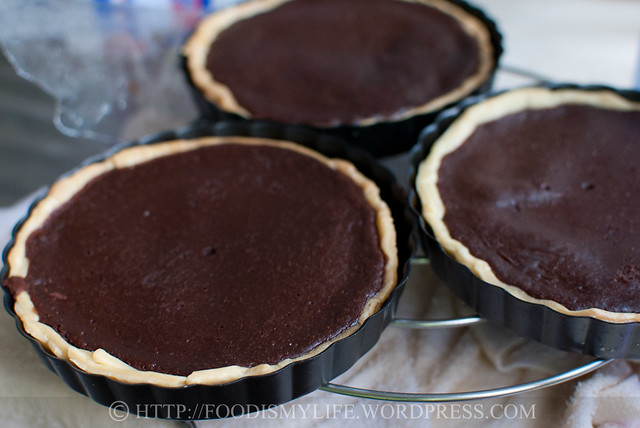
Cool completely before serving!
Unmould, and serve!
I’m submitting this to:
- Aspiring Bakers #23: Desserts on a plate (September 2012)hosted by Swee San of The Sweet Spot
- Recipe Box #16 hosted by Bizzy Bakes
- Cook Like A Star hosted by Zoe from Bake for Happy Kids, Anuja from Simple Baking and Baby Sumo from Eat your heart out. (Click on the little froggie below to see all the recipe submissions for Cook Like A Star!)

Aria Chocolate Tart
Dark Chocolate Tart with Dark Chocolate Sorbet in Profiterole and Easy Chocolate Sauce
(makes 10 3-inch tarts / 1 10-inch tart)
Baking Plan:
1) Profiteroles – store up to 2 months in the freezer
2) 3-Minute Easy Chocolate Sauce – store up to 7 days in the refrigerator
3) Dark Chocolate Sorbet – store up to 7 days in the refrigerator
4) Dark Chocolate Tarts – store up to 2 days in the refrigerator
Assembly
1 3-inch Dark Chocolate Tart
1 Profiterole
1 scoop Dark Chocolate Sorbet
3-Minute Easy Chocolate Sauce, warm or at room temperature.
1 Truffle / Cake Ball (optional)
Place the tart on the serving plate.
Split the profiterole into 1/2 and fill it with the sorbet. Replace the top and place it next to the tart.
Pour the chocolate sauce over the tart (I pour enough to cover the surface of the tart) and the filled profiterole. Place the truffle / cake ball in the middle of the tart if using.
Serve immediately.
Dark Chocolate Sorbet
adapted from MasterChef’s Aria Chocolate Tart by Poh Ling Yeow
30 grams sugar
160 ml water
100 grams good-quality dark chocolate, minimum 65% cocoa solids, finely chopped.
Combine sugar and water in a small pot and bring it to boil. Pour the boiling sugar syrup over the chopped chocolate and leave it aside for 1 minute. Stir with a whisk until the chocolate has fully melted and the mixture is smooth.
Strain the chocolate into a large container – cover loosely and freeze for 30 minutes. Remove from the freezer and whisk the chocolate until the lumps are gone. Repeat the process for another 3 times – freezing for 30 minutes, then whisk and freeze again – then cover tightly and freeze till firm, at least 4 hours.
Make ahead: The sorbet can be stored in the freezer for up to 1 week.
Profiteroles
(makes 10 profiteroles)
adapted from Pastry Friends (aka Keiko’s Cakes) – please head over here for the step-by-step photos.
50 grams milk – Note [1]
20 grams butter, softened and chopped into small pieces
1/2 teaspoon sugar
1/8 teaspoon salt
35 grams all-purpose flour, sifted onto a large parchment paper
50 grams eggs (~1 to 2 eggs), at room temperature, whisked together
Preheat the oven to 200 degrees Celsius. Line a baking sheet with baking parchment.
Combine milk, butter, sugar and salt in a pot. The butter is softened and chopped to little pieces so that it melts fast during heating. Heat the mixture over high heat, stirring occasionally with a wooden spoon, and bring it to a rolling boil – the mixture should be boiling and bubbling vigorously until the layer of butter is no longer floating on top.
Working quickly, add in all the flour at once, turn off the heat and stir quickly with the wooden spoon to mix in all the flour. (Note [2])
Once the flour has been mixed in, turn on the heat to medium-low and continue mixing with the wooden spoon (do not stop!) until the mixture forms a soft dough and that you can see a layer of dough at the bottom of the pot. Remove from heat and transfer the dough into a mixing bowl.
Using an electric mixer, mix the dough on low speed for 5 seconds, then add in the beaten eggs, a little at a time (I estimated one tablespoon each time). Make sure the dough has fully absorbed the eggs before adding more. The dough will first seemed to separate but will come together eventually into a thick, smooth and piping consistency – and that’s choux pastry! (Note [3])
Transfer the choux into a piping bag fitted with a plain tip.
Pipe 8 to 10 mounds of choux (depending how many are you serving) onto the baking sheet, leaving 2 inches of spacing between each choux.
If you get little tips after piping, dampen your finger in a little water and flatten the tip of the choux to prevent it from getting burnt during baking. If desired, spray the surface of the choux with a little water immediately before baking – according to the chef, this helps the puff to expand even bigger during baking. (I’ve yet to try this, so not sure how true it is!)
Bake the puffs for 20 minutes at 200 degrees Celsius. Reduce the heat to 175 degrees Celsius and bake for another 25 – 30 minutes until the puff is golden brown and well-risen. During baking, no matter how excited you are, do not open the oven to check them as it will cause them to deflate and it’ll be the worse thing to happen ever.
(Note [4])
Turn off the oven, leave the oven door ajar and let the puffs cool in the oven for 30 minutes. Remove from oven and let them cool completely on a wire rack. (I usually place an oven mitten between the door and the oven to keep it ajar.)
Make ahead (choux): After piping the choux pastry on the baking sheet, freeze the choux for 1 hour. Remove the choux from the baking sheet and wrap with 2 layers of cling film (plastic wrap). Keep them in a freeze-proof bag and keep them frozen for up to 2 months. When ready to bake, bake them (no need to defrost) at 200 degrees Celsius for 20 minutes then at 175 degrees Celsius for 35– 40 minutes.
Make ahead (unfilled puffs): Place the unfilled puffs in a single layer on a baking sheet. Freeze for 1 hour. Transfer the frozen puffs into a freeze-proof bag and keep them frozen for up to 2 months. When ready to use, remove the puffs from the freezer (no need to defrost) and pop into a preheat oven of 160 degrees Celsius for 5 to 10 minutes. Let cool and use as needed.
Notes:
[1] You can substitute milk with water, but milk aids in the browning of the puffs – makes the puffs darker and more golden brown in colour.
[2] The milk mixture must be boiling vigorously such that the melted butter is no longer floating on top so that when the flour is added in, it’ll absorb the milk and not the oil. Sifting the flour onto the parchment paper makes it easier to add the flour in one go – you cannot add more flour after the first addition as it’ll become lumpy and the dough would be unusable.
[3] You can mix in the eggs by hand instead of using an electric mixer, but it’ll take a slightly longer time to be incorporated. You may not need to use all of the eggs, so it’s important to know the consistency of the dough and know when to stop adding eggs – check out the video I’ve mentioned in Note [5].
[4] The first bake at 200 degrees Celsius is to help the puffs rise rapidly to form an outer shell with a hollow interior. Once the outer shell has dried, it will rise no more, hence if you want even bigger puffs, spray the surface with a little water to give the puffs more rise. The second bake at 175 degrees Celsius is to allow the exterior to turn crisp and the interior to dry out.
[5] Do head over here for the YouTube video filmed by the author herself!
Dark Chocolate Tarts
(makes 10 3-inch tarts / 1 10-inch tart)
adapted from MasterChef’s Aria Chocolate Tart by Poh Ling Yeow
Store-bought tart crust (if you want to make it from scratch, head over here and scale the recipe down by 1/2)
135 grams good-quality dark chocolate, minimum 65% cocoa solids, finely chopped
35 grams milk / semi-sweet chocolate, finely chopped
35 grams unsalted butter
200 ml heavy cream
2 eggs
1 egg yolk
1 teaspoon vanilla extract / paste
Preheat oven to 180 degrees Celsius.
Line 10 3-inch tarts (height of 0.5-inch) with the tart crust. Refrigerate for 15 minutes (alternatively, freeze for 5 minutes).
Place a piece of parchment paper over the tarts and fill it with pie weights. Bake for 10 minutes. Remove the pie weights and parchment paper and bake fror another 5 to 10 minutes until the crust is firm to the touch. Place the pies on a wire rack to cool while you prepare the filling.
Reduce the oven temperature to 160 degrees Celsius.
Combine the chocolates and butter in a large bowl. Heat cream until just below boiling point and pour it over the chocolate. Leave it aside for 3 minutes. Whisk together until the chocolate has completely melted and mixture is smooth. Leave it aside to cool for 15 minutes.
Whisk in the eggs, 1 at a time, until the egg is fully incorporated. Whisk in the egg yolk and vanilla extract / paste until fully incorporated. Divide the tart filling among the tart shells. Bake for 20 to 25 minutes until the tart filling has set but still have a slight wobble in the middle. Let the tarts cool completely on a wire rack.
Make ahead: Store the chocolate tarts, tightly wrapped, in the refrigerator for up to 2 days. Let it come to room temperature before serving.
Alternative: Line 1 10-inch tart pan and blind bake for 10 minutes. Remove the pie weights and bake for another 5 to 10 minutes. Fill with tart filling and bake at 160 degrees Celsius for 20 to 25 minutes till filling has set. Let cool completely and slice into 8 to 10 slices.
3-Minute Easy Chocolate Sauce
adapted from MasterChef Aria Chocolate Tart by Poh Ling Yeow – please head over here for the step-by-step photos.
30 grams (1/4 cup) best-quality cocoa powder (I used Varlhona cocoa)
55 grams (1/4 cup) caster sugar
100 ml water
10 grams (2 teaspoons) unsalted butter, diced
Combine the cocoa powder, caster sugar and water in a small pot. Bring it to a boil over medium-high heat, whisking constantly to dissolve the sugar and cocoa powder.
Remove the pot from heat and stir in the butter. Let the sauce cool before transferring it to a serving container. The sauce will thicken slightly when cooled.
Make ahead: Keep the sauce covered in the refrigerator for up to 1 week. Warm it up in the microwave or in a pot and whisk till smooth before using.
Notes:
[1] Use the best quality cocoa powder you can find. I love Varlhona cocoa – it’s expensive, but worth every penny!
[2] The resulting sauce is bitter-sweet, so if you like a sweeter sauce, add in more sugar while it’s still warm.
[3] If you need the sauce urgently, place the pot in an ice water bath and stir till it’s cool.
Happy baking!
Nagi@RecipeTinEats says
This is really amazing! You can already tell how good it is just by looking at it!
Jasline says
Thank you for the compliments Vera!
Vera Zecevic – Cupcakes Garden says
Hey this look s amazing! I can’t imagine how delicious it is! Fantastic images! Really nice job!
Jasline says
Thank you so much 🙂 Glad you like it, it’s uber chocolatey that I’m literally in a chocolate coma!
Jasline says
Thank you Joyce! Yea I made a lot of mess in the kitchen haha, but it’s really chocolatey and delicious 😉
Jasline says
Yes! Chocolate coma! 😉
Jasline says
Thank you Raymund!
Jasline says
Oh John I’m killing myself too. I baked so much and ate so much that I think my waistline has expanded *horrors* Will you come help me finish the baked goods the next time? 😉
Jasline says
Thank you for the compliments Baby Sumo! 😀
Jasline says
Yea it’s really chocolate overload… glad you like it 😉
Jasline says
Thank you so much, I’m salivating as I look back a the photos too 😉
Jasline says
Awww thank you Zoe, you’re so sweet!
Jasline says
Thank you Mich! All in my stomach now… haha. Make for you another time? 😉
Jasline says
Thank you for the compliments 😀
Jasline says
Thank you!
Jasline says
Thank you for the compliments 🙂 This dish is exploding with chocolate, glad you like it! 🙂
Jasline says
Thank you for the compliments!
Jasline says
Haha, yea it’s really chocolate overload! 😉
Jasline says
Thank you! Oh hope you recover soon, so you can indulge, once in a while will be fine I’m sure 😉 Take care!
Jasline says
Aww I wish I have more Villy, make for you another time? 😉
Two Kitchens, One Story says
as always, am absolutely in love with your beautiful pictures! this dessert looks to die for, perfect for a chocolate lover like me!
kitchen flavours says
Wow, your dessert looks super delicious! I’m drooling over the chocolate sauce! Seems like a whole lot of work, but definitely all the efforts paid off with one delicious bite!
Great job, Jasline!
The Melbourne Food Snob says
Ooh so much chocolate!
rsmacaalay says
Wow that looks decadent!
ChgoJohn says
You’re killing me, Jasline! First it was pastry cream. Then it was profiteroles. Of course, you had to have you chocolate sauce to pour over your pastry cream-filled puffs. And now this! A chocolate tart. And will you look at those pictures? You should post a warning for us chocoholics that serious temptation is afoot. It’s only fair. 🙂
Baby Sumo says
What a beautiful looking dessert! So much hard work has gone into making and plating this dessert. Great job!
Amrita says
This is a Chocoalte riot..and such a beautiful one.. Loved it
kpks says
That looks so drool-worthy, I am going into chocolate-withdrawal shock from longing for a piece
Zoe says
I’m sold looking at all your plate of very-chocolatey dessert… You should start a business selling exquisite cakes in Singapore and I think this combination will sell very well 😀
Mich - Piece of Cake says
Wow, this looks amazing Jasline. I need to have a plate of this!
johnnysenough hepburn says
Lovely photos! Especially like chocolate torte, or anything similar.
sugaredpecan says
That is total yumminess!
apuginthekitchen says
Beautiful dessert, as always gorgeous photo’s clear and well written instructions. Chocolate, my favorite and this is a bounty of delicious!
yummychunklet says
I’m not usually a fan of chocolate, but this dessert looks so decadent!
Choc Chip Uru says
Oh wow I think I’m going into chocolate over drive right now….
Cheers
Choc Chip Uru
A_Boleyn says
Gorgeous and rich and yummy and totally NOT allowed in my house as both I and my nephew (who’s caring for me after my surgery) will be ‘dieting’ or at least avoiding excesses calories. 🙂 They look SO good though.
Villy says
WOW Jasline! I want it all!