
My bread baking experience is building up, this is the 5th bread I’m mixing, kneading and baking from scratch this year and bread baking is so much fun! I have been using the dough hook on my mixer to knead my dough and it was truly a breeze! Unfortunately, the dough this time is a little tougher and the mixer couldn’t handle the long kneading and has broken down *cries* But looking on the bright side, this means I’m going on a mixer shopping fun! I’ll have to manually cream butter and sugar and knead dough by hand for now, hopefully that will help tone my super flabby arms, haha!
Freshly baked bread that stays soft and fluffy is something every home baker will want to achieve. As most of us don’t use preservatives or bread softener in our bakes, we often find our bread becoming tough the next day. But now, due to a new method known as Tangzhong, a lot of home bakers have now been swearing by this method as bread made using this method tends to stay soft longer!
So what is Tangzhong and how does it work? This method orginates from the Japanese where a roux is first made by cooking bread flour and water (or milk) together in the ratio of 1:5 (by weight). This roux, after is has cooled down, is then mixed into the rest of the ingredients and knead together. I have absolutely no idea how the science works behind all the flour and water and the explanation provides online just sounds pretty weird. But since it’s only going to involve one more pot and whisk, no harm trying right?
I used the recipe from The Fresh Loaf and scaled it down as I didn’t want so much dough. Even when I had scaled it down, I baked only 1/2 the batch while the rest of the dough were stuffed into the freezer. I chose this recipe primarily because it contains egg and butter, and I love how the fat from these ingredients help to yield a rich and tasty bread in my Cheddar Brioche Braid.
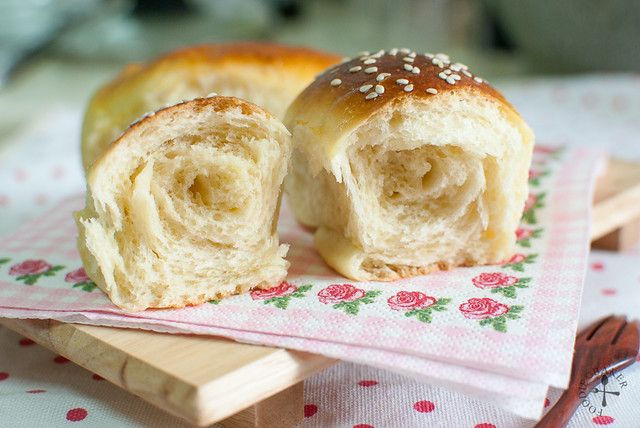
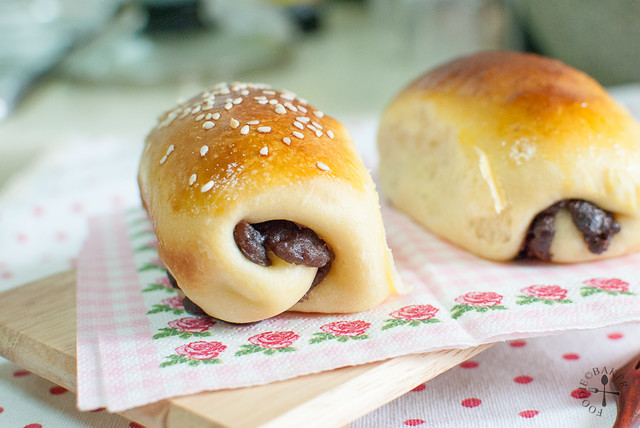
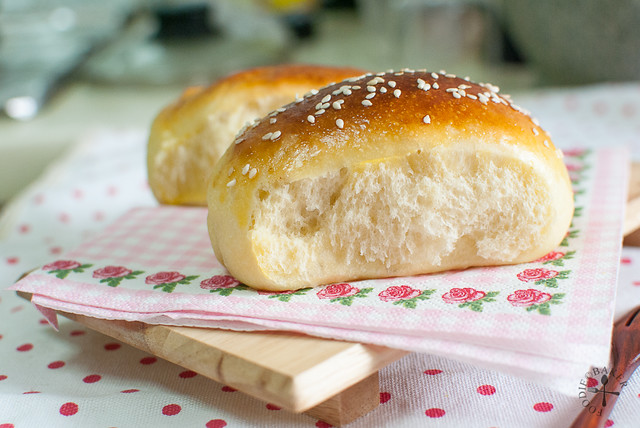
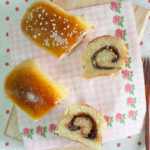
I made several modifications by using soy milk (ran out of milk), proofed the dough overnight in the refrigerator and made smaller buns. I had also swirled one with Nutella and one with red bean – both are really good. But I must say plain is the best as the rolls are really soft, fluffy and pillow-y, like cotton candy! I wasn’t able to test whether they stay soft for a couple of days as I baked them on the day of my trip so I finished all the bread on the same day (oops!) But I will test it another time on my frozen dough, and probably try out other variations of the bread – perhaps a sausage roll? 😉
Here are the step-by-step photos for the bake!
Step-by-step Photos | |
|---|---|
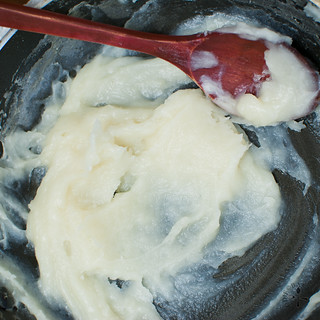 | 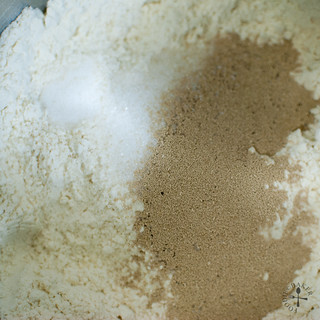 |
| 1) Make the roux and let cool. | 2) Whisk dry ingredients together |
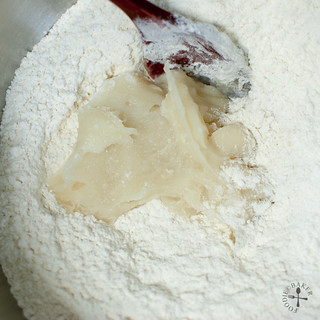 | 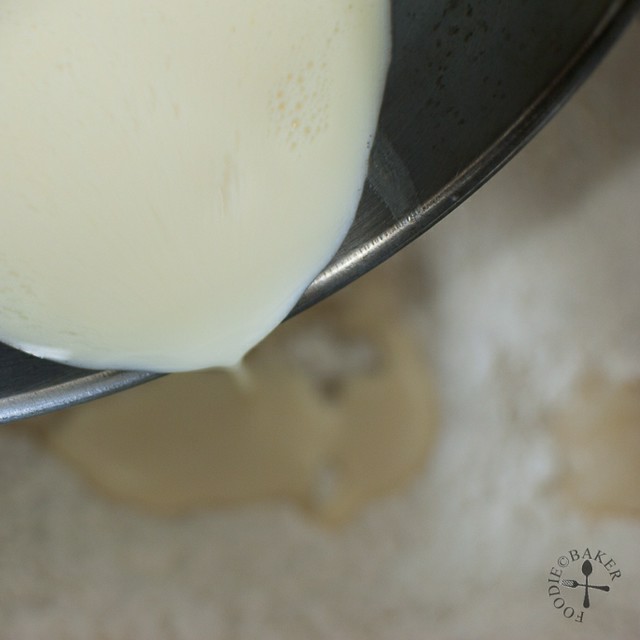 |
| 3) Stir in the roux. | 4) Followed by milk and cream. |
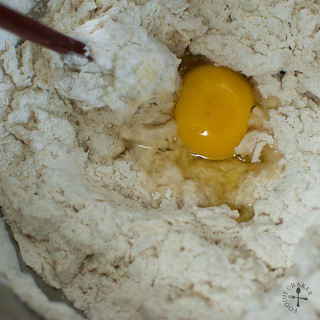 | 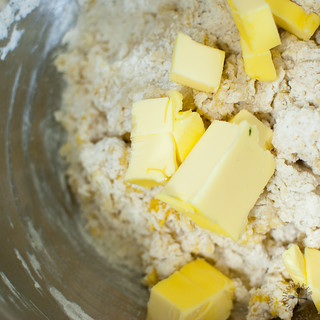 |
| 5) The egg goes in for the fun. | 6) Followed by butter. |
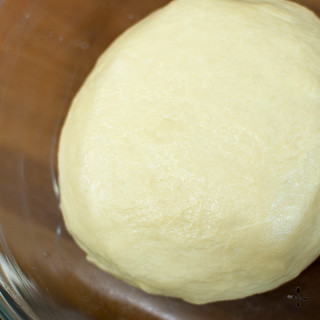 | 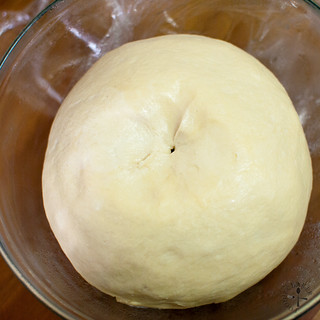 |
| 7) Knead until very smooth and elastic. | 8) Proof the dough until double in size. |
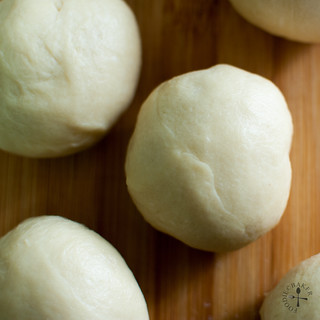 | 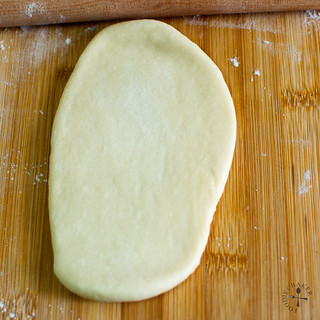 |
| 9) Divide into 8 pieces. | 19) Flatten out one portion of the dough. |
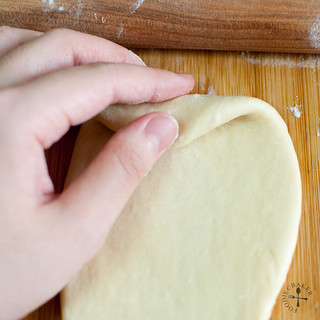 | 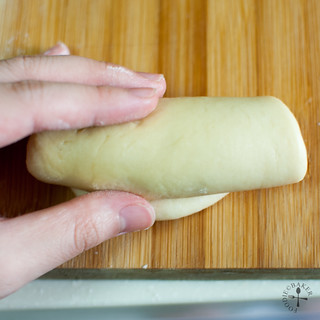 |
| 11) Roll it up from the further edge. | 12) And form a log. |
 |  |
| 13) If desired, spread with Nutella. | 14) Or perhaps some red bean? |
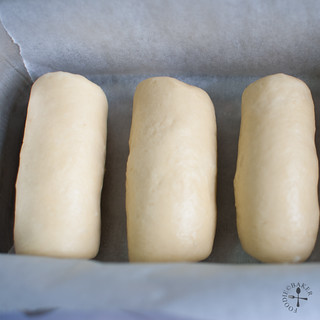 | 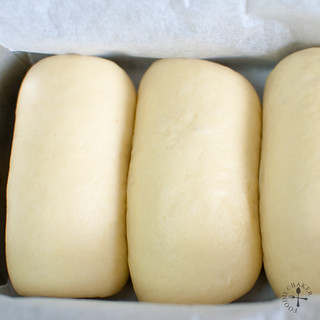 |
| 15) Space them out in a tin. | 16) Let rise until double in size again. |
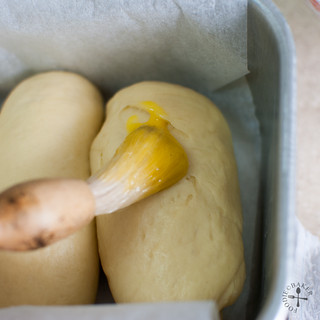 | 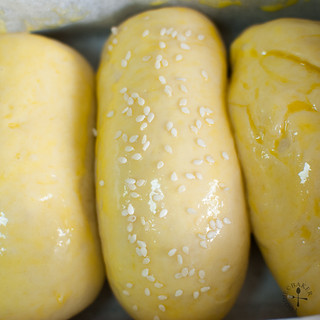 |
| 17) Brush with beaten egg. | 18) Seasme seeds for the red bean and bake away! |
![]()
I’m submitting this to Bake-Along hosted by Zoe from Bake for Happy Kids, Joyce from Kitchen Flavours and Lena from Her Frozen Wings! And before I go into the recipe, here are all the other bakes by fellow foodies!
Hokkaido Milk Rolls
INGREDIENTS
Roux
- 3 tablespoons bread flour
- 125 ml full-fat milk, 1/2 cup
Dough
- 400 grams plain flour, ~3 to 3 1/2 cups
- 55 grams caster sugar, 1/4 cup
- 2 teaspoons instant yeast
- 1/2 teaspoon table salt
- 60 ml cream, scalded and cooled slightly
- 90 ml milk, scalded and cooled slightly
- 1 egg
- 55 grams unsalted butter, at room temperature (1/4 cup)
Egg Wash
- 1 egg yolk
INSTRUCTIONS
- Roux: Combine flour and water in a small pan. Heat over medium-high heat, stirring constantly with a wooden spoon / whisk / spatula until streaks start to form as you stir the mixture and becomes a paste, or ideally, reached 65 degrees Celsius. Remove from heat, cover with plastic wrap and let cool completely. The roux can be made ahead and kept refrigerated for 2 to 3 days. Let it come to room temperature before using.
- Dough: Measure flour, sugar, yeast and salt in a large bowl. Stir to mix them together. Add in the roux, followed by warm milk and cream. Stir with a spoon until a soft dough forms. Mix in the egg and subsequently the butter. Knead the dough until smooth and elastic, about 8 to 10 minutes. Shape the dough into a ball. Transfer the ball of dough into a buttered / oiled bowl and turn it several times to coat with the butter / oil. Cover and let rise until double in size, about 1 to 1.5 hours in a warm environment or 8 to 10 hours in the refrigerator.
- If dough is rising in the refrigerator, let the dough come to room temperature before working with it. Punch down the risen dough slightly and turn it out onto a lightly floured counter. Divide the dough into 8 pieces and roll them into balls. Cover and set aside for 10 minutes to rest.
- Roll out a portion of dough into an oval, fill it with desired fillings like Nutella or red bean paste (can leave it plain if desired) then roll it up, pressing down the seam.
- Line a 8x8-inch baking tin with parchment paper or butter the tin. Place the dough, seam side down, in the tin, slightly apart from each other. Cover and let rise until double in size, about 45 minutes to 1 hour in a warm environment.
- Preheat oven to 180 degrees Celsius.
- Brush the rolls with the beaten egg yolk. Bake the bread for 25-30 minutes. If the top is browning too fast, tent it with a foil. Let bread cool in the tin for 10 minutes, then transfer it out onto a rack and let cool.
- Serve warm or at room temperature. Store uneaten bread in an airtight container and warm it up in the microwave for 10 to 15 seconds before serving.
NOTES
Super Naggy: Do note that you will need an 8×8-inch tin to fit all the rolls. As I baked only 4 of the rolls (4 were frozen), I used a smaller tin as shown in the step-by-step photos!
mui mui says
Hi Jasline,
Your rolls looks awesome. Love the ones with red bean.
mui
Johnny Hepburn says
These sound delicious! I’ve been looking for a bread recipe to try using yeast for the first time, and these look too good not to make 🙂
Amelia says
Hi Jasline, I love your milk loaf. Look really soft and fluffy. I love the one with nutella. :)) Nice click!
Best regards.
mydearbakes says
Lol, I think the pictures here are making hungry! ^^
Zoe says
Hi Jasline,
Buy a new mixer??? HURRAY!!! – I love shopping for appliances! :p Hope that you get your ideal mixer soon 😀
I felt the same, afraid of bread baking when I started baking bread 3 years ago and now I’m baking bread so often… I can see that you are getting the hang of bread baking and little rolls looks fantastic! You like TangZhong method? Me? I reckon that it is plausible that TangZhong makes better breads…
Zoe
Amy says
I love homemade breads and rolls and yours look perfectly soft and fluffy. 🙂 I love that your roll nutella and red bean paste in them. Must be really good.
lena says
yes, the best thing about tz is apart from producing soft and fluffy bread, it also stays that way on the 2nd and 3rd day..nice to know that the it can actually do slow proofing overnight..at times i think it’s good as it requires less work the next day..very beautiful rolls you made..!
tworedbowls.com says
Amazing!!!! I just started baking with yeast and I find it so incredibly fun as well. Your rolls look just perfect — something else to add to my list of things to try. Thanks for posting and for the wonderful step-by-step pics!
kitchen flavours says
Hi Jasline,
Your bread sounds good with the red bean filling! This bread with Tangzhong is so popular with us Asians!
Sorry to hear about your mixer! Now seems like a good time to get a stand mixer, you would not regret it! I have been using mine for 8 years now. It really is worth the money!
Happy Mixer Shopping! And thanks for linking!
yummychunklet says
Beautiful little swirls!