No wonder I’m growing… horizontally – I have been eating way too many cakes lately *cries* (check out the culprits: this, this and this)
But well, the idea of having a chocolate mousse and Oreo filling cake is too good to pass.
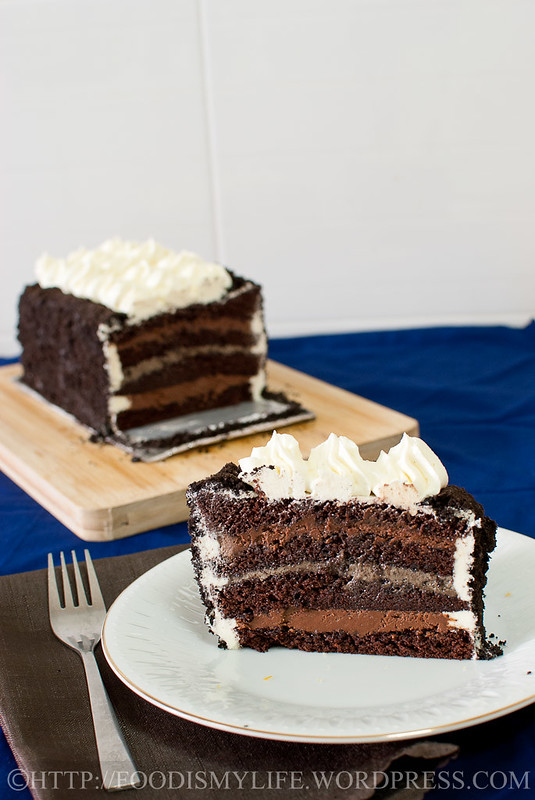
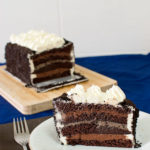
The chocolate genoise is simply delicious – it’s very light, airy and porous. It absorbs syrup readily so it can soak up lots of delicious flavours (imagine brushing it with a rum-flavoured syrup!) Using a genoise as a cake base helps to lighten the overall flavours – I can finish one thick slice by myself without feeling that it’s too rich.
The only problem is that I can’t slice a cake… for nuts! Well, my skill has definitely improved from the past but there’s no consistency – most of the times I still end up with cake slices of varying heights. I really need to practice more often…
The chocolate mousse portion can’t be any simpler – it’s made with just chocolate and whipping cream. I used Varlhona dark chocolate, which gives a very deep and rich chocolate flavour – absolute YUMS.
I had some leftover Oreo cream cheese frosting from a previous recipe – because it’s not enough to frost the whole cake, I decided to use it as a filling. I originally wanted to mix some huge chunks of Oreos into the filling but in the end was too lazy to do so… so plain it is!

As for the frosting, I tried out a new recipe that requires cooking flour and milk into a paste and adding it into a creamed butter and sugar mixture. I like the recipe because the frosting is very steady – what I mean is that even though the temperature was pretty warm in the kitchen that day, the frosting did not melt or ooze or anything. Of course it’s still better chilled, but it doesn’t soften as fast as a cream cheese frosting and it pipes really well. As for taste-wise, it’s milky and creamy – not my favourite but I’m hoping to make a chocolate version of this soon.
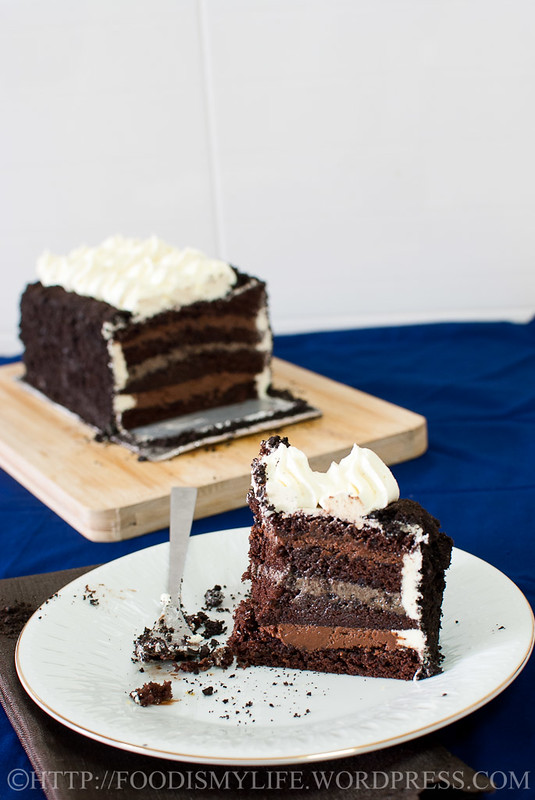
Overall, it’s a light, moist, soft and delicious cake. Even my mom who’s not fond of cream cakes finds this delicious! I am 200% certain that this cake will definitely be a crowd-pleaser – who doesn’t love chocolate, Oreos and cake altogether? 😉
I’ve not taken photos of how to make the individual components (except for the genoise in my previous post), but I’ve taken photos of the assembly. It would definitely be easier if you have a lazy susan / cake decorating turn table as it makes the decorating much easier.
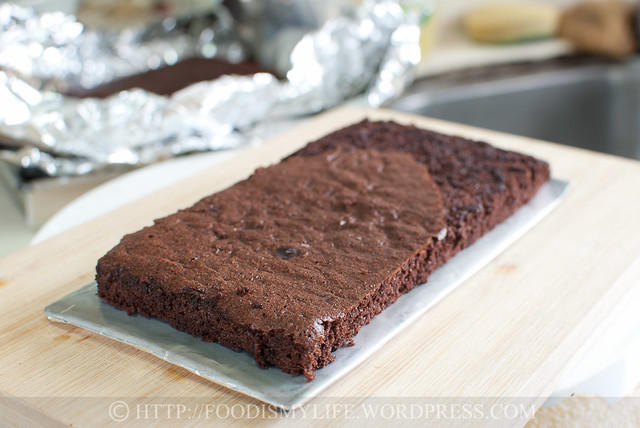
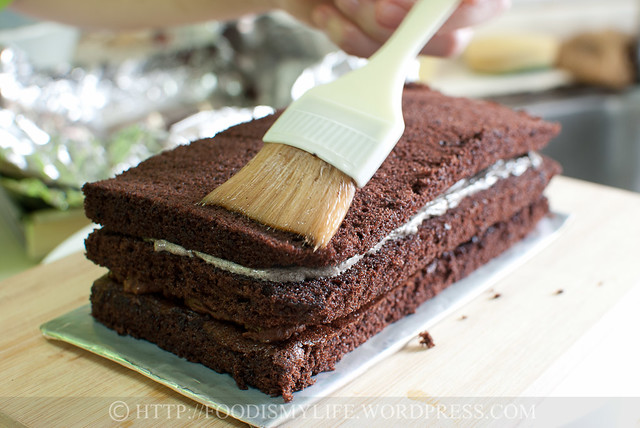
Start off with a layer of chocolate genoise.
I don’t have a cake board that is 7×3.5-inch, so I made my own by cutting a piece of cardboard and then wrapping it with two layers of aluminum foil – an instant cake board done!
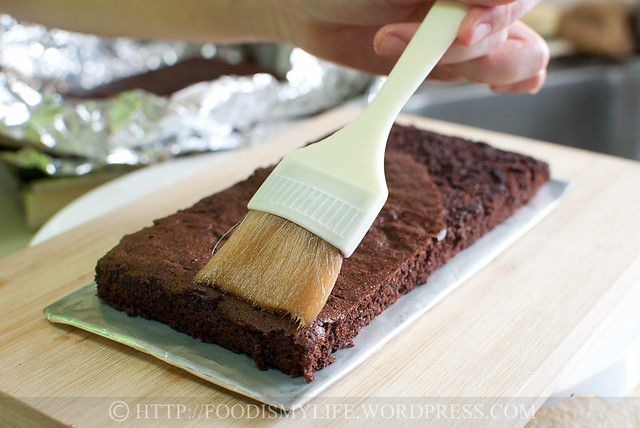
Brush with a layer of syrup.
There’s no need to drench the cake in syrup, just a thin layer will do. The syrup will help to prevent the cake from drying out too fast when stored in the refrigerator. It can also help to boost a bit of flavours if you flavoured your syrup with alcohol 😉
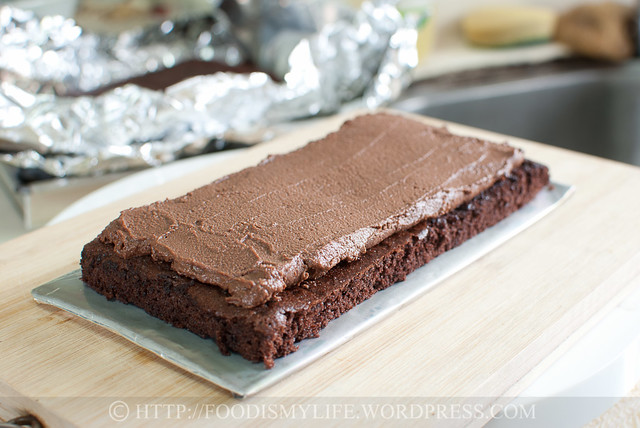
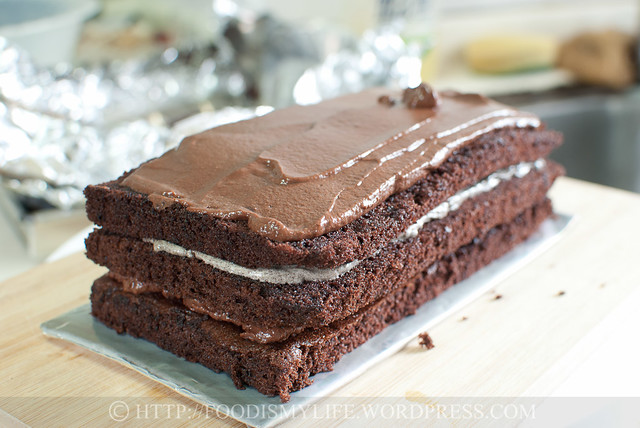
Spread a layer of chocolate mousse.
I’m using the most simple recipe for the chocolate mousse – just Varlhona dark chocolate and whipping cream. It’s so easy and it’s so delicious!
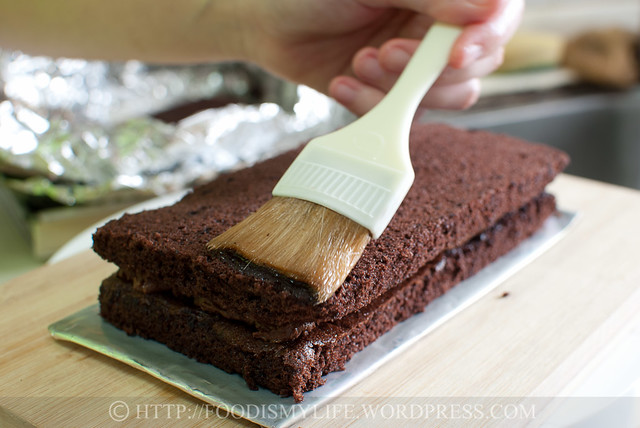
Brush both sides of the second layer with syrup.
Top it with some delicious Oreo filling.
This is my leftover Oreo cream cheese filling from this recipe. So, so, so delicious!
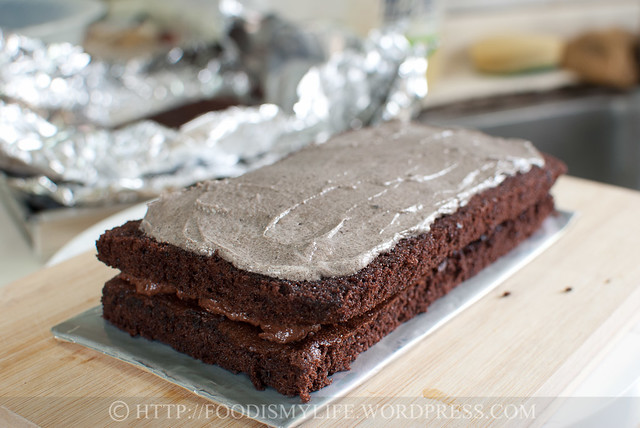
Up goes the third layer.
And smooth it with the remaining mousse.
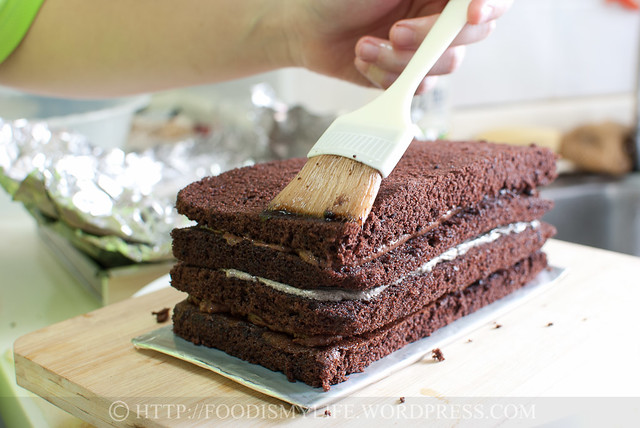
The last layer goes up.
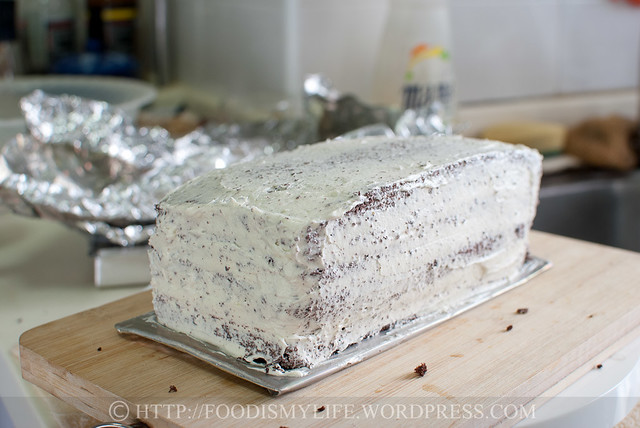
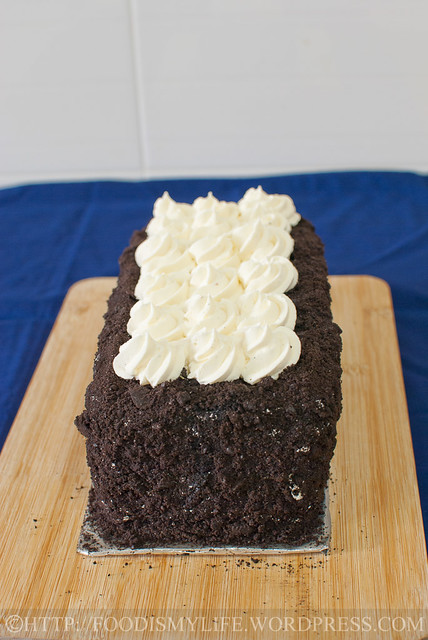
Cover the sides and top with a buttercream frosting, then decorate it!
You can do a crumb coat and refrigerate the cake first before applying a proper layer of frosting – it will prevent the cake crumbs from getting into the frosting – that is if you want to decorate the cake plain with the frosting.
I wanted to coat mine all over with Oreos crumbs, so I just slapped the frosting on and press the Oreo crumbs all over.
Something like this!

Bake one today!
I’m submitting this to Aspiring Bakers #18: Layers of Love (April 2012) hosted by Sam of Sweet Samsations!
This recipe consists of four components:
- Chocolate Genoise;
- Chocolate Mousse;
- Frosting / Filling; and
- Simple Sugar Syrup
It’s much, much easier and less complicated to bake and assemble this cake (when compared to this crazy one).
Relax Plan:
Day 1: Make the sugar syrup and keep it refrigerated.
Day 2: Bake the chocolate genoise and store in the refrigerator.
Day 3: Make the mousse and frosting. Assemble the cake and keep it refrigerated. Serve.
Busy Plan:
Day 1: Make the sugar syrup and chocolate genoise. Keep them in the refrigerator.
Day 2: Make the mousse and frosting. Assemble the cake and keep it refrigerated. Serve.
Crazy Plan:
Day 1: Make the sugar syrup, bake the chocolate genoise and make the mousse and frosting. Assemble the cake after the genoise has cooled completely and keep it refrigerated. Serve.
My plan was a busy one and it’s very manageable. One thing to note is that I already had some leftover cream cheese frosting (which is used in the filling) so I made the frosting using lesser amounts than stated in the recipe below. I have provided recipes to both types of buttercream – a cream cheese and a plain version, choose whichever you like! The measurements are not exact (just an estimation of how much you’ll need to fill, frost a thin layer and to pipe the rosettes on top). You may end up with extra filling / frosting – depending on how much you use to frost.
If you don’t want to use Oreo crumbs to coat all around, remember to make double the amount of frosting so that you have enough to frost it completely (mine was a thin layer – just enough so that the Oreo crumbs can adhere onto the cake).
Oreos and Chocolate Mousse Layered Cake
INGREDIENTS
Simple Sugar Syrup
- 1/3 cup sugar
- 1/3 cup water
Chocolate Genoise (step-by-step photos here)
- 45 grams 1/3 cup + 1 tablespoon plain flour
- 35 grams 1/3 cup + 1 tablespoon good-quality cocoa powder
- 4 eggs, cold or at room temperature
- 100 grams 1/2 cup caster/granulated sugar
- 45 grams 3 tablespoons hot, melted butter
Easy Chocolate Mousse
- 55 grams 2 oz good quality semi-sweet chocolate, chopped
- 65 ml 1/4 cup whipping cream
Buttercream #1: Cream Cheese Buttercream
- 100 grams about 1/2 cup room temperature cream cheese
- 100 grams about 1/2 cup room temperature unsalted butter
- 200 – 250 grams, 1 1/2 cups to 2 cups icing sugar, sifted
- 1/2 teaspoon vanilla extract
- 3 Oreos, cream removed and crushed to smithereens (and an additional 3-5 pieces roughly crushed for texture if desired)
Buttercream #2: Tasty Kitchen's Best Frosting
- 155 ml 2/3 cup milk
- 3 tablespoons plain flour
- 150 grams 2/3 cup unsalted butter, at room temperature
- 150 grams 2/3 cup caster sugar
- 1/2 teaspoon vanilla extract
- 3 Oreos, cream removed and crushed crushed to smithereens (and an additional 3-5 pieces roughly crushed for texture if desired)
Assembly
- 1 Chocolate Genoise
- 1 Simple Sugar Syrup
- 1 Cream Cheese Buttercream or Tasty Kitchen's Best Frosting
- 10 Oreos, cream removed and crushed (you can leave some big chunks for texture)
INSTRUCTIONS
Simple Sugar Syrup
- Place the sugar and water in a small pot. Bring the mixture to a boil, swirling the pot to dissolve the sugar crystals. Boil for 2 – 3 minutes on high heat then remove the pot from heat. Let cool to room temperature before using.
Chocolate Genoise
- Preheat the oven to 170 degrees Celsius. Grease a 7-inch baking tin and line the bottom with parchment paper. Set aside.
- Sift the flour and cocoa powder together thrice. Set aside.
- Place the eggs in a medium pot or a large metal mixing bowl. Add in the sugar and whisk immediately until combined. You must whisk the sugar immediately into the eggs otherwise lumps will form and it will be very hard to get rid of them later on.
- Hold the pot / mixing bowl over medium-low heat and whisk the egg-sugar mixture constantly, to bring up the temperature until its like baby's milk - warm but not hot. The mixture would be foamy. You can set it directly over the heat, just make sure that you remove it from time to time so you don't end up with cooked eggs.
- Transfer the mixture in the pot into a mixing bowl and whisk it with a hand-held electric mixer on high speed until the bubbles start to disappear. The mixture will triple in volume. Turn the mixer down to low and whisk it for at least 1 minute, to stabilize the air bubbles in the cake batter. The cake batter will leave a trail when you lift up the beaters and will sink and merge back slowly into the batter.
- Sift in half of the flour mixture and gently fold it in until almost all are combined. Sift in the remaining half of the flour mixture and fold until no flour pockets are visible. Do not over-mix.
- Add one-third of the cake batter into the hot, melted butter. Use a smaller spatula and fold the butter into the cake batter thoroughly. Pour the butter-mixed batter back into the rest of the cake batter and fold in gently.
- Transfer the cake batter into the baking tin. Tilt the tin so the batter spreads out evenly and drop it several times on the counter top to burst the uneven air bubbles.
- Bake in the middle rack for 15 to 20 minutes until the cake springs back when touched gently and a skewer inserted into the centre of the cake comes out clean.
- Make ahead:Make the cake one day ahead and store in an air-tight container in a cool place or in the refrigerator.
Easy Chocolate Mousse
- Melt the chocolate and let it cool to lukewarm. Whip the cream to soft peaks formed and fold in the melted chocolate.
- Refrigerate the mousse for 10 to 15 minutes until it has thickened but still soft enough to be spread on the cake. If it has hardened, leave it out at room temperature to soften before spreading it on the cake.
Buttercream #1: Cream Cheese Buttercream
- Using an electric mixer or food processor, beat the cream cheese, unsalted butter and icing sugar together until light and fluffy. Beat in the vanilla extract.
- Remove a quarter of the buttercream and mix into the crushed Oreos. This would be your filling for the cake later on.
- Remove half of the remaining buttercream and transfer it to a piping bag fitted with a star tip to pipe rosettes later on.
- The rest of the buttercream would be used to frost the cake.
Buttercream #2: Tasty Kitchen's Best Frosting
- Pour the milk into a small pot. Whisk in the flour with a wire whisk. Heat the mixture over medium-low heat and whisk constantly, until the mixture has thickened and has the consistency of a brownie mix (it should be very thick, like glue). Remove from heat and let it cool to room temperature completely.
- In a clean mixing bowl, use an electric mixer and whip the softened butter and the sugar until the sugar has been fully incorporated (no graininess remains). Beat in the vanilla extract.
- Scrape the cooled milk-flour mixture into the butter-sugar mixture and whip with the electric mixer until they have all combined together and resembles whipped cream.
- Remove a quarter of the buttercream and mix it with the crushed Oreos. This would be your filling for the cake later on.
- Remove half of the remaining buttercream and transfer it to a piping bag fitted with a star tip to pipe rosettes later on.
- The rest of the buttercream would be used to frost the cake.
Assembly
- Slice the genoise half vertically to get 2 7x3.5-inch rectangles. Slice each half horizontally to get 4 slices of genoise 7x3.5-inch each.
- Place one layer of the genoise on a cake board. Brush with a layer of syrup - don't soak the cake!
- Spread half of the chocolate mousse on top of the cake later, leaving a 1/4-inch border all around.
- Brush the second layer of genoise with syrup on both sides then place it on top of the mousse.
- Spread the Oreos-mixed filling onto the genoise, leaving a 1/4-inch border all around.
- Brush the third layer of genoise both sides with syrup and place it on top of the Oreos filling.
- Spread or pipe the remaining chocolate mousse on the genoise. Brush the last layer of genoise both sides with syrup and place it on top.
- Spread a layer of frosting on the sides of the cake and a thinner layer of frosting on top.
- Hold the cake (with the cake board) in your hand, press the crushed Oreos all over the sides of the cake. If desired, press some of the crushed Oreos on the top of the cake to create a border.
- Pipe rosettes on top of the cake as close to each other as possible and refrigerate till ready to serve.
NOTES
- Frosting adapted from Tasty Kitchen's Best Frosting I've Ever Had
Super Naggy – Mousse:
- How to melt chocolate
- Get a pot that will allow the large heatproof bowl to sit snugly on it without the bottom of the bowl touch the bottom of the pot. Pour water in the pot until the height of the water comes up to 1 inch. Bring the water to a boil and turn the heat down to the lowest setting.
- Chop the chocolate to small even-sized pieces and place it in the heatproof bowl. Place the bowl over the pot, making sure that the bowl is not touching the surface of the water at all (preferably at least 1 inch away). Stir the chocolate occasionally with a spatula until all the chocolate has melted and the mixture is smooth.
- Alternatively, melt the chocolate in a microwave: turn the microwave settings to medium-high. Place the finely chopped chocolate in the heatproof bowl and microwave for 20 seconds. Take it out, give it a stir then microwave it for another 15 to 20 seconds. Repeat until all the chocolate has melted. Don’t microwave it for too long at one go – chocolate burns easily and burnt chocolate is simply gross!
- Substitute the semi-sweet chocolate with dark chocolate or use a mixture of semi-sweet and dark. I used Varlhona dark chocolate this time round.
- Make the mousse the day you want to use it.
Super Naggy – Cream Cheese Buttercream:
- Crushing the Oreos: If you don’t have a food processor like me, simply place the Oreos in a large ziploc bag. Use a rolling pin or a bottle, roll the biscuits until they are all crushed to desired size. You can also whack with the rolling pin but don’t whack it too hard as the ziploc bag may tear.
- This buttercream becomes soft faster at room temperature as compared to Buttercream #2, so do store the cake in the refrigerator and bring it out only 15 minutes before serving them.
- Make the buttercream the day you want to assemble the cake.
Super Naggy; – Tasty Kitchen’s Best Frosting:
- I ran out of flour, so I actually used 2 tablespoons corn starch – works well too!
- If you’re in a rush, place the heated pot of milk-flour mixture into a bowl of ice water. It will help to bring down the temperature of the mixture faster.
- I like to process the caster sugar in a food processor until it’s of a very fine powder before mixing it in – incorporates into the butter much faster in my opinion.
- Make the buttercream the day you want to assemble the cake.
Super Naggy – Assembly:
- To spread the filling evenly on the cake, I find it best to scoop the filling onto the middle of the cake and slowly spread it out. Another method that I like is to place the filling in a piping bag and pipe it – this ensures an even amount of filling being applied (but there would be more to wash up later on).
- Hold the genoise in one hand. Brush it with a layer of syrup and place the syrup side down onto the filling then brush the top with the syrup.
- You don’t have to put a very thick layer of frosting if you’re going to coat it with Oreo crumbs. If you don’t wan’t to coat it with Oreo crumbs, do remember to make double the amount of frosting so you have enough to go around. If you are not coating it with Oreo crumbs, it’d be best to do a crumb coating first so that the cake crumbs don’t get all over the frosting.
- The Oreo crumbs become soft if you store it too long in the fridge, so if you want crunchy Oreos, do coat the cake with Oreos just before serving (crunchy or not, I like them all the same!)
Cupcakes de plátano, nueces y triple chocolate | Pizza and Recipes says
[…] Oreos and Chocolate Mousse Layered Cake Image by Food Is My Life / Foodie Baker foodismylife.wordpress.com/2012/04/28/oreos-and-chocolate… […]
Friday Favorites | Just a Spoonful of Sugar says
[…] Cake: Oreos and Chocolate Mousse Layered Cake. I don’t know how this wouldn’t be […]
summerdesireblog says
omggg.. I love it….
oreo and chocolate mousse layer cake. | Cooking Pics says
[…] oreo and chocolate mousse layer cake. /* […]
Tasty Kitchen’s Vanilla Frosting « Food Is My Life says
[…] It’s also lighter and holds pretty well at room temperature. I’ve made it before for my Oreos and Chocolate Mousse Layered Cake, but I think the frosting deserves a post on its […]
Jasline says
Hi Haleema,
I’m sorry to hear about your genoise. Did you whisk it with an electric mixer? The eggs and sugar mixture needs to be warm (but not hot as the eggs would be cooked if you heat the mixture for too long) before you whisk it with an electric mixer. It will take some time for the mixture to triple in volume, about 5 minutes.
I learned how to make the genoise from this video (Julia Child’s Chocolate Raspberry Ruffle Cake), here’s the link: http://www.youtube.com/watch?v=tbD8Nj16FCc&feature=youtube_gdata_player
I hope the video would be useful!
Cheers and take care,
Jasline
haleema says
my mixture didnt triple in volume its just stayed the same what am i doing wrong
haleema says
thankyou the cake looks scrummy by the way
Jasline says
Hi Haleema,
Genoise is a cake made without any artificial raising agent – air is beaten into the eggs to help the cake rise. Therefore there’s actually no need to use self-raising flour. I’m not sure what would be the effect of using self-raising flour, but I’m worried that the cake would rise too much and then collapse after baking…
Here are some tips on making a genoise: http://www.squidoo.com/Sponge-Cake-recipe
Hope it helps! Take care!
Cheers,
Jasline
haleema says
can you use sefraising flour
Janine says
as always, i enjoy your extremely detailed photos and instructions! cake looks awesome too!
Jasline says
Thank you Lena! Yea… gotta start exercising but I kept finding myself excuses not too… :p
Jasline says
Thank you very much Sandra! It’s a bit of a cheater loaf shape since a cut a square into half, making it a loaf! :p It’s better because the cake bakes much faster – means I get to eat it sooner! 😉
Jasline says
I love this idea! Making my friends fat along with me…! :p
katyarich says
🙂
lena says
such a luscious cake here! i’m also getting a little worried here that i’m putting on weight and not going down..eesh..! thank you for sharing the information on the flour milk buttercream method.
Jasline says
Hi Katya, thank you for following! I am glad you like this little blog of mine 🙂 I hope the future posts won’t disappoint!
Jasline says
Thank you for liking it and thank you for featuring the cake! 🙂 I am happy that you liked it! 🙂
The Foodie Affair says
Your cake looks fabulous! What decadence, yum!! I really like the loaf-like shape you baked it in too.
delicio8 says
Good luck. I’m trying to give everything away after I bake it!
Sibella says
Anytime! 🙂
Jasline says
Thank you Chris! Yea it’s sinful but I guess it’s worth the fats I’m gaining because it’s very delicious 😉
Jasline says
Thank you so much! I agree, going on low carb is very, very tough, so I’m starting to cut back on some of the sweets… I hope it works! :p
Jasline says
Thank you! Glad you like it 🙂
Jasline says
Thank you Sibella! Thanks for noticing the blog header 😉
Jasline says
Thank you!
Jasline says
Thank you! I’ll try to see if I can whip up any delicious low-carb! 😉
katyarich says
I’m new following, this recipe looks so delicious, I’m looking forward for new posts, 🙂 katya
Chaya says
Thank you for this recipe with all the hints and advice and the beautiful cake. I think,you did a super job and I am featuring it on Bake With Bizzy.
Chris says
Wow … sinfully delicious.
delicio8 says
Oh I’m gaining weight just looking at it! Looks wonderful! Oreos crumbled on a cake is such a good idea. I want to try low carb too but it’s sooooo hard, Especially when you like, um love sweets!
Aspiring Bakers #18: Layers of Love (April 2012) – Roundup « Sweet Samsations says
[…] Oreos and Chocolate Mousse Layered Cake by Jasline of Food Is My Life Banana Choco Mousse Chocolate Layered Cake […]
A_Boleyn says
A gorgeous assembly of tasty layers. 🙂
Sibella says
Very chocolatey! 🙂 I love the new blog header!
Photo Media says
Nice pics and looks delicious !
Got Your Holiday On?? says
Looks fabulous!!! Go for the low-carb, won’t scare me away, you go girl!!
Jasline says
Thank you for the compliments Giovanna!
Jasline says
Thank you for the compliments Joyce! Ahh yes… I think I should start making myself some low-carb meals… but I think that will scare all my readers away.. haha! Glad you like the cake!
Jasline says
I wish I could send one over to you, Raymund!
Jasline says
Awww thank you! I hope the plans will help others plan their time better! 🙂
Jasline says
Thank you so much for the sweet compliments. I wish you success in getting your perfect cake! Can’t wait to see it in your Bartolini kitchen! 😉
Jasline says
Oh I have to agree with you, I always tell myself not to waste my calories and fat on bad-quality food! Thank you for the compliment, it is indeed scrumptious! 🙂
Jasline says
Thank you for the compliments!
Jasline says
Oh it’s okay! 🙂 I’m glad you like the cake! It was very much loved by my friends and family!
Jasline says
Thank you Catalina, glad you like it!
Jasline says
Thank you Sam! I’ve been trying to level them using my serrated knife… still gonna keep practicing! Haha. Let me know how your cake leveler turns out, maybe I’ll consider getting one!
Jasline says
Thank you! I wish I could send you a slice!
Jasline says
Thank you for the compliments! 🙂
Bluejellybeans says
I can’t think of a more tempting cake… delicious!! 🙂
kitchen flavours says
Wow, your cake looks sinfully delicious! Nowadays I try to make half a recipe, you are right about growing horizontally, me too! Need to make more salad instead of cakes, for me, that is!! hehehe! But I would not say no to a piece of this gorgeous cake if offered a slice! 🙂
rsmacaalay says
Wow, I really wanna have a slice of that. Mmmmm!
yummychunklet says
LOVE that you made two plans to accommodate schedules. Ingenious!
ChgoJohn says
This is one beautiful cake and certainly worth the wait! You did not disappoint. I couldn’t make this straight away and would have to make a few “practice cakes” before getting it right, which is fine with me. That would be one tasty group of failures! 🙂
girlinafoodfrenzy says
If you’re going to eat a cake it may as well be worth the calories! I can tell by looking at your gorgeous Oreo layered cake that it is. Looks very scrumptious 🙂
A_Boleyn says
A gorgeous creation.
johnnysenough hepburn says
changed my mind – sorry!
johnnysenough hepburn says
You’ve very definitely change my mind about sponge cakes! This looks light and moist, the way I’d like them. Will have to google oreos .
Catalina @ Cake with Love says
I love mousse cakes, this one just looks so gorgeous!!!
samology says
Wow! What a delicious cake! Lots of chocolate!! yummy… And I love that chocolate mousse recipe! Only 2 ingredients? No way!!! That’s awesome.. 🙂 Oh and I feel ya!! I’m horrible with torting my cake!! They never end up perfectly straight. All I can do is let out a grunt in the kitchen. haha.. I’m going to invest in a cake leveler http://www.wilton.com/cakes/making-cakes/leveling-cakes.cfm which I believe only cost about $5 here! 😀 My stupid serrated knife doesn’t do the trick… Or perhaps I still got lots to work on. haha! Thanks for your delicious submission!!!
Choc Chip Uru says
This cake is absolute brilliance – you are so creative! I can imagine the deliciousness it offers 🙂
Cheers
Choc Chip Uru
apuginthekitchen says
You are brilliant! Luscious, creamy and oreo’s are my favorite!