
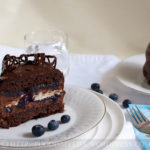
A Varlhona dark chocolate cake with Varlhona-Ghiradelli semi-sweet chocolate mousse and blueberry curd with a vanilla meringue center, coated with a Varlhona dark chocolate ganache glaze.
Upon knowing that the theme of Aspiring Bakers this month is Layered Cakes, I’ve been dreaming about what kind of layered cake I should make… And one day I saw dear Sibella’s dream cake – I was so hooked with the idea of creating a dream cake! What makes it perfect is that my best friend’s birthday was coming up, so I knew it would be the perfect opportunity to bake her her dream cake.
I discussed with her the type of dream cake she would like and these are her requirements:
- Chocolate cake
- Blueberry jam
- Chocolate cream
- No whipped cream
After some researching and browsing of cookbooks, here’s the sketch of the cake (I followed Sibella’s idea of sketching and it’s a great way to visualize the cake!)

Instead of making it a three layered chocolate cake with mousse and blueberries in between, I chose to add a meringue layer in between, thinking that it would add some texture to the cake. I changed the blueberry jam to a curd because I wanted to try making one.

Mini cakes in assembly.
The recipe below is intended for an 8-inch cake, but I made mine a 7-inch and 2 3-inch mini cakes.
Overall it’s a very, very heavy cake – in terms of weight and taste. Unfortunately I can’t taste the difference in texture because the meringue integrated with the curd. I think it’s probably because the meringue is too thin. I should have piped a thicker meringue!
I used dark chocolate for the border of one of the mini cakes and white chocolate for the big one. I didn’t make the border for the other mini cake because I was lazy… hehe.

The cake is very rich and ultimately chocolatey – maybe a bit too rich in my honest opinion. If I ever make this again, I would swap the cake with a chocolate genoise instead. Luckily the birthday girl is an ultimate chocolate girl and she ate it without complains but praise.

Her dream cake – the white chocolate border created a very pretty contrast.

A long recipe awaits!
I’m submitting this to Aspiring Bakers #18: Layers of Love (April 2012) hosted by Sam of Sweet Samsations!
Chocolate, Mousse, Meringue and Blueberry Curd Layer Cake
(makes 1 8-inch cake – serves about 10)
The cake consists of the following:
- Chocolate cake – can be made 2 – 3 days in advance; store in an air-tight container at room temperature.
- Chocolate mousse, ganache, collar – to be made on the day of assembly
- Meringue – can be made one day in advance; store it in an air tight container at room temperature.
- Blueberry curd and simple boozy syrup – can be made one week in advance; store it in the refrigerator.
Relax Plan
Day 1: Make the cake (store in an airtight container) and simple syrup (store in refrigerator).
Day 2: Make the meringue (store in a dry place) and the blueberry curd (store in refrigerator).
Day 3: Make the chocolate mousse, assemble the cake and freeze.
Day 4: Spread chocolate ganache and make the chocolate border. Thaw in the refrigerator.
Day 5: Serve!
Busy Plan
Day 1: Make the cake (store in an airtight container), simple syrup (store in refrigerator), meringue (store in a dry place) and the blueberry curd (store in refrigerator).
Day 2: Make the chocolate mousse, assemble the cake and freeze.
Day 3: Spread chocolate ganache and make the chocolate border. Thaw in the refrigerator.
Day 4: Serve!
Crazy Plan
Day 1: Make the cake, meringue, syrup, blueberry curd, chocolate mousse, assemble the cake and freeze.
Day 2: Spread chocolate ganache and make the chocolate border. Thaw in the refrigerator.
Day 3: Serve!
Insane Plan
Day 1: Make the cake, meringue, syrup, blueberry curd, chocolate mousse, assemble the cake and freeze for 2-4 hours, spread chocolate ganache and make the chocolate border. Keep in the refrigerator.
Day 2: Serve.
My plan was in between a busy and crazy one. I made the blueberry curd the night before and then bake and assemble them all the next day (I took about 6h, including measuring, mixing, baking, and assembling. I tried to wash most of my mixing bowls while the cake/meringue is baking). The assembled cake was then frozen for 3 days before I unmould and frost it. It was served the next day.
There are a lot of steps, so it is advisable to read the recipes in advance to know the steps involved roughly and prepare all the ingredients a few days before you need them – you wouldn’t want to be out rushing to buy some ingredients while baking something! Most importantly, relax and enjoy the baking process!
Chocolate, Mousse, Meringue and Blueberry Curd Layered Cake
INGREDIENTS
Blueberry Curd
- 2 lemons
- 250 grams blueberries
- 1 1/2 tablespoons water
- 150 grams sugar
- 85 grams unsalted butter, at room temperature
- 3 eggs, lightly beaten
Simple Boozy Syrup
- 40 grams sugar
- 100 ml water
- 15 ml rum, optional
Cake
- 90 grams all purpose flour
- 20 grams good quality Dutch-processed cocoa powder
- 1 teaspoon baking powder
- Pinch of salt
- 110 grams good quality dark chocolate, roughly chopped
- 200 grams unsalted butter, can be cold or at room temperature
- 150 grams caster sugar
- 4 eggs
Vanilla Meringue
- 3 large egg whites, at room temperature
- 150 grams icing sugar
- 1/2 tablespoon vanilla extract
Easy Chocolate Mousse
- 115 grams good quality semi-sweet chocolate, chopped
- 125 ml whipping cream
Dark Chocolate Ganache Glaze
- 125 ml heavy cream
- 150 grams good-quality dark chocolate, chopped
- 2 tablespoons golden syrup
Chocolate Border
- 100 grams dark / milk / white chocolate
INSTRUCTIONS
Blueberry Curd
- Peel the lemon zest and juice the lemons.
- Place the zest, juice, blueberries, water and sugar in a pot over low heat. Stir the berries constantly until the berries have softened and are releasing juices, about 10 minutes.
- Strain the blueberries into a clean pot to remove the lemon zest and blueberry skins (I did not strain mine, but simply remove the lemon zest).
- Add in the butter and stir until all the butter has melted. Stir in the eggs gradually. Cook the blueberry mixture over low heat, stirring constantly until it is thick enough to coat the back of a spoon, which will take about 10 to 15 minutes.
- Transfer the curd into a clean container, let cool completely, cover and refrigerate overnight to let it set.
Simple Boozy Syrup
- Place the sugar and water in a small pot. Bring the mixture to a boil, swirling the pot to dissolve the sugar crystals. Boil for 2 - 3 minutes on high heat then remove the pot from heat. Let cool to room temperature and stir in the rum if using.
Cake
- Preheat the oven to 170 degrees Celsius. Grease an 8-inch round tin and line the bottom with greaseproof paper.
- Measure the flour, cocoa powder, baking powder and salt in a small bowl. Use a wire whisk and whisk the dry ingredients together until they are all well-mixed and evenly distributed.
- Measure the dark chocolate and unsalted butter in a large heatproof bowl and melt them over a pot of simmering water, stirring occasionally -Note [1].
- Remove the heatproof bowl from the pot. Add in the caster sugar and whisk gently – not all of the sugar will dissolve, it’s ok if the mixture is grainy. Let the mixture stand for 10 minutes to cool down slightly (the eggs will scramble if added to a hot mixture).
- Crack in one egg into the chocolate mixture. Whisk the mixture (yes, same wire whisk!) for 30 seconds until it is fully incorporated. Whisk in the second egg, and then whisk in the vanilla extract.
- Sift a third of flour mixture into the chocolate batter and folding gently using a large metal spoon or rubber spatula. until all the dry ingredients have been incorporated – Note [2].
- Transfer the cake batter into the lined cake tin. Bake for 30 to 40 minutes until a skewer inserted into the centre of the cake comes out clean.
- Cool the cake in the tin for 10 to 15 minutes, then turn it out onto a wire rack and let it cool completely.
Vanilla Meringue
- Preheat the oven to 120 degrees Celsius. Trace a 7-inch circle onto a greaseproof paper. Place the pencil side down onto a baking sheet. Butter the top of the greaseproof paper lightly. Set aside.
- Place the egg whites in a clean, dry and oil-free bowl. Use an electric mixer and whip the egg whites on medium speed until frothy, about 2 minutes. Turn up the speed to medium-high and add in the caster sugar, a tablespoon at a time, until the meringue is creamy, about 4-5 minutes. Beat in the vanilla extract on medium speed.
- Pipe or spread a 7-inch circle on the greaseproof paper, using the template drawn earlier as a guideline.
- Bake for 55 minutes - 1 hour until the meringue is biege in colour - the meringue will spread out slightly and it will be dry and crunchy on the outside but chewy on the inside. Open the oven door ajar and let the meringue cool completely.
Easy Chocolate Mousse
- Melt the chocolate and let it cool to lukewarm. Whip the cream to soft peaks formed and fold in the melted chocolate.
- The mousse should be made just before assembling the cake so that it will be soft and liquid-y enough to pour it into the mould.
First Assembly
- Level the cake so that the top is flat. Slice the cake into two horizontally.
- Set an 8-inch ring mould onto a board. Moisten both sides of one cake slice and place it in the ring mould.
- Pour half of the mousse onto the cake layer. Spread the mousse all over the cake evenly with a spatula or a spoon. Pour in half of the blueberry curd and spread it evenly.
- Place the vanilla meringue onto the blueberry curd and press down gently. Pour the remaining mousse over, followed by the blueberry curd.
- Moisten both sides of the remaining cake slice and place it on top of the blueberry curd, pressing it down gently.
- Wrap the cake with plastic wrap and freeze it overnight or up to 1 week.
Dark Chocolate Ganache Glaze and Second Assembly
- Heat the cream in a pot until small bubbles start to appear on the sides (simmering stage). Pour the cream over the chopped chocolate and let it sit for 2 minutes. Stir until all the chocolate has melted. Stir in the golden syrup. Let it sit aside to cool for 30 minutes.
- Alternatively, heat the cream in a microwave for 30 seconds on medium high. Add in the chocolate and microwave at 15 seconds interval, checking the mixture and stirring it at each interval until all the chocolate has melted. Stir in the golden syrup and let cool for 30 minutes.
- Remove the cake from the freezer and unmould the cake. Place the cake on a wire rack set over a baking sheet. Pour the chocolate ganache all over the cake, spreading it out with a spatula, letting the excess drip onto the baking sheet.
- Refrigerate the cake while you prepare the final assembly.
Chocolate Border and Final Assembly
- Wipe a large table with damp cloth. Immediately line a big piece of plastic wrap on the damp table so that it will stick to the table. This is to help with the ease of clean up later.
- Measure the height and length of the cake border desired using a long piece of baking parchment and cut it out, leaving an inch on the sides and the top for easy handling later on. Place it on the plastic wrap and hold it down with some paper weights if your baking parchment tend to roll up.
- Melt the chocolate. Transfer the melted chocolate into a small piping bag. Snip of a small corner of the end of the piping bag. Pipe rounds all over the baking parchment - it doesn't have to be very neat and precise and perfect ovals - it's called being artistic! :p Once the cake border goes up onto the cake, nobody will notice the flaws you think you've made because it will already look grand and beautiful!
- Leave the piped chocolate aside for 5-10 minutes until it's slightly set but not yet harden - the piped chocolate will not ooze when lifted and when you touched it there will be no trace of melted chocolate on your finger. I wouldn't recommend putting the baking parchment in the refrigerator because the chocolate may harden faster than you think and you will need to start over.
- Take the cake out of the fridge. Lift up the baking parchment of piped chocolate and wrap it carefully around the cake. Refrigerate until the chocolate has fully set and hardened. Discard the plastic wrap.
- Peel off the baking parchment as gingerly as you can. If you leave the cake slightly longer at room temperature, the chocolate border will softened as curl downwards. I didn't expect for this to happen but nature took its course and I find that the cake looks great all the same.
- For the leftover melted chocolate, piped wordings or small pearls at the bottom of the cake for a decorative finish.
- Keep the cake in the refrigerator overnight to let it thaw out completely.
- Serve in thin wedges dusted with icing sugar.
Super Naggy – Cake:
- How to melt a chocolate and butter mixture
- Get a pot that will allow the large heatproof bowl to sit snugly on it without the bottom of the bowl touch the bottom of the pot. Pour water in the pot until the height of the water comes up to 1 inch. Bring the water to a boil and turn the heat down to the lowest setting.
- Place the bowl of chocolate and butter over the pot, making sure that the bowl is not touching the surface of the water at all (preferably at least 1 inch away). Stir the mixture occasionally with a whisk (the same one you used to whisk the dry ingredients), until all the chocolate and butter has melted.
- Alternatively, melt the chocolate and butter in a microwave: turn the microwave settings to medium-high. Place the bowl in the microwave and microwave for 20 seconds. Take it out, give it a stir then microwave it for another 15 to 20 seconds. Repeat until all the chocolate and butter has melted. Don’t microwave it for too long at one go – chocolate burns easily and burnt chocolate makes the worst cake ever!
- How to fold flour into batters
- Rubber Spatula Method: Hold the spatula so that the flat side is perpendicular to the table top. Cut into the middle of the cake batter – all the way to the bottom. Draw the spatula towards you then turn the the spatula (either left or right), scraping the bottom and up the sides of the bowl, gently lifting the spatula up (together with some cake batter) and let it drop gently on top, over the flour mixture. If you turn the spatula left, turn the bowl anti-clockwise 90 degrees and repeat cutting the batter. Do it very gently and slowly – it will take some time before the flour mixture is fully incorporated.
- Metal Spoon Method: Use the largest metal spoon you can find. Add in the flour and move the metal spoon in a figure-of-eight motion – turning the bowl as you mix and not lifting the spoon out of the cake batter (you can lift it slightly, just don’t lift the spoon out of the batter completely). Mix gently until all the flour has incorporated.
- If mixing the flour in batches, don’t wait until all the flour has been incorporated then add a second batch. Add the second batch when most of the flour from the first batch has been incorporated. Folding is a slow-and-steady skill that cannot be rushed – take your time to slow down!
Super Naggy – Mousse:
- How to melt chocolate
- Get a pot that will allow the large heatproof bowl to sit snugly on it without the bottom of the bowl touch the bottom of the pot. Pour water in the pot until the height of the water comes up to 1 inch. Bring the water to a boil and turn the heat down to the lowest setting.
- Chop the chocolate to small even-sized pieces and place it in the heatproof bowl. Place the bowl over the pot, making sure that the bowl is not touching the surface of the water at all (preferably at least 1 inch away). Stir the chocolate occasionally with a spatula until all the chocolate has melted and the mixture is smooth.
- Alternatively, melt the chocolate in a microwave: turn the microwave settings to medium-high. Place the finely chopped chocolate in the heatproof bowl and microwave for 20 seconds. Take it out, give it a stir then microwave it for another 15 to 20 seconds. Repeat until all the chocolate has melted. Don’t microwave it for too long at one go – chocolate burns easily and burnt chocolate is simply gross!
- Substitute the semi-sweet chocolate with dark chocolate or use a mixture of semi-sweet and dark. I used semi-sweet from Ghiradelli and dark from Varlhona.
Super Naggy – Assembly:
- Unmould a Cake
- Method 1: Rinse a cloth in warm water. Wipe the sides of the cake pan – you want the sides of the cake to warm up and soften so it’s easier to take it out.
- Method 2: Place the cake on a cake decorating turn table / lazy Susan. Turn the hair dryer on high heat and use it to warm the sides of the cake to loosen it. I personally prefer this method as it’s faster and more efficient.
Devil’s Chocolate Cake with Peanut Butter & Jam | Food Is My Life says
[…] So nowadays I only reserve baking layer cakes for birthdays, or when I’m really free, haha! This cake was baked for a close friend’s birthday in April (look how fast time flies!), the same friend whom I baked for last year. […]
An Unbelievable Cake! Chocolate, Mousse, Meringue and Blackberry Curd Layered Cake « Crazed Mangoes says
[…] Recipe is adapted from FoodIsMyLife […]
Jasline says
Thank you Kit, hope you try it one day! 🙂
Jasline says
Hi, thank you Katie! I still have a lot to learn in photography 🙂 I shoot my photos mainly in Aperture or Manual mode using the Nikon 35mm f/1.8 DX lens.
Kit says
Wow! These looks a sounds delicious! Simply divine! Will bookmark this recipe! YUM! 🙂
pinchofglamor says
Hi!! I’ve baked it last weekend. But there’s still areas to improve!! Your advices are really helpful! Thank you so much!!
Chocolate Mousse and Blueberry Layered Cake « Pinchofglamor says
[…] working on a blueberry chocolate layered cake. It was love at first sight when i saw the “ Chocolate, Mousse, meringue and Blueberry Curd Layered Cake” by foodismylife. The cake looks so beautiful. What can be better than a combination of my […]
Katie says
Hi!!!
I really like your photos of the cake! Your pictures are so bright and focused. I have a d3000 too! Which mode did you use to take these pictures!!
Jasline says
Hi there! I’m glad I found another fellow foodie! Thank you for the compliments.
As for your question, I did not freeze the cake after the chocolate ganache, I froze the cake after the first assembly – where the cake, mousse and curd comes together. The chocolate ganache was applied after I unmould the cake, which I then stored the cake in the refrigerator overnight to let it thaw. Freezing the cake overnight helps the filling inside to firm up, which makes it easier to unmould later on. (It’s easier to unmould a frozen block of cake then soft layers of cake and mousses.) Also, the cake can also be kept longer frozen – I kept mine frozen for about 4-5 days before I unmould it and spread it with ganache.
If using ramekins, I will recommend lining the bottom of the ramekins with greaseproof paper, then assemble the cake. Freeze the cake until firm (ramekin cakes are smaller, so they’ll probably need to be frozen for only a couple of hours). Run a small, thin, dry and hot knife (dip the knife in hot water and wipe it dry with paper towels) along the sides of the cake so that it will not stick to ramekin, then turn the ramekin upside down and hold your hand or a plate underneath to catch the cake.
A ring mould / cake ring will still be the best option because it has no bottom, so you can assemble the cake directly on the cake board and then unmould it. If you are interested in getting one, I got mine from Phoon Huat (7-inch in diameter and 3-inch in height) and I think it’s not very expensive.
I hope this answer your questions! All the best baking the cake! Let me know how it goes! 😉
Jasline says
Thank you Sandra! I am glad you like it 🙂 Have a great weekend ahead!
pinchofglamor says
Hi!!!
I m really motivated to bake by all of the food bloggers! I am also very interested in cooking n baking since young. So I m trying to be like one of you, to set up a site to share my cooks and bakes! This cake looks totally awesome. I plan to bake this cake this week but I have some qns. Why do you have to freeze the cake after you add the chocolate ganache? I plan to bake using my ramekins so how should I mould the cakes? Put in the ramekin?
Sandra - The Foodie Affair says
This is beautiful and I love the combination of flavors, chocolate and blueberries together.
Aspiring Bakers #18: Layers of Love (April 2012) – Roundup « Sweet Samsations says
[…] Chocolate, Mousse, Meringue and Blueberry Curd Layered Cake by Jasline of Food is My Life Chocolate Mousse Cake […]
Jasline says
Thanks Russell! Glad you enjoyed the cake 🙂
Jasline says
Thank you Lena! I wish I can give everyone a slice, everyone’s been really sweet! 🙂
Russell at Chasing Delicious says
I love all the layers in this cake! What a delicious combination.
lena says
how i wish i can have a slice now! i must applaud you for giving such detail explanation of making this cake, i’m sure worth all your busy and crazy plans to get this done! very nice choc borders!
Jasline says
Thank you so much for the compliments 🙂 The cake takes time to make but the individual components are not very difficult thankfully 😉 I can’t wait to see your Quadruple Chocolate Cheesecake… just its name is making me drool!!
Jasline says
Thank you for the compliments! 🙂
Jasline says
Thank you Bobbi! Took me about a whole afternoon and slightly more since I made most of the components on the same day… it was well worth the effort!
Jasline says
Thank you very much Balvinder! I’m glad you enjoyed the slice. Have a great week ahead!
A_Boleyn says
A truly wondrous creation. Anything that needs a sketch to create (ok, I used one the first time I made my spinach and cheese lasagna) is a bit out of the ordinary.
I’m a wussy old-line Canadian who stuck to the old US type measurements when we went metric and these types of recipes stymie my poor little brain so I’m not likely to attempt this recipe but I would happily devour a slice if it was offered to me. The 3D decorations are outstanding and your explanation makes me realize it was actually very straightforward. 🙂
By the way, I like chocolate as well and will … soon, make what I call a Quadruple Chocolate Cheesecake. The poor deluded fools who named it called it a Double Chocolate Cheesecake, but it’s used in all four layers so that counts as Quadruple … doesn’t it? 🙂
rsmacaalay says
Wow complicated but I think its all worth the effort just look at that decadent slice.
Bam's Kitchen says
Holy cow. This cake is a thing of beauty. How many hours total did it take you to make?
balvinder ( Neetu) says
This looks gorgeous. I love every detail of it.
Pretty picture of a chocolate cake slice brought me here from Choc chip Uru’s blog.
Jasline says
Thank you so much for the compliments Joyce! Practice makes perfect! I still have much more to learn 😉 Glad you enjoyed the cake!
Jasline says
Aww thank you, Catalina!
Jasline says
I’m glad you enjoyed the cake! There’re really too many steps… I think I’ll make this kind of cake only a couple of times a year, the amount of washing is just so scary haha.
Anyone For A High Tea? « Go Bake Yourself says
[…] I feature the marvellous Jasline @ Food Is My Life (mine too!) with her Chocolate, Mousse, Meringue & Blueberry Curd Layered Cake – excuse me? Where is my share? Honestly people these days Jokes Jasline, what a fabulous […]
kitchen flavours says
It’s a beautiful cake! You really have the patience to make the cake with all the lengthy steps! Kudos to you! I am lousy when it comes to layer cakes! I’m awed by your creativity! Super great job, Jasline!
Catalina @ Cake with Love says
It doesn’t sound weird, it sounds delicious!
yummychunklet says
Thank you for sharing this recipe! It’s a gorgeous looking cake but well worth all the effort.
Janine says
i think your instructions are one of the most detailed i’ve ever seen for any layered cake – which is fantastic! knowing me, i’d probably end up with the insane plan since i like to leave things to the last minute (and I’ve ended up with horrible results :X) love your drawing too – mine usually turns out to be scribbles which no one understands but me hehe
Jasline says
Thank you Yvette! I have to agree with you, the relax mode is an ideal situation that’s very hard to achieve! I’m happy that you like this post, thank you!
Jasline says
Thank you so much for the compliments! I definitely won’t mind if you reblog this – I am so happy that you like this cake. Thank you!
Jasline says
Thank you, thank you Sam! I hope the detailed instructions will help anyone out there who’s interested in baking this cake 😉 If not for you choosing Layered Cakes as the theme of Aspiring Bakers this month, I may not have baked this cake, thank you!
Jasline says
Thank you Leslie, yea baking the cake is quite time consuming, but the results are very rewarding! 🙂
Jasline says
Thank you! It was really time consuming and because it’s my first time taking on such a huge task, the kitchen was a mess! But I hope to learn more from this experience and be more efficient in the future 😉
Jasline says
Thank you for the compliments John! Glad you enjoyed it. 🙂
Jasline says
Thank you Villy! Have a great weekend ahead!
Jasline says
Thank you! I would love to spread some blueberry curd on my toast, but all ended up in the cake! I think I should make them again soon 😉
Jasline says
Thank you Catalina! At first I think it sounds weird, blueberries and chocolate together in a cake, but I’m glad the flavours worked out nicely.
Jasline says
Thank you so much, it’s really time consuming, but the results are very rewarding. Thanks for stopping by, take care!
Jasline says
Thank you for the compliment! 🙂
Jasline says
Thank you Sibella! I have to thank you for such a wonderful idea! 😉
Yvette says
I would hope I could make this cake in the ‘relax’ mode, but know would probably be in the ‘crazy’ zone!LOL!
Wonderful details and like the draft up drawing as well. A great post!
Choc Chip Uru says
This cake is one of the hardest, most complex, most creative, most utterly fantastic ideas for a cake I have ever had the pleasure to see before – would you mind if I reblogged this with my next post? It deserves to be shared everywhere 😀
Cheers
Choc Chip Uru
samology says
this looks… really good.. I mean… REALLY REALLY GOOD!!! Instructions are so detailed and looks like there are quite a few components of the cake. I would have been afraid to flip the meringue layer! Looks so fragile. hehe.. I like how you sketched the cake out! That’s a great idea. Plus, I love the chocolate “frills” on the top. Great job and thanks for your submission!!
Leslie Chapman says
What a beautiful cake! So many steps, but it looks like it was worth it 🙂
Just A Smidgen says
Wow… This is a spectacular and intricately assembled birthday cake! Good on you, it must have taken some time to prepare! Lucky birthday girl!!!
ChgoJohn says
This is one unbelievable cake! A real thing of beauty.
Villy says
I love this! Great idea and execution of course!
saffronandhoney says
Looks just gorgeous! Blueberry curd – yum.
Catalina @ Cake with Love says
Wow Jasline thi scake is beautiful, the blueberry curd sounds amazing in this chocolate cake!!! Very nice!!!!
apuginthekitchen says
What a spectacular cake, I love the blueberry curd what a wonderful addition to the rich chocolate cake. Truly a work of art.
whisksandchopsticks says
You have out done yourself this time! 🙂
Sibella says
Wow, you have outdone yourself on this one! Beautiful! 🙂