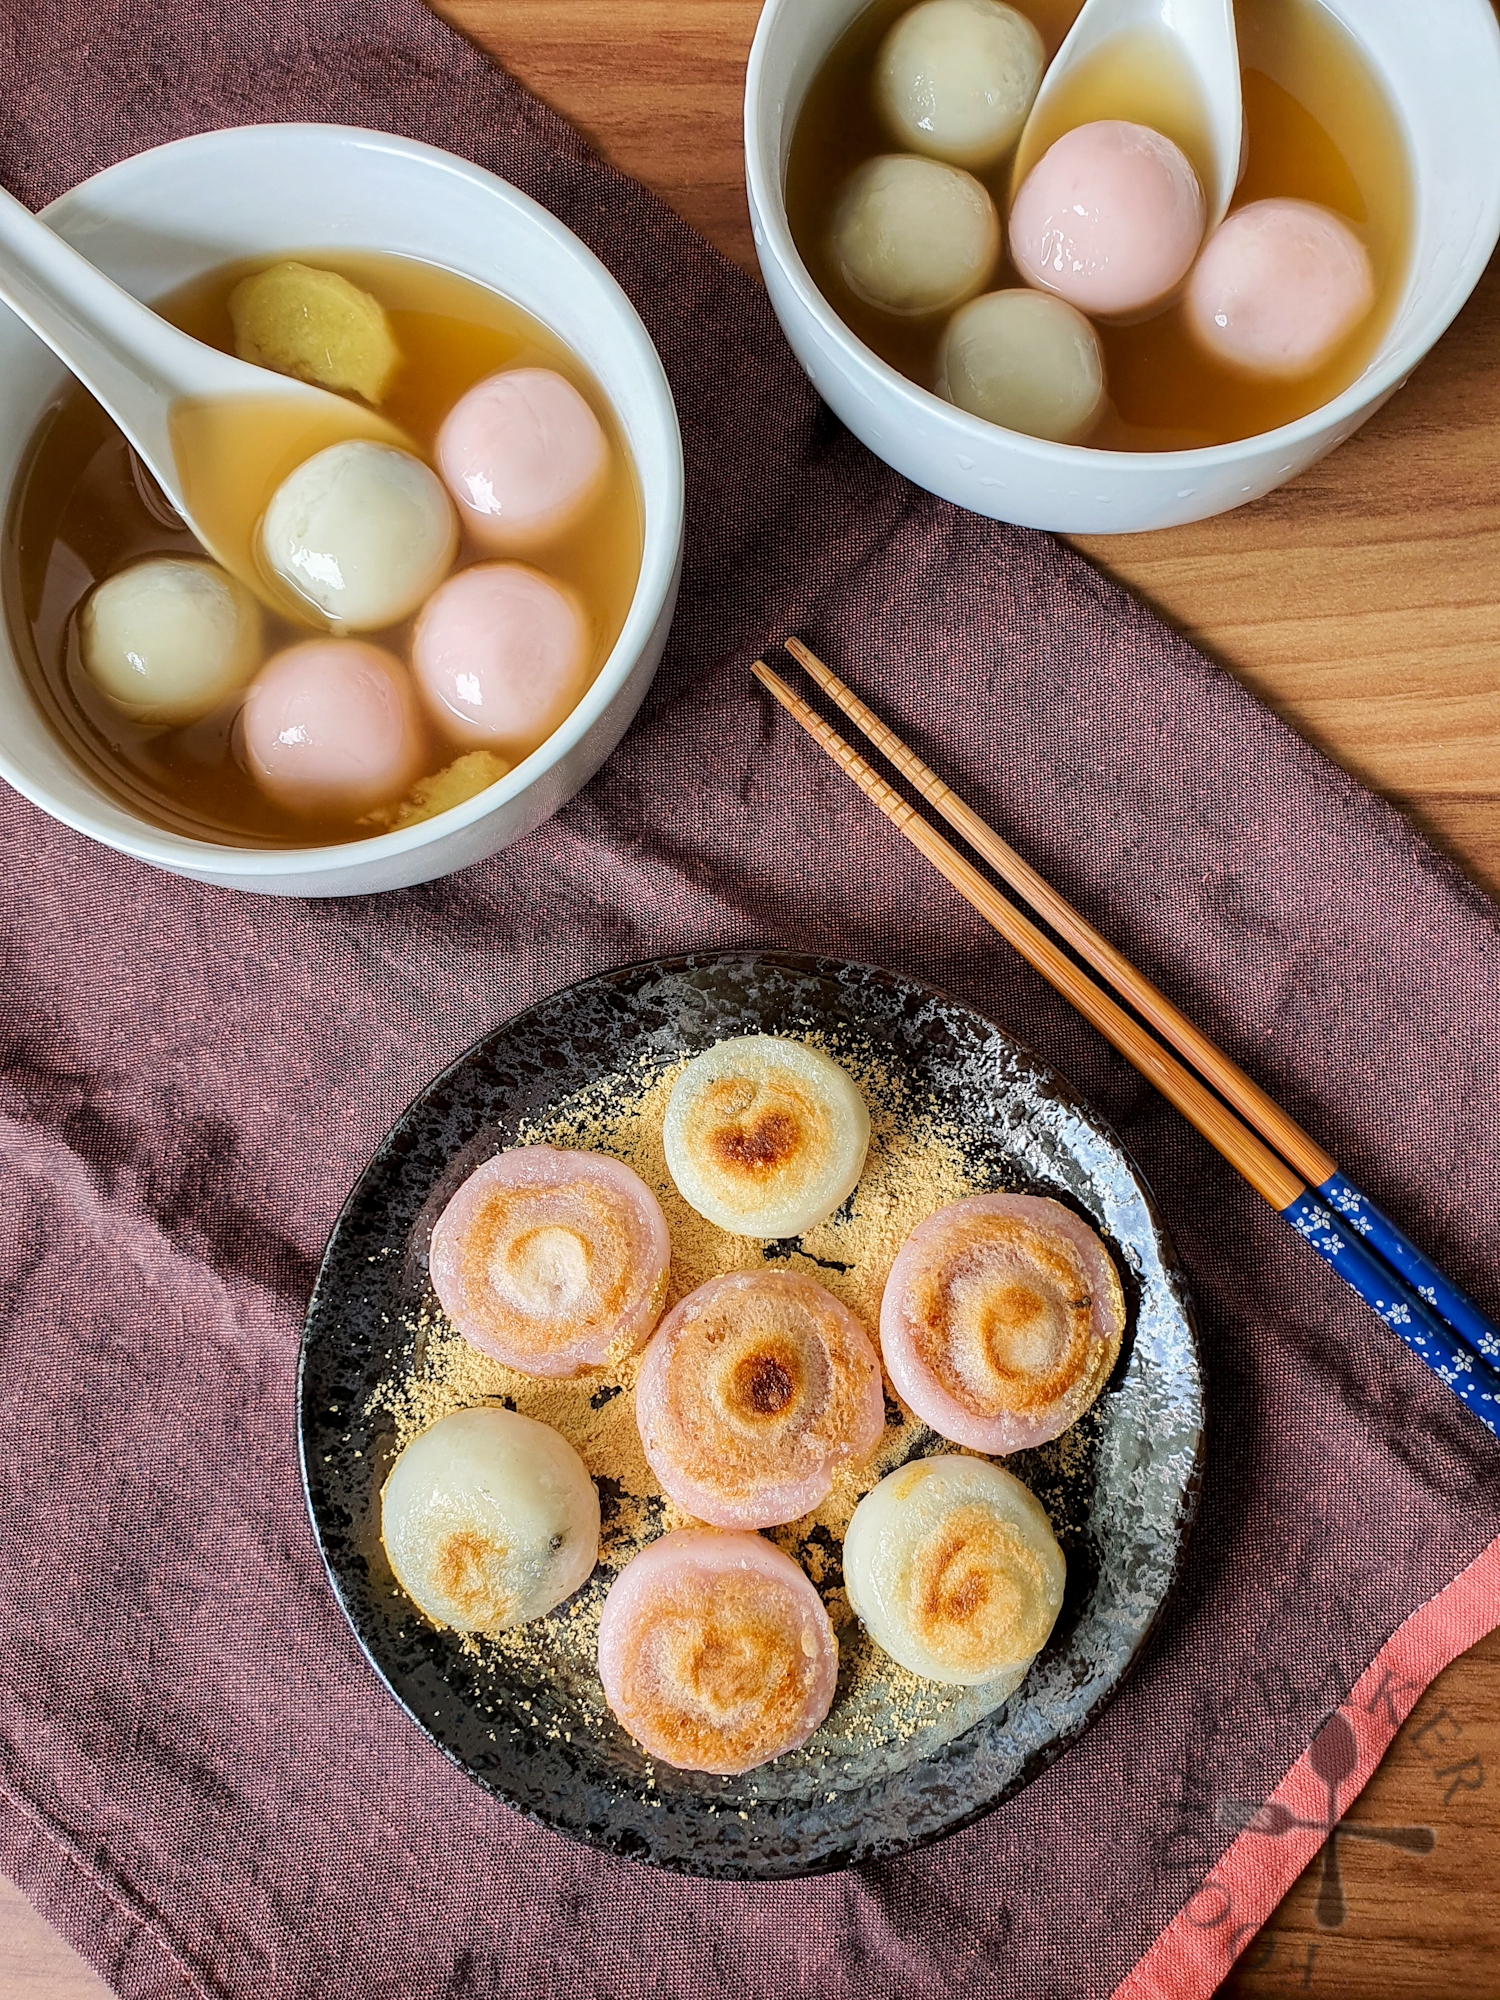
Pan-Fried Tang Yuan are crisp and chewy at the same time, with a hot oozy black sesame / peanut filling. Dusted with kinako (roasted soybean flour) for a slight nutty flavour, they are a delicious way to end the Chinese New Year celebrations.
Chinese New Year (aka Lunar New Year) is traditionally celebrated over 15 days. Today is the 15th day of the Chinese New Year, and is known as 元宵节 yuan xiao jie (meaning “first night of the full moon”). On this day, we will usually eat 汤圆 tang yuan (glutinous rice balls) because of its auspicious name and shape. 汤圆 tang yuan is a homophone for 团圆 tuan yuan, so eating them symbolises togetherness and completeness.

What is 汤圆 Tang Yuan?
Tang yuan is a rice ball made with glutinous rice flour. It can be plain, or filled with a peanut, sesame or red bean filling. When cooked, the rice ball has a tender and chewy texture. If the filling is well-made, it will ooze out, making them a delicious delight.
I have tried making my tang yuan from scratch, but couldn’t achieve the oozy filling. So I just get them from supermarkets these days. I usually cook my tang yuan in a pandan-ginger syrup, sweetened with brown sugar for a slight molass-y flavour.
X saw this pan-fried version online and asked me to try it out. We fell in love: they have a nice contrast in texture – crispy exterior with chewy interior; with a hot and oozy filling “exploding out” when we bit into it.
Tips to Make Pan-Fried Tang Yuan
Use a non-stick pan. I’m using a coated non-stick pan (aka Teflon). It prevents the tang yuan from sticking to the pan, which may result in the tang yuan tearing and the filling oozing out. As I’m trying to phase out using such pans, I’ll update again when I remake them with a ceramic-coated pan.
Handle the tang yuan gently, especially if there are filling inside. If you use too much strength to flatten the dumplings, they may tear the filling will ooze out.
Dust serving plate with kinako. The kinako helps prevent the tang yuan from sticking to the plate or to one another. In addition, it also adds a nutty flavour to the tang yuan. You can omit it or use ground peanuts if you don’t have kinako on hand.

Pan-Fried Tang Yuan (Chinese Glutinous Rice Balls)
EQUIPMENT
- 1 Non-stick pan
INGREDIENTS
- 8 tang yuan
- ½ teaspoon oil
- 40 ml water
- Kinako, aka roasted soy bean flour, for serving (optional)
INSTRUCTIONS
- Place tang yuan in the cold non-stick pan. Drizzle in oil and swirl to coat tang yuan with oil. Add in water.8 tang yuan, ½ teaspoon oil, 40 ml water
- Spread out the tang yuan to ensure they are not touching each other. Turn on the heat to medium and bring water to a simmer. Cover pan with a lid and cook for around 3 to 5 minutes, until the water has evaporated. The tang yuan will expand in size.
- Remove lid and turn the heat down to low. (The oil may splatter a little so you may want to cover the pan with a splatter screen.) Flatten the tang yuan gently and slightly with a spatula.
- Cook until the bottom of the tang yuan are golden and crispy, then flip and cook until the other side are golden and crispy as well. Turn off the heat.
- Dust a serving plate with kinako. Gently transfer tang yuan onto the serving plate. Serve with kinako if desired.Kinako
Cheryl says
Sorry if this qn seems ridiculous! But just to confirm, you put the tangyuan into the cold pan when it’s still frozen (i.e. straight from the freezer)? This sounds interesting (like pan-fried ang ku kueh) and I’d like to give it a try! Thanks 🙂
Jasline (FoodieBaker) says
Hi Cheryl – yes I put the tang yuan in frozen! 🙂
Raymund says
Wow, this pan-fried tang yuan sounds amazing! I love the crispy exterior with the chewy interior and the hot and oozy filling. The tips to make sure it turns out perfect are great, especially using a non-stick pan and handling the tang yuan gently. Dusting the serving plate with kinako is a brilliant touch, adding a nutty flavor and preventing sticking. Can’t wait to try this recipe!