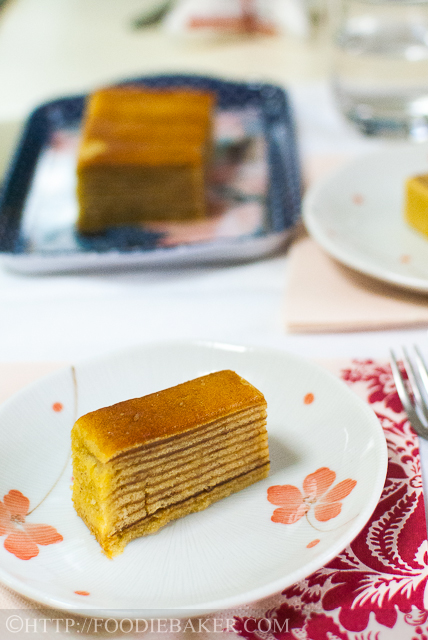
Kueh Lapis Legit / Spekkoek
Disclaimer: This is not a cake for the faint-hearted, not for those who are watching their weight and worrying about their waist/hip lines – this cake’s fatty contents is bound to make your jaws drop and you will need to run God-knows-how-many-kilometres before you can get rid of the calories and fats you’ve gained – don’t say I didn’t warn you! 😉
Kueh (Kuih) Lapis / Lapis Legit / Spekkoek is a very popular Dutch-Indonesian layered cake. Lapis Legit literally means “rich layer-cake” – and it is indeed an extremely rich cake, considering the fact that a standard 8 x 8-inch cake can contain up to 30 egg yolks, 500 grams of butter and 400 grams of sugar, and with the addition of a special blend of cinnamon, cloves, mace and anises, this yields a cake that is rich, buttery and eggy texture with a distinct and unique aroma and taste.
Not only does the cake uses a lot of ingredients, it also takes up a lot of time as one needs to stand next to the oven all the time, adding the batter and grilling it layer by layer. A standard Lapis Legit needs to contain at least 18 layers – madness! Hence, Lapis Legit is a pretty expensive delicacy, but a good Lapis Legit is definitely worth every single penny (and every single mouthful of fat!)
Almost burnt the second layer!
Every year I will bake some Chinese New Year treats to bring back to my hometown in Malaysia. For the past 2 years I’ve been baking Pineapple Tarts, but I was a little lazy to bake them this year, and this Aspiring Baker’s challenge came just in time! Since my attempt on Lapis Legit was successful, I’ve decided to bake it and bring it back for my relatives to try.
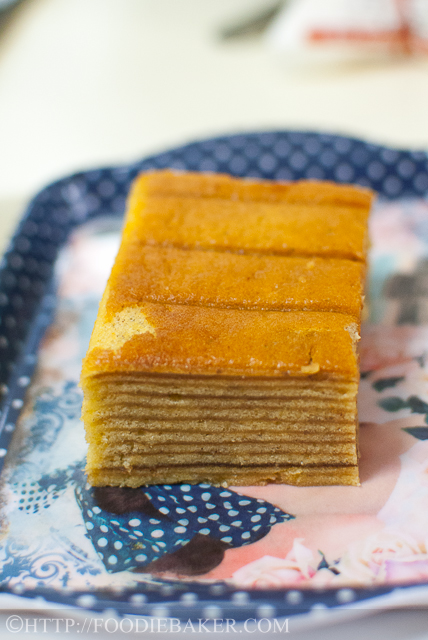
I eventually settled on Wendy’s recipe (Thank you so much Wendy!) and it worked really well, with the exception of a little hiccup at the start. Wendy’s recipe stated to grill the middle layers for 3 – 5 minutes. So I happily left my second layer in the oven for 3 minutes and when I checked it, it was already burnt! I had to discard it and restart, and I was really close to burning my second layer again (almost, but didn’t), hence you can see a really dark line in the cake. I ended up grilling it for only 1 min 40 seconds (yes, that precise!) and the rest of the layers turned out very nicely. Update 7/2/2014: The 1 min 40 seconds was for a 8×5-inch cake. I baked a new cake this year with a 8×8-inch tin and the grilling time is longer – see the recipe below for the details!
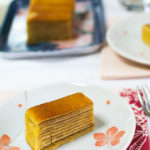
I also felt that I could have pressed the cake down a little firmer, so that there won’t be holes in the cake (kind of reminds me of cheese…), but well, I think it doesn’t look too shabby for a first attempt, does it? 😉
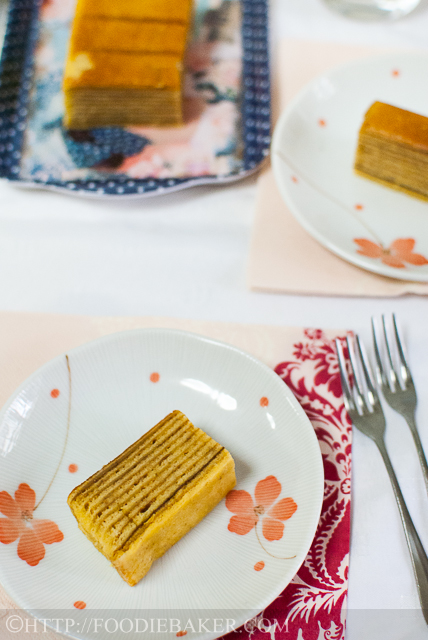
I love the buttery and richness of the cake, but it’s so fattening!
In terms of taste-wise, I found the sweetness level just nice and the overall cake was really buttery and rich after 1 day of resting. I think the flavours really developed after a day or two, so I would recommend resist the temptation for a day! If you’re looking for some new Chinese New Year treat to bake, do give this a try! If you managed to pull if off, I’m sure everyone will be in awe 😉
Here are the step-by-step photos! I’ve included very detailed notes and a video at the end of the recipe, so I will not be talking much in the step-by-step photos.
Note: It had been raining so heavily for the past few days that the sun didn’t even have a chance to show its face! I had to bump up the ISO and shoot all these photos using the kitchen light, explaining the slightly blurry, grainy and unnaturally-lit photos. I have very little experience taking photos without sunlight, so please forgive the lousy photos! The cake tasted much better than it looks 😉
Step-by-step Photos | |
|---|---|
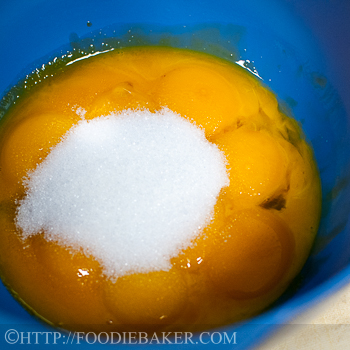 | 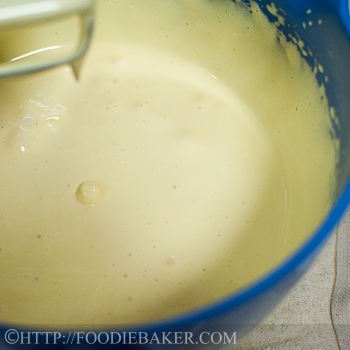 |
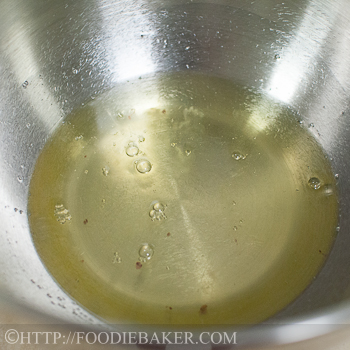
| 1) Cream the egg yolks and sugar together. | 2) Until the egg yolks are thick and pale into a ribbon stage. |
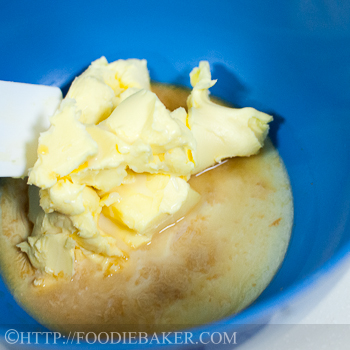 | 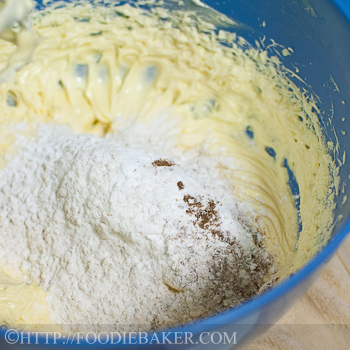 |
| 3) Cream butter, condensed milk and rum together. | 4) Add in flour and mixed spice into the batter. |
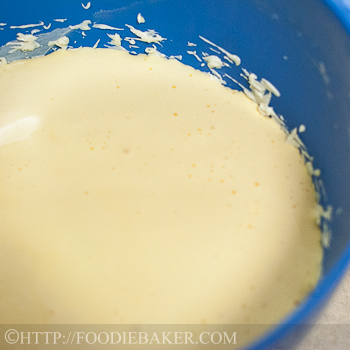 |  |
| 5) Add in the egg yolk mixture and mix until incorporated. | 6) Get some egg whites. |
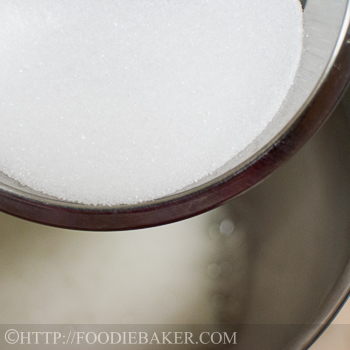 | 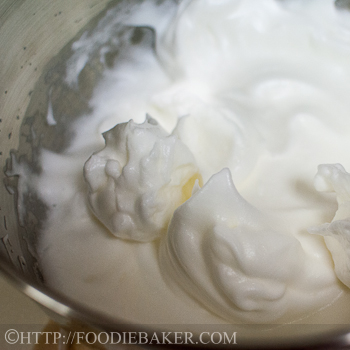 |
| 7) Beat in salt and sugar. | 8) Until the egg whites formed stiff peaks. |
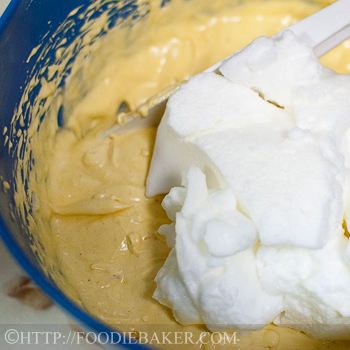 | 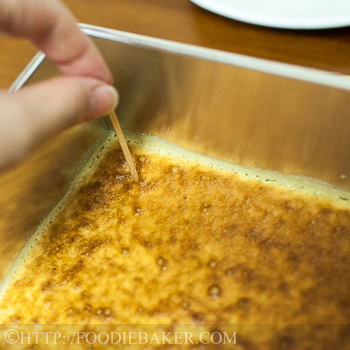 |
| 9) Fold in the egg whites. | 10) Poke the cake layer all over with a toothpick. |
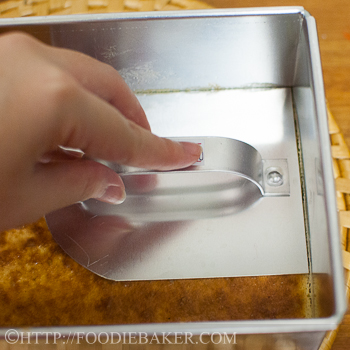 | 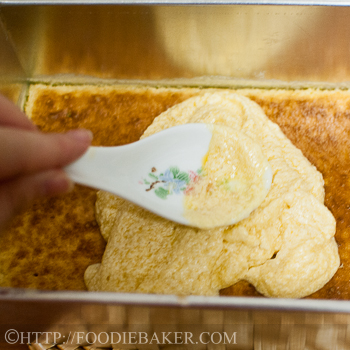 |
| 11) Press it down to flatten the cake. | 12) Spread the batter all around and bake again! |
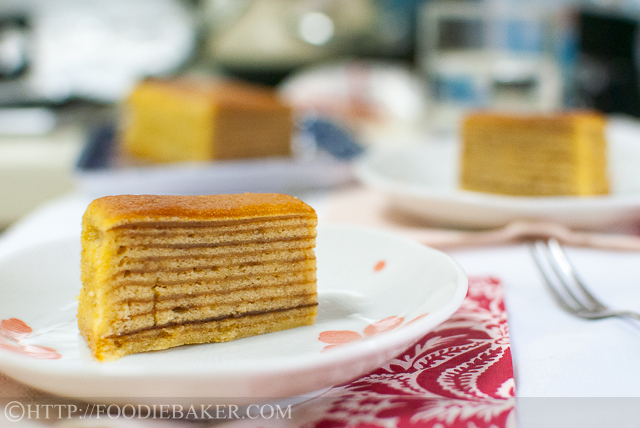
Slice and serve!

I’m submitting this to Aspiring Bakers #27: Through Thick and Thin – Kue Lapis Classics hosted by Sam of Sweet Samsations.
I’m also submitting this to Bizzy Bakes Recipe Box #31
Kueh Lapis Legit
INGREDIENTS
Egg Yolks
- 20 egg yolks, from large eggs
- 120 grams caster sugar, 1/2 cup
Butter Batter
- 500 grams best quality butter, at room temperature (2 1/4 cups; 4 1/2 sticks)
- 200 grams condensed milk, 5/8 cup
- 2 tablespoons rum, can be substituted with 1 tablespoon vanilla extract
- 35 grams corn flour, 1/4 cup
- 115 grams plain flour, 1 cup
- 1 teaspoon mixed spice
Egg Whites
- 10 egg whites
- 1/4 teaspoon salt
- 80 grams caster sugar, 1/3 cup
Baking
- 1 tablespoon unsalted butter, melted
INSTRUCTIONS
- Preparation: Preheat the oven to 200 degrees Celsius. Place a 8-inch square tin (ungreased) into the oven to warm up while you prepare the batter.
- Egg Yolks: Place the egg yolks and sugar in a large bowl. Beat with an electric mixer on high speed until the egg yolks are pale and thick to ribbon stage. Set aside.
- Butter Batter: Place the butter, condensed milk and rum in a large bowl. Without washing the beaters, beat on high speed until the mixture is light and fluffy. Add in corn flour, plain flour and mixed spice and beat on low speed until fully incorporated. Beat in the beaten egg yolks on low speed until fully incorporated. Set aside. Wash and dry the beaters.
- Egg Whites: Place the egg whites in a large, clean, dry and oil-free bowl. Beat on low speed until foamy. Add in the salt and beat with an electric mixer on medium speed until soft peaks formed. While the mixer is still running, add in the sugar gradually. Once all the sugar has been added, beat on high speed until the egg whites are glossy and stiff peaks formed. Fold 1/3 of the egg whites into the butter batter. Fold it in to lighten the mixture (don't have to be too gentle at this stage). Fold in the rest of the egg whites gently until fully incorporated.
- Baking First Layer: Weigh 100 grams of batter. Remove the hot tin from the oven. Brush the bottom generously with the melted butter, trying your best not to get the butter onto the sides, otherwise your first layer may shrink away from the sides of the tin.
- Pour the batter into the tin and spread it evenly, pushing the batter to the corners of the tin. The batter will "melt" but it's okay. Bang the tin twice and bake the cake for 5 to 7 minutes on the center rack until the top is golden brown in colour.
- Baking Subsequent Layers: Weigh 100 grams of batter. Remove the tin from the oven. Change the oven onto the grill setting (only the top heating element is on) and increase the temperature to 200 to 240 degrees Celsius. Poke the first cake layer all over with a toothpick. Press the cake layer down lightly with a cake presser to flatten the cake. Pour in the batter and spread it evenly, pushing the batter to the corners of the tin. The batter will "melt" as the bottom layer is warm but it's okay. Bang the tin twice and grill the cake for 1 to 3 minutes until the top is golden brown in colour (I prefer a darker golden brown colour). Repeat the process.
Update 7/2/2014: To be more specific, I made a total of 15 layers with the batter. I grilled the 2nd to 5th layers at 240 degrees Celsius for about 2 minutes 30 seconds (per layer). The 6th to 10th layers are grilled at 220 degrees Celsius also for about 2 minutes 30 seconds (per layer). The 11th to 14th layers are grilled at 200 to 210 degrees Celsius, for about 1 minute 45 seconds to 2 minute 15 seconds. I have a small oven, so the top layers are very close to the heating element, so I had to watch the layers very closely to prevent the layers from burning. Also, it helps to know the "hot spots" in your oven so you know when to rotate your tin to get an even browning for each layer. - Baking Last Layer: Follow the same steps as the "Subsequent Layers". Change the oven back to normal settings (top and bottom heating element is on) and reduce the heat to 180 degrees Celsius. Bake for 8 to 10 minutes until the top is golden brown in colour. Remove the cake from the oven and invert it out on a wire rack. If the cake did not fall out on its own after 15 minutes, run a sharp knife around the edges of the cake and invert it out. Cool the cake completely on the wire rack.
- Storing and Serving: Once the cake has cooled completely, store the cake in a container. Let the cake rest at room temperature for one day for the flavours to develop. Slice the cake and serve. The cake can be kept at room temperature in a container for 1 week or in the refrigerator for up to 3 weeks.
NOTES
Super Naggy:
[1] Grease only the bottom of the tin. The sides do not have to be greased.
[2] The bowl must be dry and oil-free so that the egg whites can rise well. A stainless steel bowl works best, followed by glass bowls. Plastic bowls are not recommended as they tend to retain grease, hindering the rise of the egg whites.
[3] Weighing the batter will help to ensure that every layer is even.
[4] The first and last layers of the cake is baked while the middle layers are grilled.
[5] The grill setting means only the top heating element is on. If your oven does not have the setting, place a tray of water at the bottom rack so that the bottom heat will not reach the cake.
[6] Poking the cake with a toothpick and banging the tin help prevent the layers from puffing up. When poking the cake, make sure you poke all the way through the cake. If the layer still puffed up after baking, just poke the puffed up area several times with toothpick and press it down with the presser.
[7] I have a small oven, so I grilled my cake in the center rack as the top heating element is very near my tin. If you have a large oven, I recommend baking the cake on a higher rack so it’s nearer to the heating element.
[8] Watch the cake layers very, very carefully as it will burn easily. As the layers add up, the grilling time will shorten as the the top of the cake is getting closer to the top heating element.
[9] Know your oven well – you need to know whether there are any hot spots in your oven. If there are, you might need to rotate them during the grilling process so that they are browned evenly.
[10] Towards the end, the batter will become watery – I think that is the melted butter, don’t stir it into the remaining batter, scoop out whatever batter remaining and discard the liquid.
[11] When I baked mine, I baked only 1/2 the recipe, here, I’m sharing the full recipe. There are several notes and a video at the end of the recipe which may be useful if this is the first time baking the cake. As the original recipe is in weight (grams), I’ve tried to my best of ability to convert it into cups using this here and here. I took about 1 hour to measure the ingredients and mix the batter. The baking took about 1 1/2 hours and the washing up took another 1/2 hour. So do plan your time properly!
Happy baking!
Daniel Biss says
Hi Jasline,
thanks a lot for this recipie, which sounds really good 🙂 I want to try it and have 2 questions:
– If you mix together all the eggs, butter and other ingredients into one mass, how are you doing it, that the layers have a different colour?
– Which kind of mixed spices do you use?
Thanks a lot for your support,
Daniel
Jasline (FoodieBaker) says
Hi Daniel. The “layers” that you see are actually the grilled golden-brown top of each cake layer. When one layer is baked, the top is grilled to a golden-brown. Batter is then added and then grilled until the top is golden-brown. Underneath the golden-brown top, the cake layer is still yellow-ish, hence you will see the “layers” when you cut into the cake. The mixed spice is a mix of cinnamon, clove, nutmeg and cardamom. It is readily available in Singapore baking shops as many people bake kueh lapis. You can Google “kueh lapis mixed spice” if you need to make the mixed spice from scratch. Hope this helps and happy baking!
Daniel says
Perfect, thanks a lot for the fast and perfect answer – amazing ☺️
Sara Teoh says
Hi what size tin did you use when you made ½ the recipe? Thanks!
Jasline (FoodieBaker) says
Hi Sara, the full recipe calls for a 8×8-inch square tin. Half the recipe will require a 8×4 inch tin. You can also make it in a 8×5-inch tin, but there will be fewer layers.
babyjolynn@hotmail.com says
The grill function in my built in oven does not have temperature options, only timing. I tried baking all layers using the same function, but for middle layers, with a tray of water at the bottom. My middle layers took much longer than 3-5min to brown, more around 7min. And when my cake will fully done, the bottom few layers and sides were already burnt.. Any way to fix this issue?
Jasline N. says
Hi there. If you can use the top grill function, there’s no need to set temperature. Just monitor how long does it take for each layer to brown, then repeat for each layer. If it burns too fast before the layer is cooked, move the baking tray to a lower rack.
Every layer should take approx the same timing to brown, the difference shouldn’t be so huge. Make sure you are using the same amount of batter for each layer. If it’s still different, it may be due to your oven has uneven heating.
To prevent bottom from burning, position your baking tray at the highest rack. If you are using the grill function, there shouldn’t be a lot of heat at the bottom. Alternatively, you can get two heavy-bottomed sheet pans stacked on top of each other, place them on the rack, then place your baking tin on top of the stacked sheet pans to insulate against the bottom heat. But you will need to keep taking the sheet pans out for them to cool down after a few layers. I’ll not use the water as it just adds steam.
If the sides burn, I’ll just trim it off. The centre should be still good.
If you have no issue baking other cakes with your oven, then you may need to check the manual or with others who are using the same model of oven on how to use the grill function.
Hope this helps!
Lenny says
Hi Jasline, thanks for the above tips. Actually i am so used to bake kue lapis with my old oven which has top and bottom heating button, Now i am using oven without any top/bottom heating menu, do you think i still can do the steps that you shared above?
Jasline N. says
Hi Lenny I think it will be difficult to bake kueh lapis without option to choose top/bottom heating element. If you managed to do it successfully, do let me know!
Lenny Christina says
Alright!
may says
I love this recipe but my lapis has many bumps in each layer. Please advise how I can prevent these bumps from happening. Can I poke many holes for each layer, what will happen?
Jasline N. says
Hi May, thank you, glad you love this recipe! In order to reduce bumps, after you pour in and smooth out the batter, drop the tin several times on the table counter to get rid of excess and large air bubbles so that the layer rise evenly. If there are bumps after baking, burst them with a toothpick and press down gently to flatten the layer. Hope this helps!
Jasline (Foodie Baker) says
You’re welcome Cassandra, good luck baking the kueh lapis and take care! 🙂
Cassandra says
Haha,I have a small size oven like yours!:)Thankyou for the tip Jasline!:)have a great day!:)
Jasline (Foodie Baker) says
Hi Cassandra! Are you using a big oven like AEG or Bosch? Those built-in oven kind? If yes, do place the pan on the highest rack. I placed mine in the center rack because I have a small no-brand oven bought from NTUC (that can only fit a maximum 9×9-inch cake pan). Hope this helps!
Cassandra says
Hi dear!may I ask for the subsequent layers for baking,do I still place the pan on the center rack or on the highest rack in the oven? Thanks!:)
Hannah (BitterSweet) says
This cake is absolutely spectacular. I love those thin layers like nothing else, and creating a vegan version has been on my baking bucket list for as long as I can remember. Thank you for reminding me, and re-inspiring me to give it a go! I can almost taste it now…
Jasline says
Pure delicious and fattening bliss 😉 Thanks Bobbi!
Bam's Kitchen says
So many layers of pure bliss. What a great job!
Jasline says
Thank you Sibella! I’ve heard of the cake as well when I was in Europe, but pity I didn’t get to eat the original, hopefully will have a chance to in the future! 🙂
Jasline says
Hi Sammie! Yes the grilling time was really precise, 10 seconds less and it’s not brown enough, and 10 seconds more the layer would have been burnt! Thank you for choosing this theme this month, otherwise I wouldn’t have tried this recipe at all!
Jasline says
Oh thank you so much Jeannie, I think it’s beginner’s luck! 😉
Jasline says
Thank you so much Joyce! Yea it really takes up a lot of time, so I don’t think I’ll be baking this very often 😉
Jasline says
Oh you flatter me John! I think there are many other bakers out there who baked this cake better than me! I am actually going to bake this cake twice next week… I think all the chickens have probably ran away! 😉
Jasline says
Thank you, me too! 🙂
Jasline says
Hi Amelia, I don’t think I’ll bake this very often too, too damaging for the waistline! 😉
Jasline says
Thank you for the compliments Johnny! I really like how it turned out despite it being my first attempt 🙂
Jasline says
Thank you Raymund!
Jasline says
Thank you Uru! It was a really luxurious treat 🙂
Jasline says
Thank you! Do let me know how your attempt goes!
Jasline says
Thank you so much for the compliments! It is very labour intensive, but well worth the effort 🙂
Jasline says
Thank you very much Suzanne! The cake is more popular in Asia, maybe that’s why you haven’t heard of it. It’s really delicious, but really sinful too!
Sibella at bakingwithsibella.com says
Wow, does this look good Jasline! My compliments on hard work and explaining it so well! A russian cake that is made with honey and it’s called “medovik” looks almost like this one..
Sammie says
Hi Jasline! Wonderful job on making this lapis! Wow 1 min 40 sec! Very nice! Great tips you got there too!!
jeannietay says
That looks very good! It doesn’t look shabby at all! Unlike mine:P
kitchen flavours says
Your kueh lapis is fantastic! Very evenly layered! Kudos to you! I do not have the patience to grill layer by layer! This is indeed a labour of love! Your family are very lucky!
ChgoJohn says
I applaud your abilities, Jasline, for I have neither the patience nor skill to attempt this cake. You did a wonderful job; it looks beautiful. I bet a shudder went through your area’s chickens when word got out you were making this cake. 🙂
Pei Yu says
Thanks for sharing your recipe and tips! They are very helpful. I’ve tried baking and find that I get some layers which looked underbaked. Any idea why does this happen and how do I resolve this?
Jasline N. says
Hi Pei Yu! If the layers look underbaked, you can try grilling the layers at a slightly lower temperature for a longer period. If the grill temperature cannot be adjusted, try grilling the cake at a lower rack from the top grill (so the heat is less direct) and grill for a longer period. Hope this helps!
yummychunklet says
I love all the delicate layers!
Amelia says
Hi Jasline, that’s a very delicious cake. Yours look good very nice layering. I love this too but the thought of 3 hours just to make one cake, LOL…I only bake this cake once a year.
johnnysenough hepburn says
Sounds amazing! Especially with those spices included. Think you did exceptionally well for a first attempt. Besides, step-by-step photos look great!
rsmacaalay says
Very impressive, love how it turned up. Look at those layers
Choc Chip Uru says
I adore your layering my friend, truly exquisite dessert 🙂
Cheers
Choc Chip Uru
Balvinder says
My goodness! that looks absolutely spectacular! Would I dare to try such labor intensive cake? May be yes 🙂
A_Boleyn says
I agree with the previous poster … it’s a very labour intensive cake with all those layers. Obviously a labour of love and it does look very nice.
apuginthekitchen says
I am really impressed, amazing really. I have never heard of this type of cake, it certainly is labor intensive and you weren’t kidding about the huge amount of eggs and butter. I just bet it’s really delicious though, Hats off to you for making this cake and yours turned out beautiful!