
Note: I try to update the post after every year’s attempt of making pineapple tarts – check them out here.
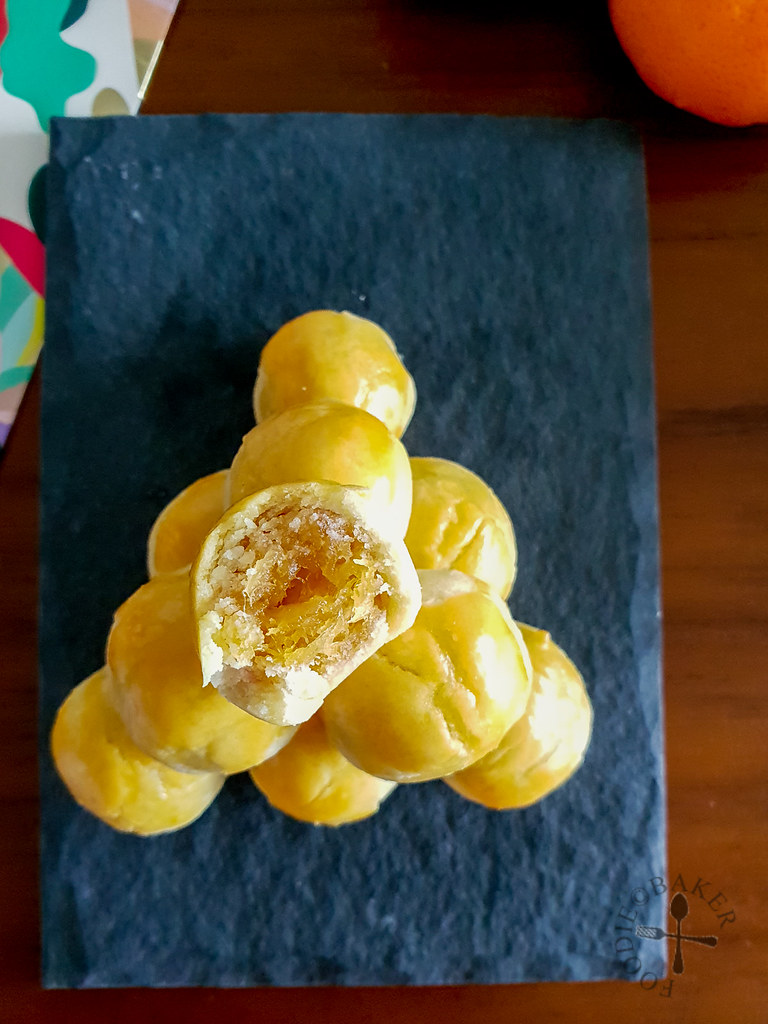
Pineapple Tart is a Chinese New Year goodie that I make every year because it’s my mom’s favourite. I’ve all along been using store-bought pineapple paste from Phoon Huat but they are always a little bit too sweet for me. I started making my own from scratch 3 CNYs ago – and I think this year’s attempt is by far the best. It’s moist but not wet, and has a nice balance between sweet and tart.
1) Choosing the Pineapple
To be honest, I have no clue what are the pineapple varieties in Singapore. I usually just go to the wet market and asked the fruit stall owner for pineapples to make pineapple tarts, like literally “Uncle/Aunty, 我要买黄梨饼的黄梨”. I also ask them to pick ripe ones for me as I usually make the paste immediately on the day I buy the pineapples.

After some googling, I learned that my first two attempts were made with honey pineapples (not sure if they are also known as Josapine pineapples). When ripe, they are sweet, fragrant and juicy. However they are not as fibrous. This year, the fruit stall owner recommended me another variety of pineapple – the Morris pineapple (uncle called it 黄梨饼的黄梨, my mom told me it’s the pineapple used to make rojak). It is fibrous and tart but in my opinion, not as fragrant as the honey pineapples.
Fibrous pineapples give you more jam because of the fiber. The sweet and juicy ones are mainly juice, meaning you end up spending more time evaporating the liquid if they are made into jam. I ended up mixing both varieties of pineapples together, using one half-ripe honey pineapple, one ripe honey pineapple and one ripe Morris pineapple. I ended up with pineapple paste that is fibrous, sweet and slightly tangy.
2) Peeling the Pineapple
I won’t dwell on this because there are tons of YouTube videos that teach you how to peel a pineapple (that’s how I learned too). Do take the effort to remove the pineapple “eyes”.
After peeling and removing the pineapple “eyes”, weigh the pineapples to determine how much sugar to add later on.
3) Sweetener
I use regular caster sugar to sweeten my pineapple paste. Some recipes use brown sugar or honey but I don’t want to muddle the pineapple flavour. The amount of sugar I use is dependent on the pineapples’ weight (peeled and eyes removed) – about 15% to 20%. E.g. 1kg of pineapple (peeled and eyes removed) will require about 150g to 200g of sugar.
When large amount of sugar is used, sugar will act as a preservative and inhibit microbial activity. However, the amount of sugar I used here is not enough to act as a preservative. Hence I will recommend finishing the pineapple tarts as soon as possible.
The sugar is added in two parts. I’ve read that adding all the sugar at one go will resulting in sugar caramelising and turning the pineapple paste a dark brown. I’m not sure if that’s really the case but I do like adding the sugar in two parts so I can test the sweetness of the paste.
Lemon juice is added at the end to provide a slight tang and to counter the sweetness of the paste.
4) Spices
For every kilogram of pineapple (peeled and eyes removed), I use 1 cinnamon stick, 1 star anise and 3 cloves. The star anise and cloves will break into smaller pieces after the long cooking, so I’m still thinking of a way to remove them more easily.
5) Grating the Pineapples
The peeled pineapples are then grated / blended / processed / juiced / chopped. Some swear by one method over the other, but ultimately I think it depends on the type of texture you like. Some people like the fibrous texture, but some prefer a more smooth and jam-like texture. I personally like the fibrous texture, so I grate my jam by hand. But then again, I do not have a blender or a food processor to chop up the pineapples. (See my 2024 update here).
I wear a pair of gloves to prevent irritation from the pineapples. The flesh side is grated first as it’s the softer side, then I work the way to the pineapple core. I have to admit, this is an extremely tedious process and sometimes I do wonder why I put myself through this xD
There will be some small bits leftover that will be impossible to grate without grating the fingers together. It is not worth it to lose my fingers, so I will use an immersion blender and blend up these small bits to mix into the grated pineapples.
Some recipes will strain the grated pineapple to remove the juices. I don’t as I think the juices are flavour as well. I cook and reduce the entire pineapple – pulp, core, juice and all.
6) Cooking the Pineapples
I grate and cook at the same time. Once I grated a quarter of a pineapple, I will add it into the pot with the spices and start cooking over medium heat, stirring occasionally. Then I will keep adding grated pineapple as I grate them. The cooking time is not reduced but I find this more efficient as the grating and cooking tasks are ongoing at the same time.
Once all the pineapples are grated and added into the pot, the heat is turned up and the pineapples are stirred occasionally to let it dry up. I cook my paste in my widest pot available with a huge surface area so that the pineapple juices can evaporate faster. Towards the end the pineapples must be stirred more frequently to prevent the paste from burning at the bottom.
Do taste the paste after adding in all the sugar and lemon juice to see if more sugar / lemon juice is required.
My pineapple paste is not as dry as those store-bought paste, but they still have to be dry enough so that it is easy to portion and shape, as well as ensuring that the paste don’t spoil easily. There is no fixed timing to cook the pineapple paste, but the rough gauge is about 2 hours. I also assess by looking at the colour – when it turns to a darker golden colour, I know it’s about time to stop.
7) Storage
Once the pineapple paste is done, let it cool completely. I found a new method to cool the paste more quickly – by lining a baking sheet with parchment paper, then spread the paste over the baking sheet into a thin layer. Once cooled, cover with clingfilm and chill in the refrigerator.
Weigh the pineapple paste again to determine how much tart dough is required. This way you can scale the tart dough recipe according to how much paste you have. Transfer the paste into an air-tight container and store in the refrigerator. It is easier to shape and wrap the pineapple tarts with chilled pineapple paste. I usually spend the second day making the pineapple tart dough, and if I don’t have enough time, the third day wrapping and baking the pineapple tarts.
If not using the pineapple paste within the next few days, freeze the pineapple paste until required. Thaw overnight in the refrigerator before using.
8) Quantity
The yield is about 50% for every 1kg of pineapple (weighed after removing the skin and eyes). It’s not a lot so every piece of pineapple tart is very precious – and also why pineapple tarts can be so expensive! I’ve only used this pineapple paste for my closed pineapple tarts as this is the type of pineapple tart we like, so I’m not sure how it will turn out for open-faced pineapple tarts. If you have tried it for your open-faced pineapple tarts, do let me know!

8) Conclusion
If you have read until here… thank you for staying throughout my long-winded pineapple paste journey. I have to admit – it is much easier to just get store-bought pineapple paste or even ready-made pineapple tarts. Making them from scratch is tedious and painstaking. However, the satisfaction of seeing your loved ones enjoying homemade pineapple tarts is… something that will motivate me to put myself through this process over and over again. But once a year is enough! xD
9) Updates
2022: My pineapples (peeled and eyes removed) weighed about 2 kilograms and I ended up with about 800 grams of pineapple filling (40% yield). During my second attempt I used more Morris than honey pineapples and my mom feedbacked that it’s not as fragrant as the first attempt. I will use more honey pineapples in future attempts.
2023: I used 2 Morris and 3 honey pineapples which cost me SGD 11 in total. I ended up with 3.8kg of fresh pineapple (weighed after peeling and removing the eyes). After cooking, the pineapple paste weighed about 1.8kg (47% yield). Only my mom commented that the taste of cinnamon is a tad too strong for her but others like it.
2024:
- I used 4 honey pineapples as there weren’t any Morris pineapples in stock. They were also more expensive at SGD 12 in total.
- I ended up with 2.9kg of fresh pineapple. I reduced sugar to 15% of pineapple weight (430g). To address my mom’s comment about the strong spice taste in 2023’s pineapple tarts, I reduced the amount of spices to 2 thin cinnamon sticks, 2 star anises, 7 cloves and added 1/2 lemon’s juice to counter the sweetness of honey pineapples. The resulting pineapple paste is of just right sweetness. The paste weighed 1.4kg (48% yield) which was a surprise as I expected a lower yield.
- I also got a new food processor and wanted to use it to grate the pineapples this year but the grating disc didn’t really work so I used the standard blade attachment instead. The food processor did save time and arm workout but there were small bits here and there as I didn’t process the pineapples long enough (was worried that I’ll over-process). It also didn’t process evenly so I had to use an immersion blender towards the end to blend the bigger chunks. The small bits added a texture to the pineapple jam and the texture was not as “pasty” like past pineapple jam. Not sure if it’s a good thing, as I still got good reviews from my friends and colleagues.
- For next year, I will try separating the pineapple flesh from the core. Still using the food processor, I’ll grate the core (for texture) and blend the flesh.
Now here are the step-by-step photos and recipe!
Step-by-step Photos | |
|---|---|
 |  |
| 1) Grab your mix of pineapples. I'm using a mix of varieties and ripeness of pineapples. | 2) Trim off both edges. |
 | 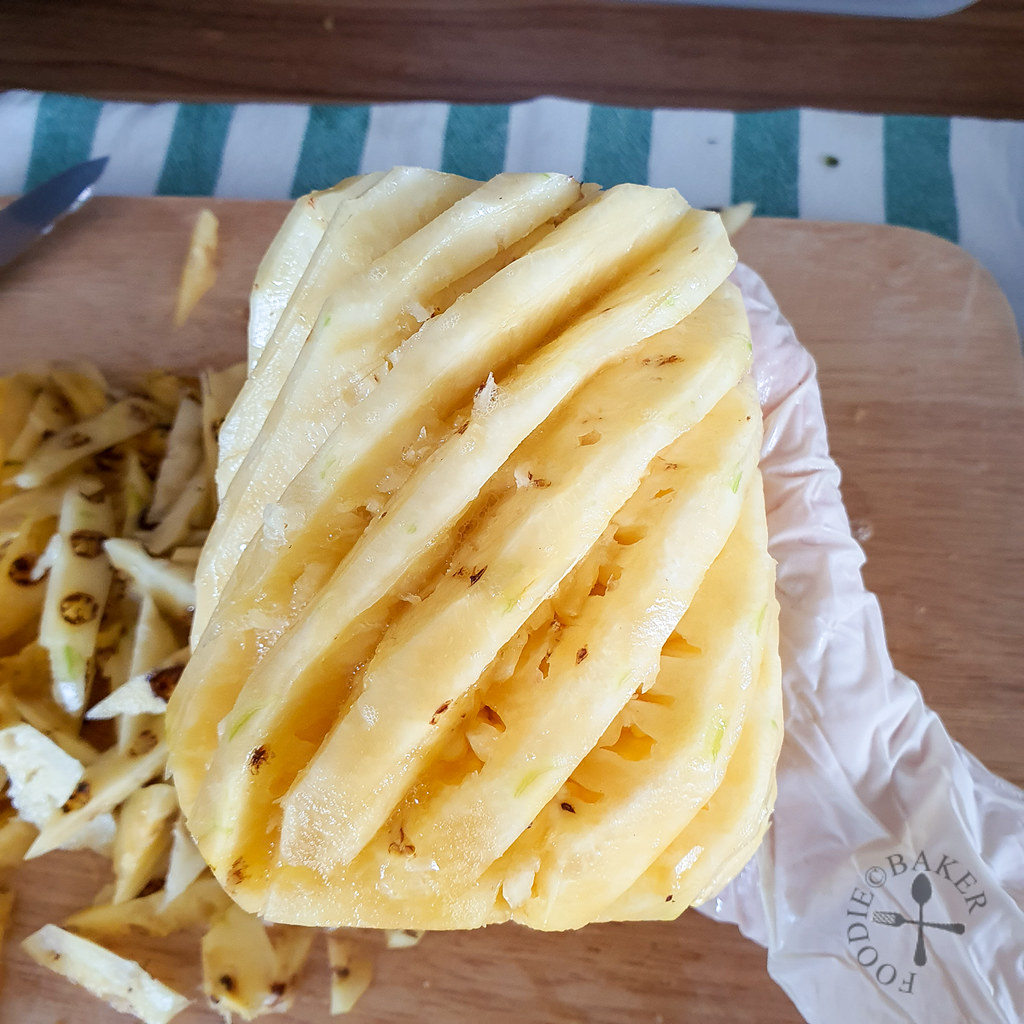 |
| 3) Trim off the skin. | 4) Use a small paring knife to remove the "eyes" of the pineapple. Measure the weight of the pineapples to determine how much sugar to add. |
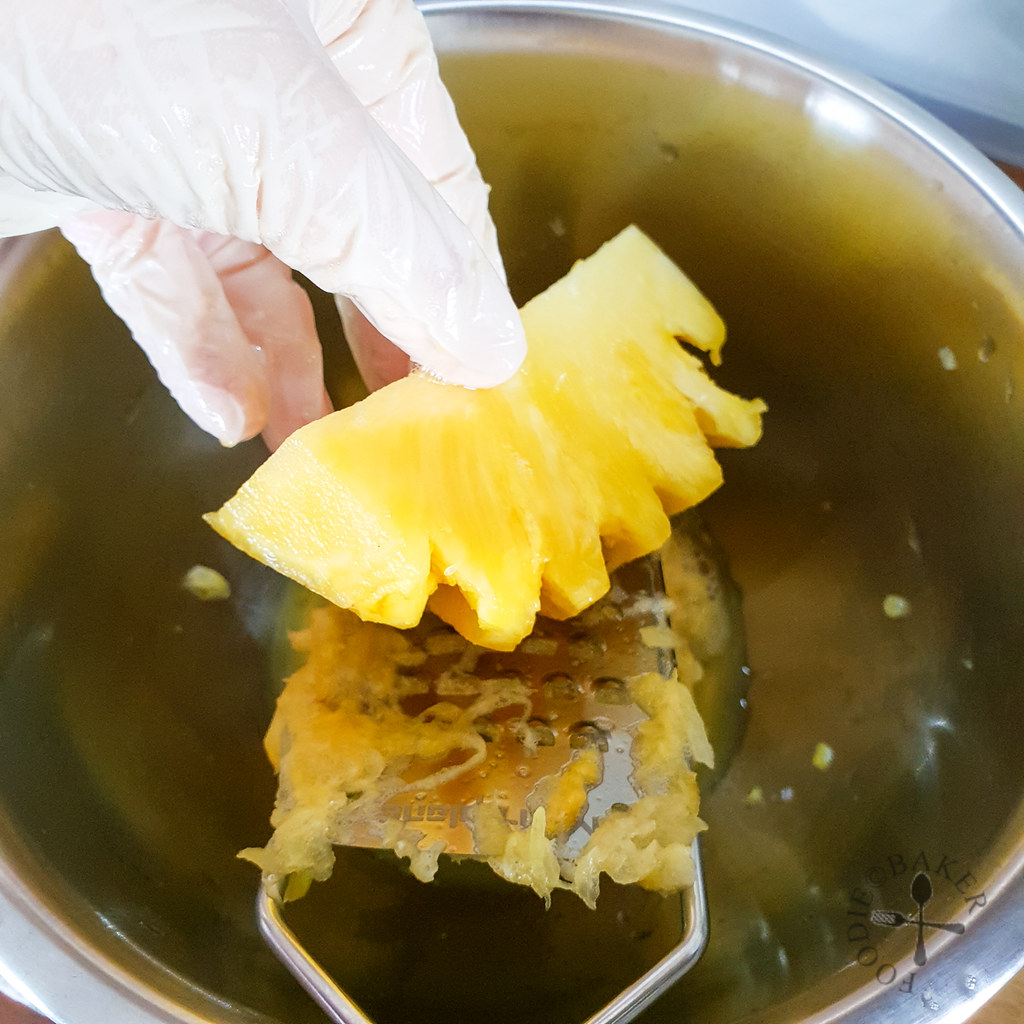 | 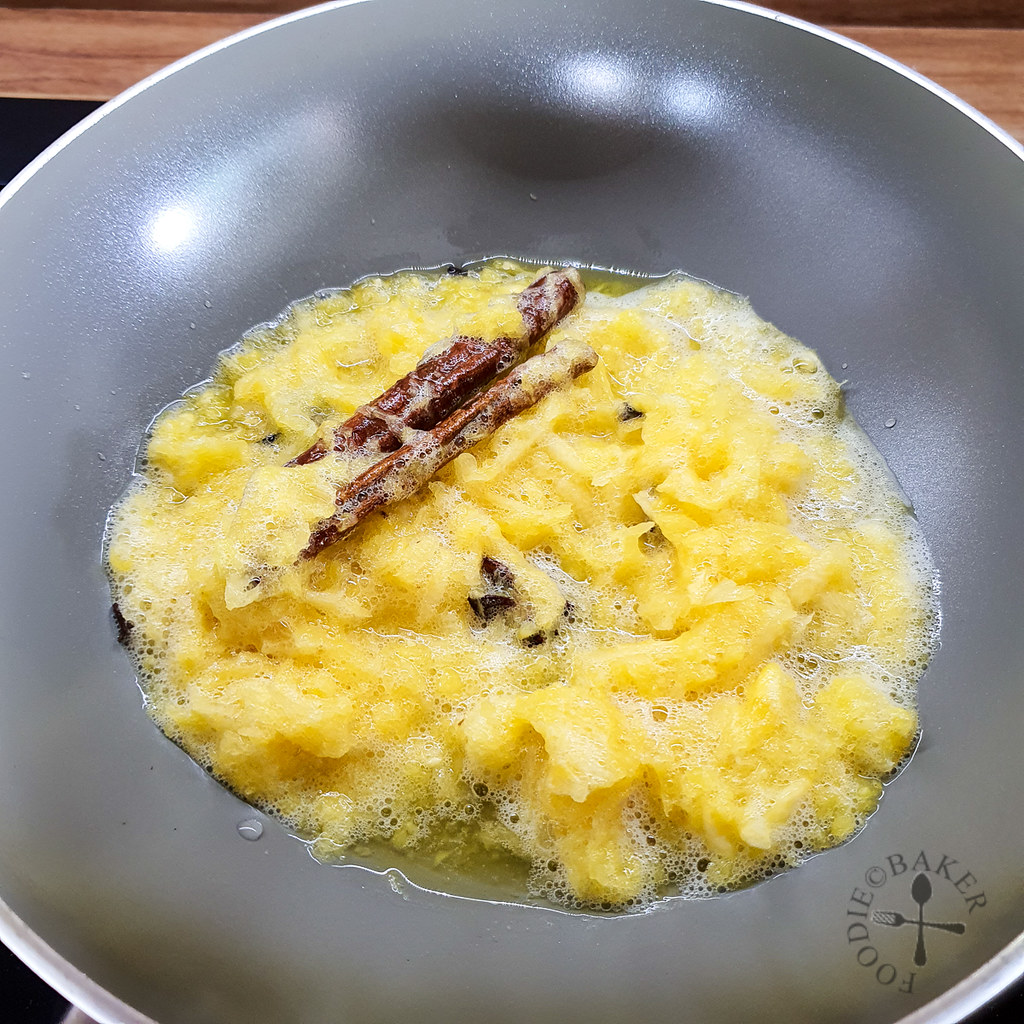 |
| 5) Cut the pineapple into quarters and grate, fleshy side down first. | 6) Combine 1 grated quarter of pineapple with cinnamon, star anises and cloves and start cooking over medium-high heat. Add in remaining grated pineapple. |
 |  |
| 7) For the bits that are too small to grate, place them in a food processor or a jar. | 8) Blend with immersion blender until fine. Alternatively, you can chop by hand or use a food processor. Add into the pot. |
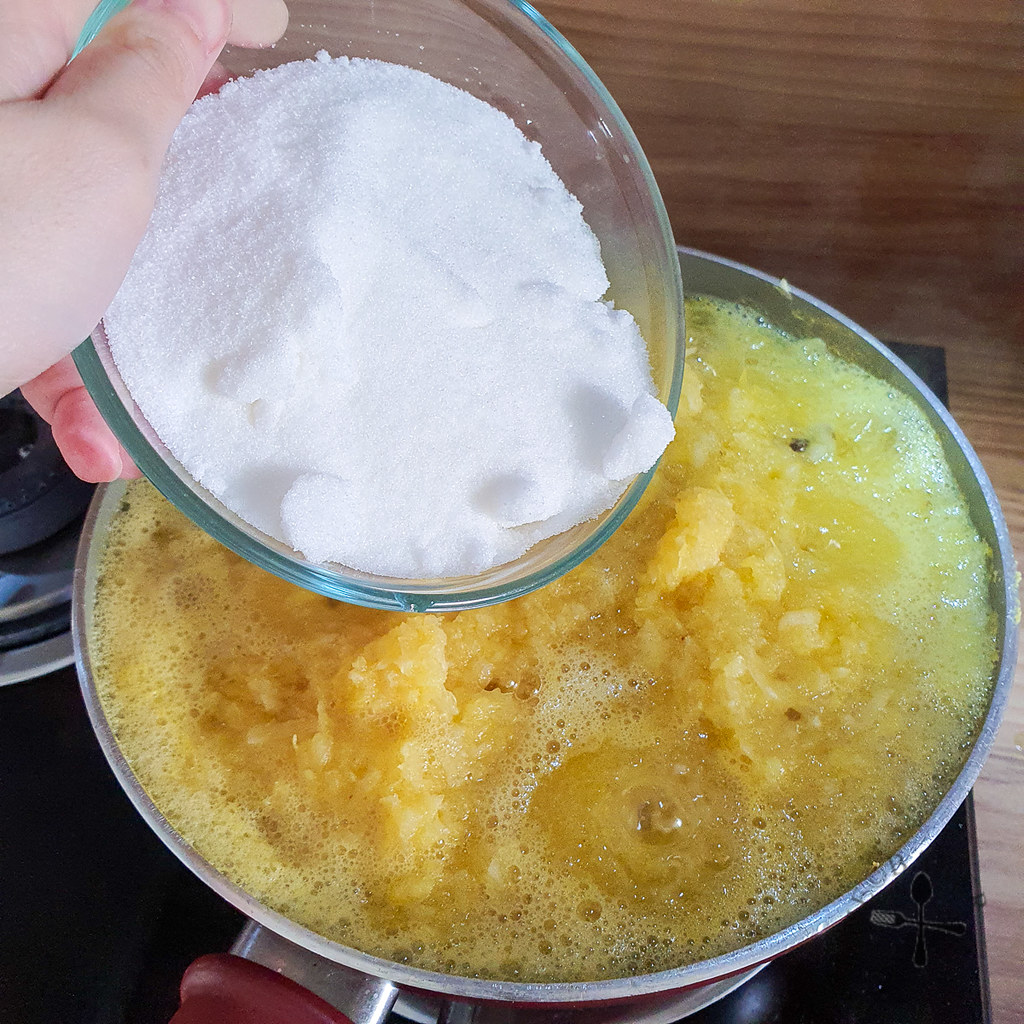 |  |
| 9) Stir in half of the sugar. | 10) Cook, stirring occasionally until the pineapple juices have evapoarated. |
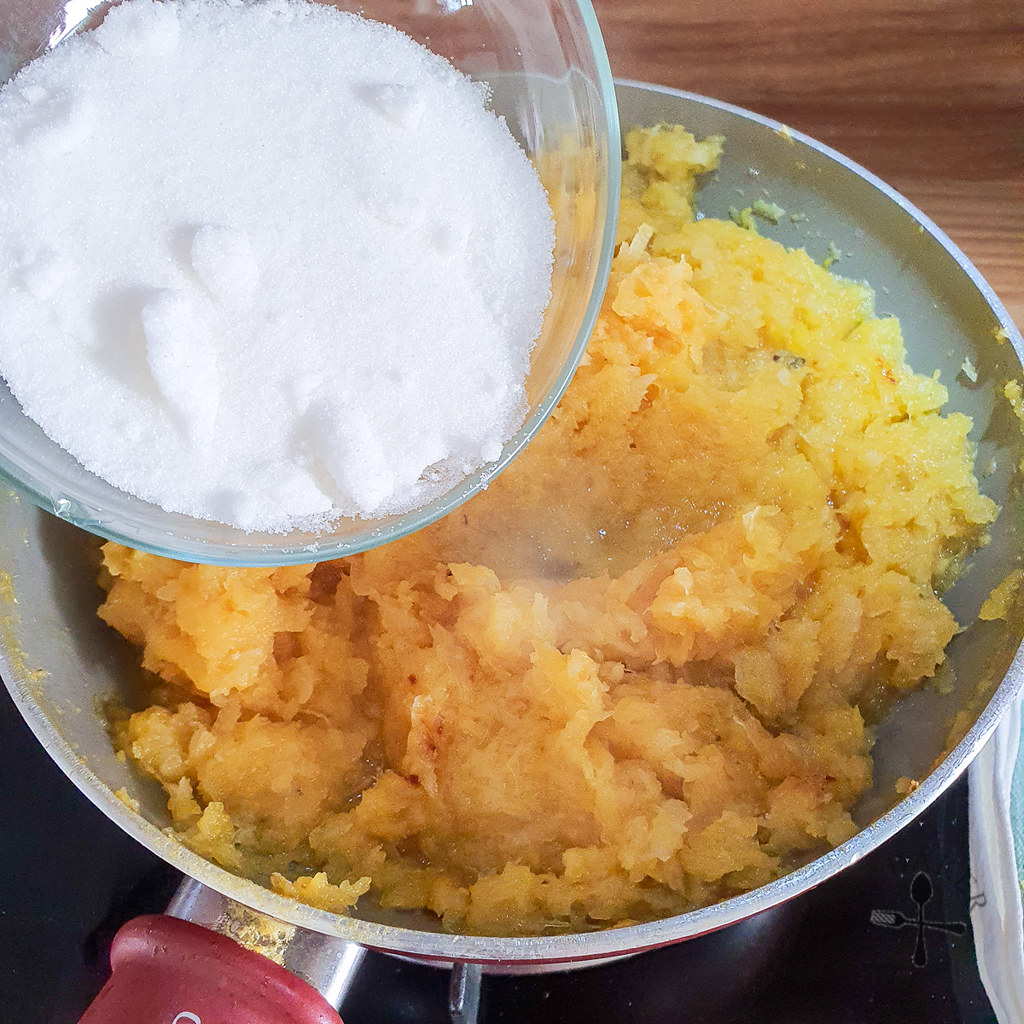 |  |
| 11) Stir in remaining sugar. | 12) And lemon juice. |
 |  |
| 13) Keep cooking! The pineapple paste must be relatively dry otherwise it will not last long (mould will grow). The arrows are pointing to remnants of liquid. | 14) Once the pineapple filling is dry, discard the spices. Let cool completely then store in the refrigerator overnight. It is easier to shape the pineapple filling when it is cold. |
Pineapple Paste / Pineapple Jam / Pineapple Tart Filling
INGREDIENTS
- 1 kg peeled and eyes removed pineapple, weight is measured after pineapple is peeled and eyes are removed
- 150-200 grams caster sugar, adjust amount accordingly to desired sweetness
- 1/2 cinnamon stick
- 1 star anise
- 3 cloves
- 1 tablespoon lemon juice, freshly squeezed preferred, adjust amount accordingly to desired tartness
INSTRUCTIONS
Peel, Remove Eyes and Weigh Pineapple
- Peel the pineapples and remove the eyes. Cut the pineapples into 4 quarters each.
- Weigh the pineapples to determine the amount of sugar, cinnamon, star anise and cloves to add into the paste.
Grate and Cook
- Wearing gloves, grate 1 quarter of the pineapples directly into the widest pot available. Add in the cinnamon, star anise and cloves to the grated pineapples. Turn on the heat to medium to allow the grated pineapples to come to a simmer, stirring occasionally.
- As the grated pineapples cook, continue to grate the pineapples (into a bowl) and add into the simmering pot. Stir occasionally. If the pineapples are drying faster than you can grate the pineapples, lower the heat slightly. Continue until all pineapples are grated and added into the pot.
- Chop or blend the leftover small bits that cannot be grated and add into the pot.
- Stir in 1/2 of the sugar. Turn up the heat to medium-high and stir occasionally until the pineapples dry up. Towards the end, stir the paste more frequently to prevent the pineapples from burning at the bottom.
- Taste the paste at this point – assess if you'd like to add in all the remaining sugar (or even more sugar). Stir in the sugar and lemon juice. Cook for a while and taste again – assess if the sweetness or tanginess need to be adjusted.
- Continue to cook, stirring frequently, until the pineapple paste is dry. It will dry up more as it cools.
- Once the paste is dry, remove from heat and discard the cinnamon sticks, star anise and cloves. Let the paste cool completely. Transfer into a container and store in the fridge until chilled before using.
NOTES
- Cooking time is a gauge – it really depends on the amount of pineapples as well as how juicy the pineapples are to begin with.
- The yield is about 50% for every 1kg of pineapple (peeled and eyes removed). This means that for every 1kg of pineapple (peeled and eyes removed), you will get about 500 grams of pineapple paste.
- The pineapple closed tart dough recipe is here – I’ve used this since 10 years ago and have never turned to any other recipe.
Agnes Lee says
Hi, what did you try this year 2025? I want to try making my own jam as sisters didn’t like the store-bought ones. Reduced sugar but still not the same. Guess not fibrous enough.
Foodie Baker says
Hi Agnes, happy Chinese New Year! I made my own jam again this year but it turned out a bit too sweet and too moist. It’s also not as fibrous as I used all honey pineapple. Will definitely have to try again next year!
frank choo says
you can put the spices in a tea bag, spice bag or bak ku teh bag
Foodie Baker says
Thanks for the suggestion, I’ll give it a try next time! Thanks Frank!