Pistachio Layered Cake: Jump to Recipe

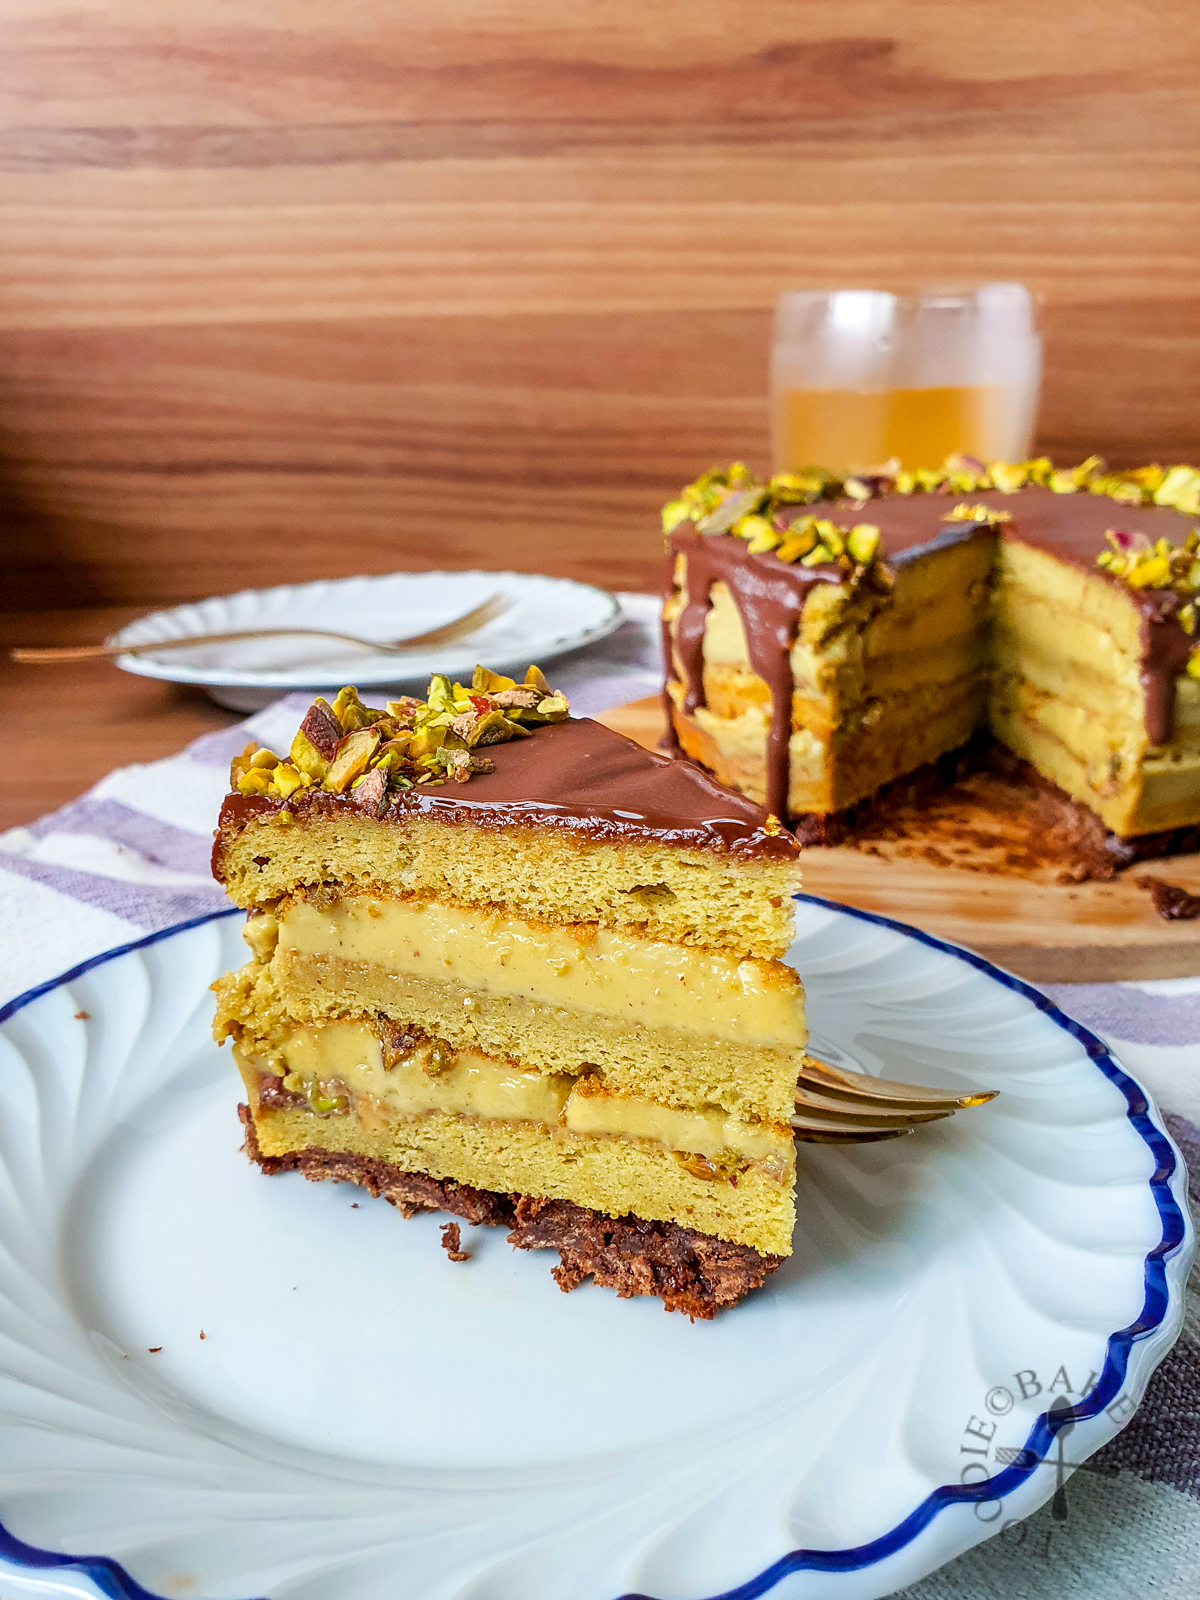
Pistachio Layered Cake is every pistachio lovers dream: crunchy pistachio chocolate feuilletine, tender pistachio joconde sponge, creamy smooth pistachio white chocolate crémux, and finished with a dark chocolate ganache.
Can you believe we are approaching the end of July? I didn’t experiment with many new recipes this month as X contracted COVID, hence I was cooking lots of soupy and comfort foods and avoiding all the sugary foods. We were also away as we managed to do a short getaway (feels so different to be overseas!)

This pistachio layered cake came about because we celebrated one of my friends’ birthday recently. As her favourite flavour is pistachio, I wanted a cake that has pistachio in everything – from the cake to the filling. However I realised pure pistachio paste is extremely expensive! It costs almost SGD 25 for a small 200g tub and I wasn’t able to get my hands on it in time for the cake. So I decided to make a pistachio praliné instead and use it in place of pistachio paste. The pistachio taste may not be as intense as compared to using the pistachio paste but I’m glad the birthday girl still enjoyed the cake.
There are 4 components that made up the layers of this cake and they are mostly French-inspired:
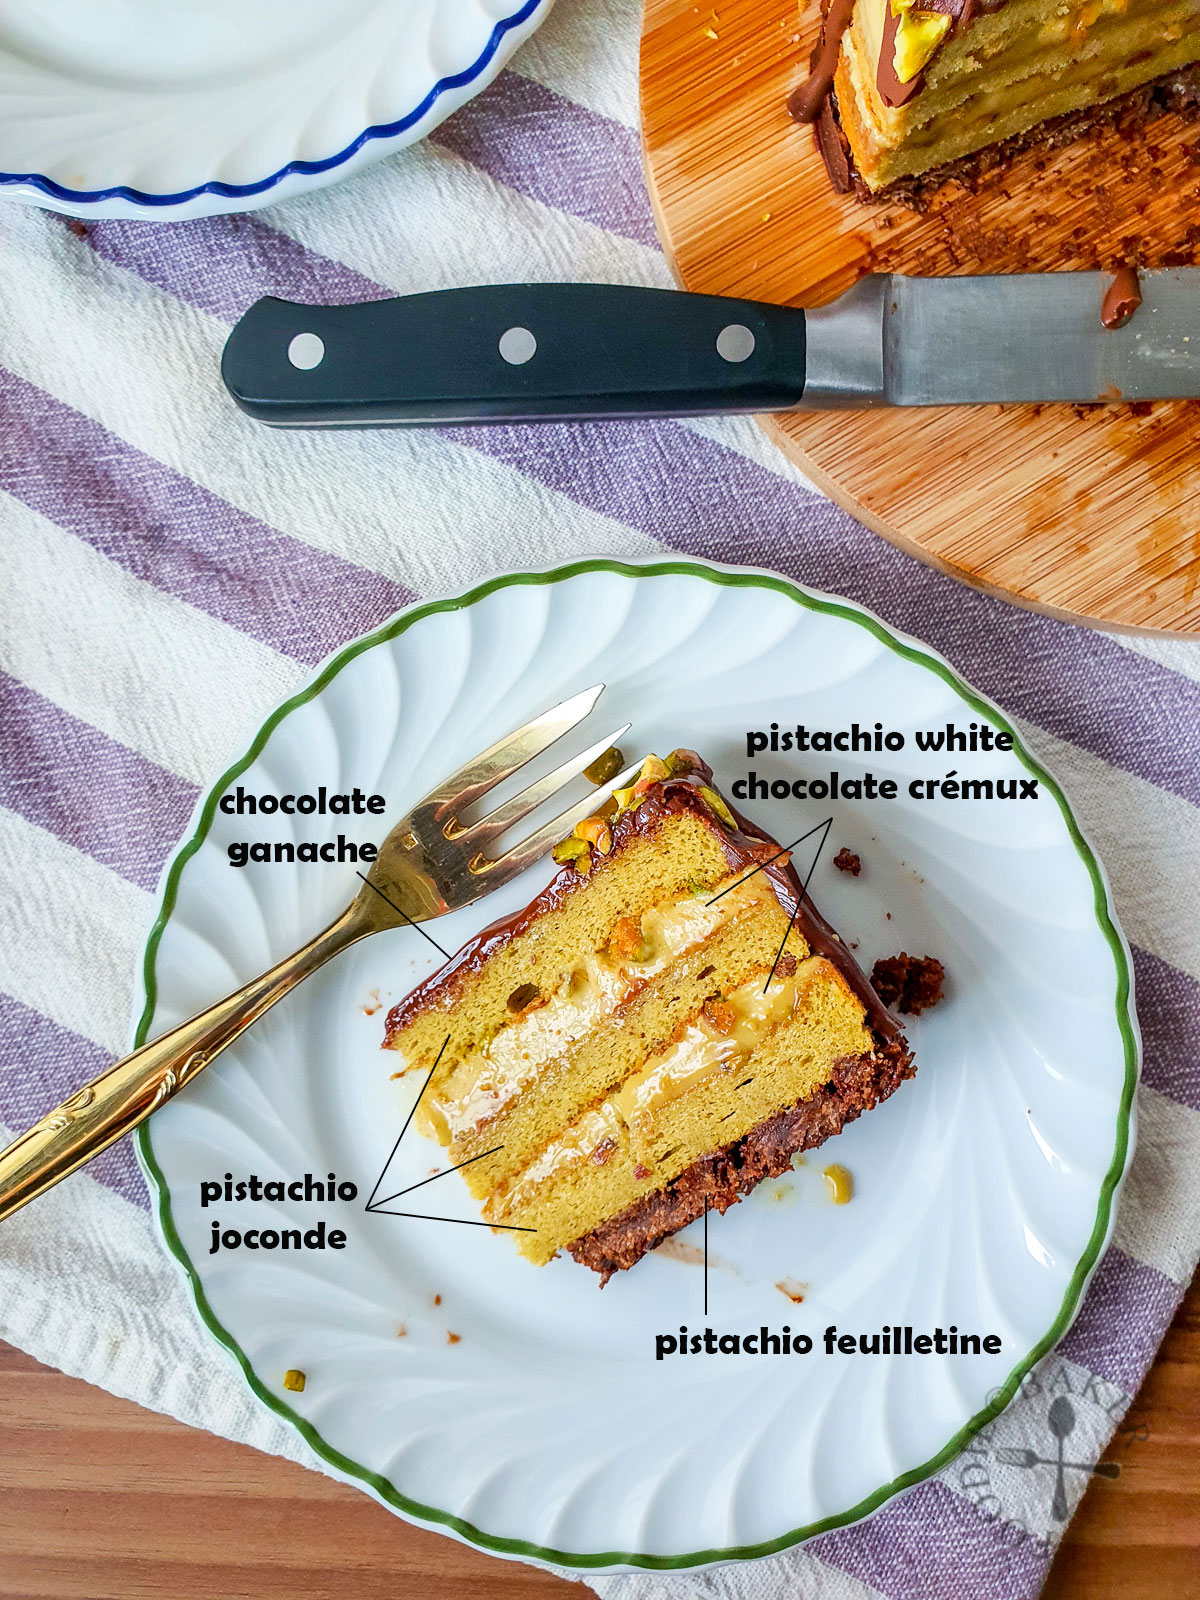
1) Pistachio Chocolate Feuilletine. Feuilletine is a crispy, thin, and wafer-like French biscuit (like tuile cookies). Combined with chocolate and pistachio praliné, it forms the base of the cake and adds a crunchy texture to the cake. (Almost everyone I know loves this crunch element).
2) Pistachio Joconde Sponge. Joconde is a French, light and nutty sponge cake. Pastry chefs love this sponge for its versatility. Fun fact, this sponge is named after Mona Lisa (in French, Mona Lisa = La Joconde). This shows how important joconde sponge is to the pastry chefs. It is usually made with almond meal but I substituted it with pistachio and it works perfectly.
3) Pistachio White Chocolate Crémux. Crémux is yet another classic French pastry recipe. It is made by combining crème anglaise with chocolate. I added gelatin as this is white chocolate based to help the crémux sets better.
4) Chocolate Ganache. I originally wanted to make a mirror glaze for the cake but didn’t have sufficient time to do so. I love using chocolate ganache anyway as it tastes great and looks awesome on cakes.
Pistachio Praliné. I cannot not dedicate a paragraph to this pistachio praliné – it is probably the soul to this pistachio layered cake. Praline (pra-leen) is a cooked mixture of sugar (usually a caramel) and nuts, like a nougatine. It is used as a decoration or processed further into praliné. Praliné (pra-leen-ay) is taking praline and process in a food processor until it becomes a paste. It is one of the most amazing and delicious thing I’ve ever eaten. It can be used as a filling in cakes, drizzled on pastries, or incorporated into mousses, ice creams, or pastry creams.
The only tedious part about making praliné is processing it into a paste. It is much easier to make this if you have a heavy duty and powerful food processor (I’m still waiting for the day I get mine). But, I manage to make it with my small Cuisinart Smart Stick food processor attachment (model CSB-79). I make only a small batch each time (maximum 150 grams of nuts + 150 grams sugar). I run the food processor for 2 to 3 minutes, then stop for 15 to 20 minutes to allow the motor to cool down. It takes about 10 to 15 minutes of running time for it to turn into a paste. So if you don’t have a big food processor at home, I strongly suggest that you make this at least a day in advance so that you have enough time to make the rest of the components.

And with this, let’s get on with the recipe!
General Steps and Assembly
This Pistachio Layered Cake recipe is documented by components for easy reference. Metric quantities for 14-cm and 18-cm cake are included. Please use Google if you require Imperial quantities, and my cake pan convertor calculator if you are making for a different size cake.
- Day 0 – Ensure you have all the equipment and tools required
- Equipment & tools: food processor, electric hand mixer, oven, immersion blender, weighing scale, acetate, spatulas, whisks, Silpat, cake boards, offset spatulas
- For baking joconde: for 14-cm cake, three 15-cm tins (6-inch); for 18-cm cake, three 19 or 20-cm tins (8-inch).
- For assembly: 14-cm / 18-cm cake ring x 7-cm tall in height. To ensure that the crémux will not seep out during assembly, the assembly cake ring is smaller than the baking tin. The final cake will be about 5-cm tall.
- Day 1
- Make pistachio praliné.
- Day 2
- Toast pistachios.
- Make pistachio joconde sponge. Cut the joconde sponge with the assembly cake ring. The joconde sponge should fit snugly in the cake ring so that the crémux will not seep out when added.
- Line interior of the assembly cake ring with acetate cake collar. Centre the cake ring on a cake board.
- Make feuilletine and spread it evenly on the bottom of the cake ring. Place one layer of the joconde, nut-side up, on top of the feuilletine. Press the sponge down gently so that it adheres to the chocolate. Chill for at least 30 minutes or keep in the freezer.
- Make pistachio crémux. Pour half of the room-temperature crémux into the cake ring. Freeze the cake for 15 minutes for the top to set slightly. Cover the remaining crémux with clingfilm (clingfilm must be touching the surface of the crémux) and keep chilled in the refrigerator.
- Place the second layer of joconde into the cake ring on top of the crémux. Pour in the remaining crémux, smooth the top and add in the last joconde, nut-side down. Chill the cake for at least 8 hours, preferably overnight.
- Day 3
- Make chocolate ganache. Ganache must be at room temperature and cake is very chilled before proceeding, otherwise the hot ganache may melt the crémux.
- Remove the cake ring and carefully peel off the acetate cake collar.
- (Optional but recommended) Slide a heated (over flame or under hot water then wipe dry), large offset spatula underneath the cake and transfer the cake onto a new cake board. If the cake is to be transported, dab a little ganache in the centre of the new cake board before transferring the cake (so that the cake will not move about on the new cake board). This step allows cleaner cuts as the feuilletine layer will not be stuck on the old cake board. See this YouTube video for reference.
- For a drip effect, transfer the chocolate ganache into a squeeze bottle (best) or measuring cup (alternative). Squeeze/pour ganache near the edge so that it drips down the edge, turning the cake as you squeeze/pour out the chocolate ganache. This is best done on a turntable if you have one. Once the edges are coated, squeeze ganache on the centre of the cake, then use an offset spatula to smooth it. Chill the cake for 5 to 10 minutes before decorating.
- To coat the entire cake, transfer the cake onto a wire rack. Set a wire rack over a lined baking sheet. Pour the chocolate ganache in the centre of the cake, then use an offset spatula to “push” the ganache so that it overflows to coat the sides of the cake. Chill cake for 5 to 10 minutes before transferring it on to the new cake board. Decorate the cake.
- Decorate cake with chopped pistachios. Place a little gold foil in the centre, if desired.
- Chill the cake in the refrigerator for the ganache to harden before serving, about 30 minutes to 1 hour.
- For clean slices, heat up the knife under hot water or over a flame, and wipe the knife clean after each cut.
Pistachio Praliné
| Step-by-Step Photos | |
|---|---|
 |  |
| 1) Make a gold amber caramel. | 2) Add in toasted pistachios. |
 |  |
| 3) Pour out to cool completely on a silpat. | 4) Break into small pieces and start processing. |
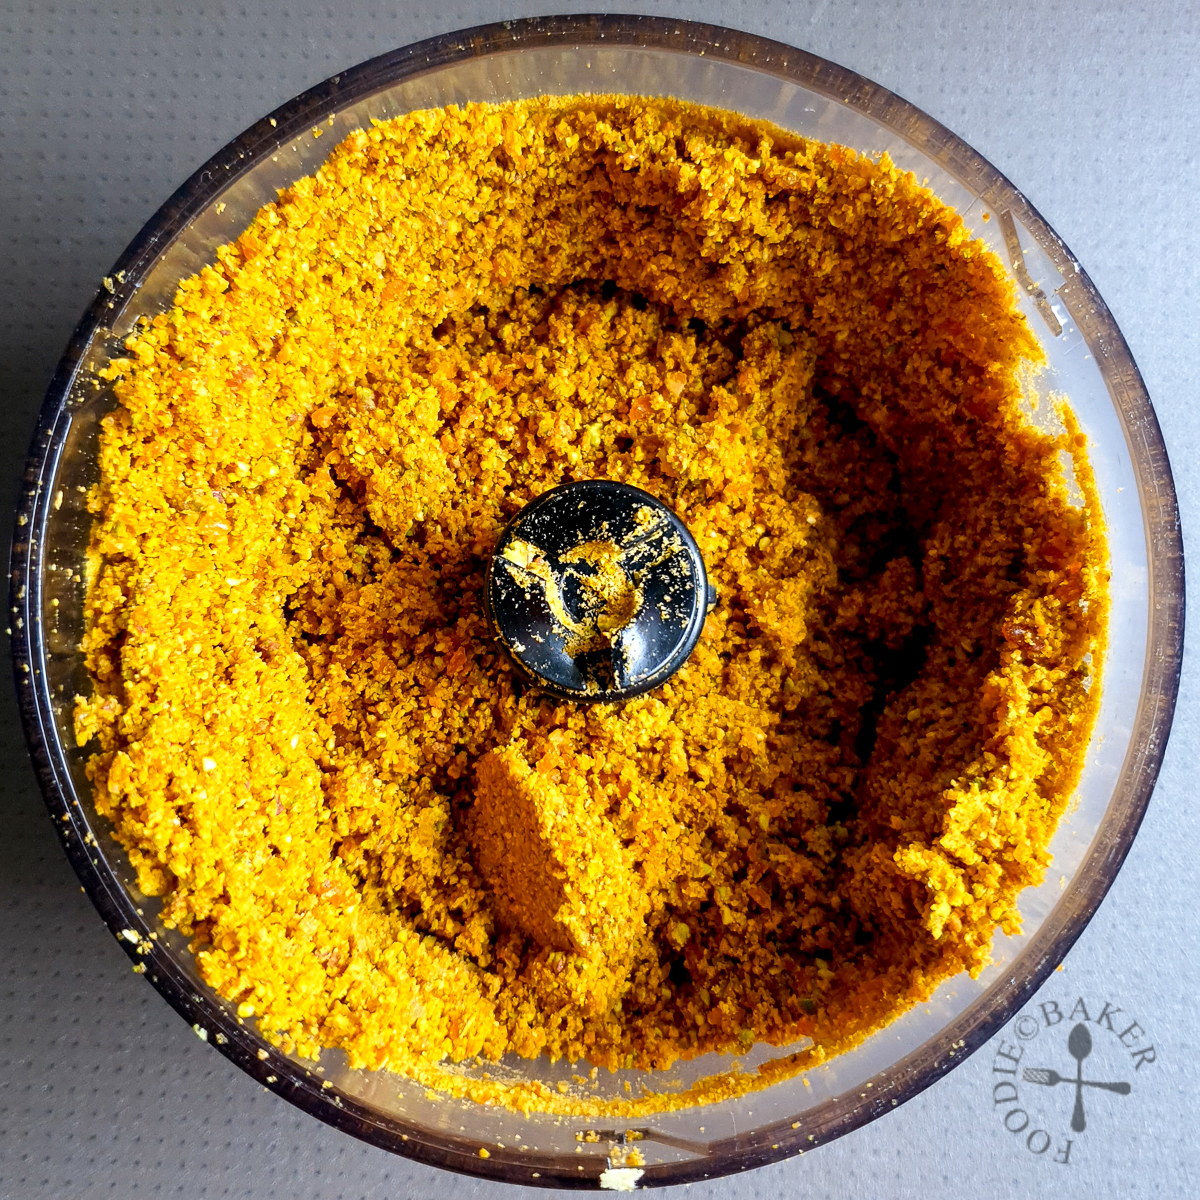 | 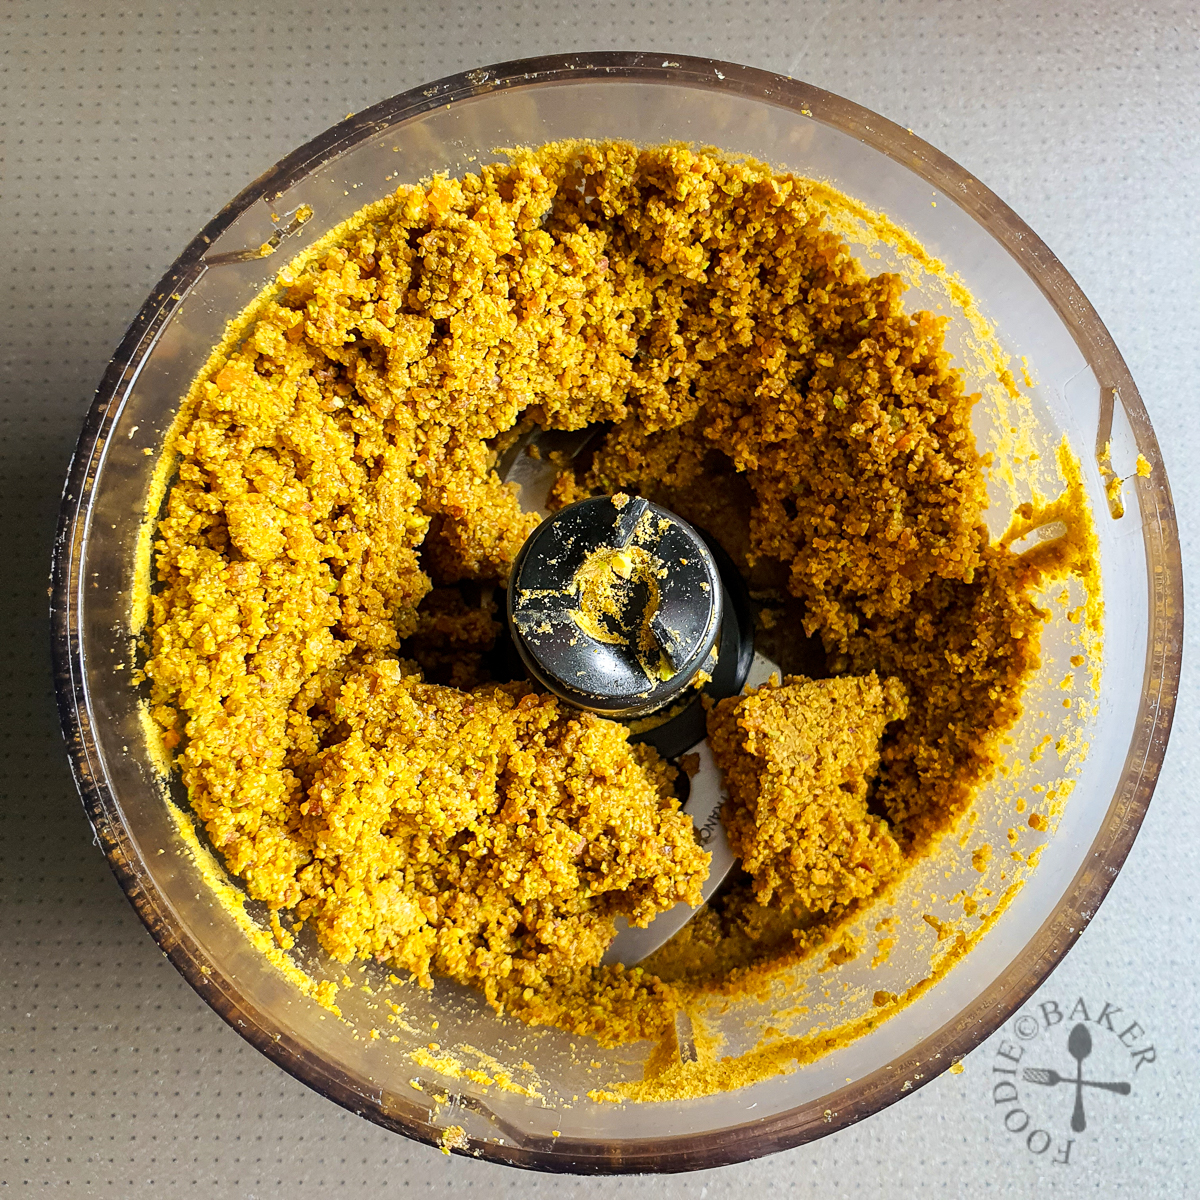 |
| 5) The fine, dry crumbs are known as praline. | 6) Keep processing and it will get lumpy and pasty. |
 | 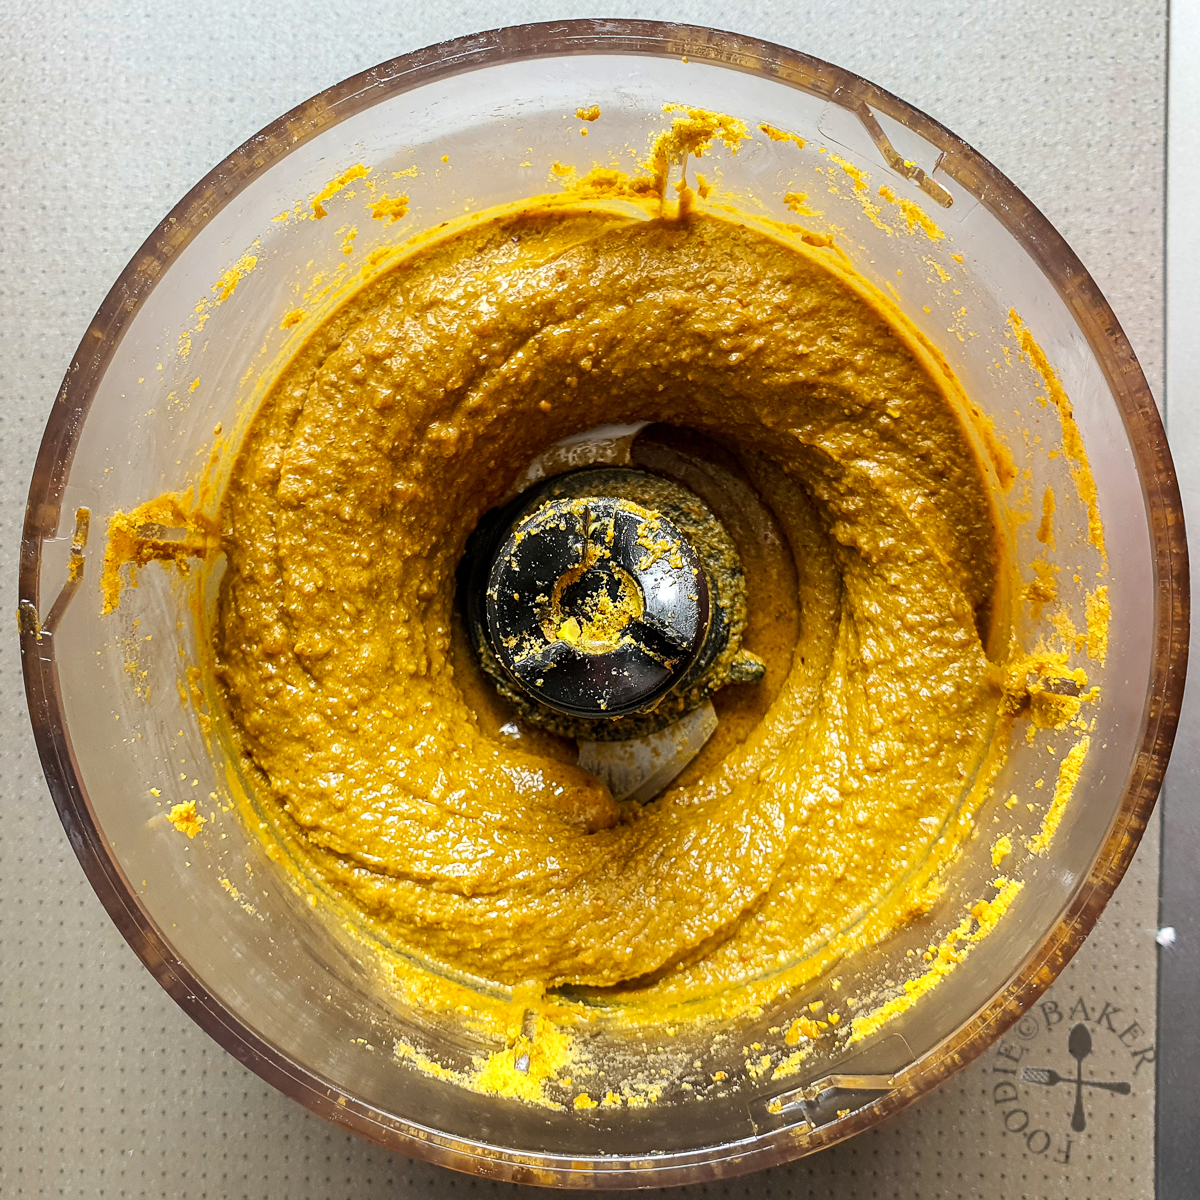 |
| 7) Almost there! | 8) Smooth, thick and absolutely delicious praliné! |
| 14-cm | 18-cm | |
| 70 grams | 140 grams | pistachio |
| 70 grams | 140 grams | caster sugar |
- Preheat the oven to 170C (conventional) / 160C (convectional). Place parchment or silpat on a baking sheet. Spread pistachios evenly on top and toast for 5 minutes (don’t let them brown). Remove from heat and set aside.
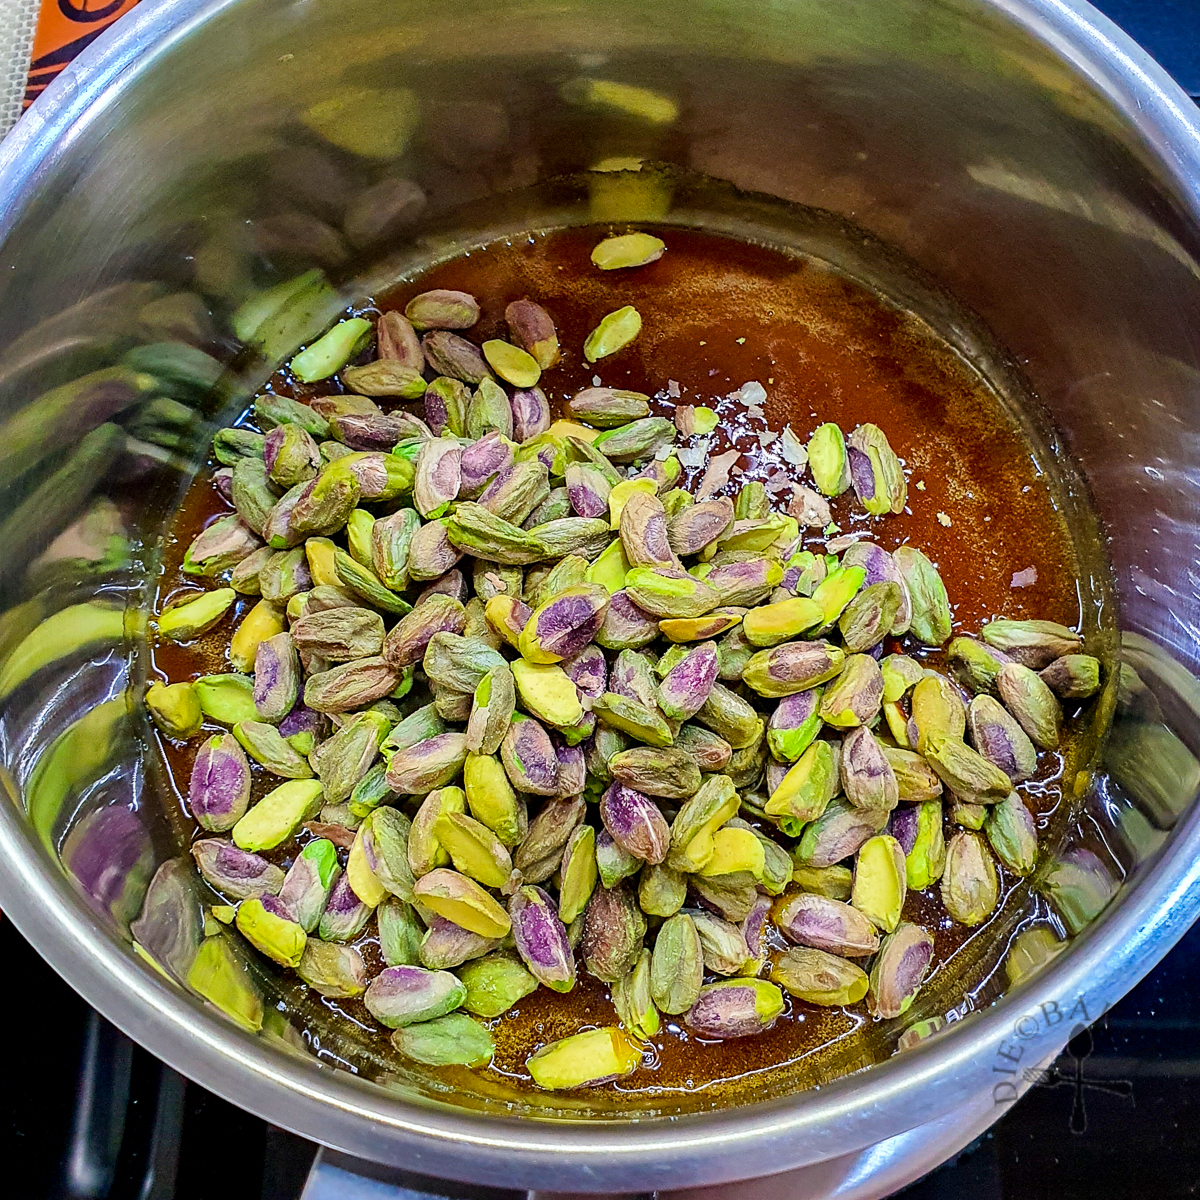
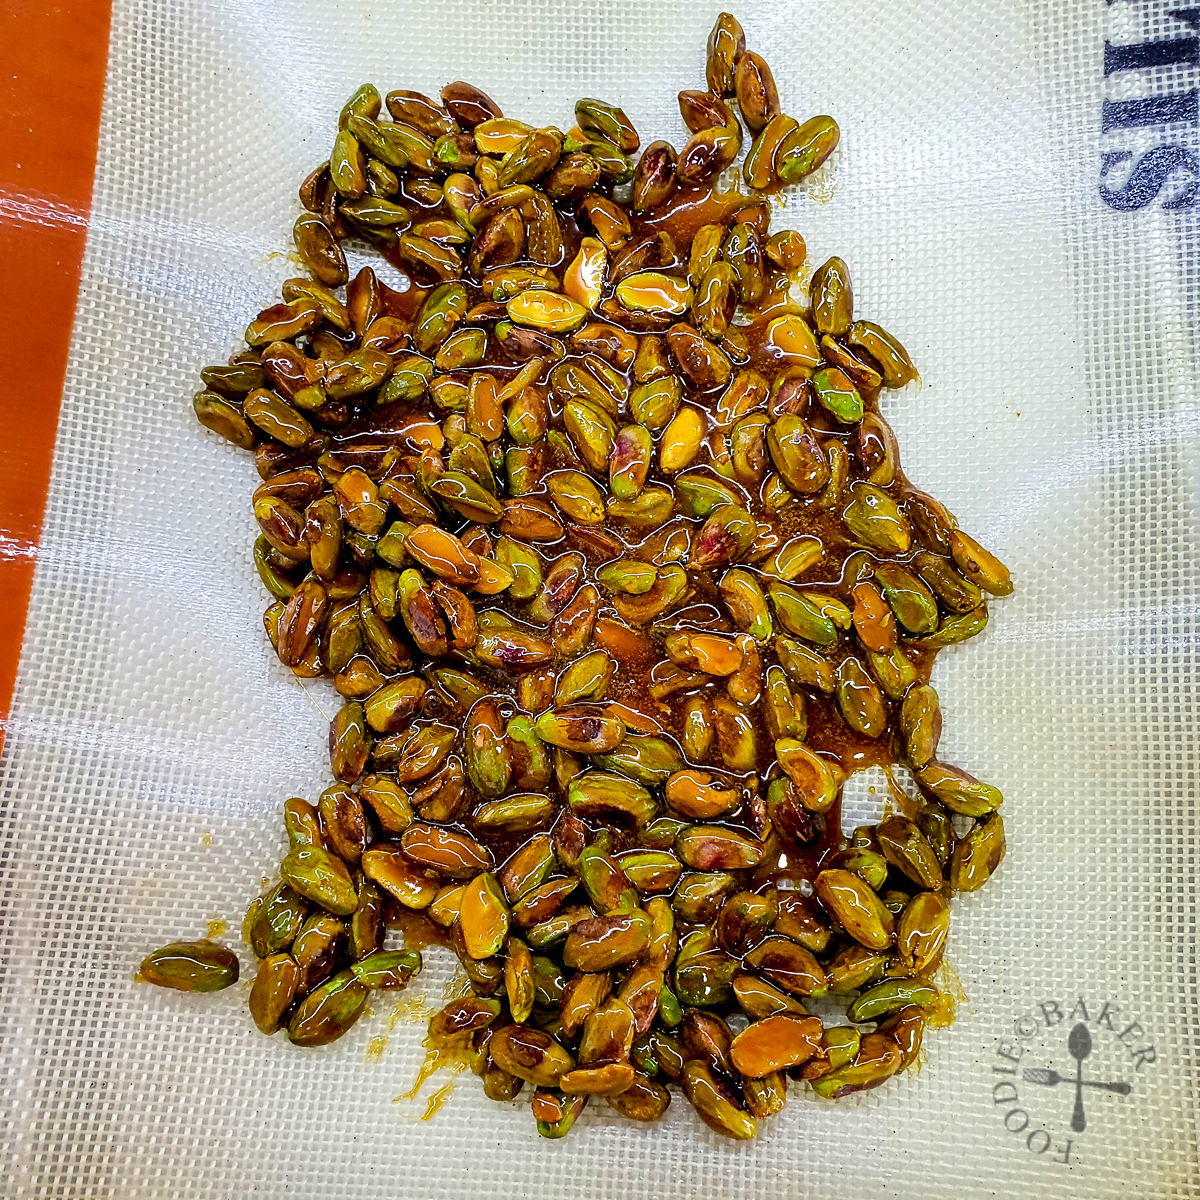
- While pistachios are toasting, pour sugar into a heavy-bottomed large pan (sugar should be in a thin even layer) and set over low heat. Cook until sugar starts to melt, then swirl frequently until sugar caramelises into a golden amber colour, or a whiff of smoke is spotted. Immediately add in the pistachios, stir to coat then pour them all out onto the lined baking sheet, spreading them out as evenly as possible. Let cool completely.
- Break praline into small pieces, then process them in a food processor until it becomes a smooth, thick yet still fluid paste.
- Notes:
- Praliné can be made in advance. It will last for at least a month in an air-tight container in the refrigerator but I prefer to make them maximum only a few days ahead for freshness.
- There will be a little leftover praliné from this amounts. The leftover makes really great cupcake filling, drizzle, and is awesome on toast!
Toasted Pistachio
| 14-cm | 18-cm | |
| 120 grams | 240 grams | pistachio |
- Preheat the oven to 170C (conventional) / 160C (convectional). Toast for 5 minutes until fragrant (don’t let them brown). Let cool completely.
- Process half (50%) into a fine meal in a food processor. Chop remaining half (50%) into small pieces (0.5-cm).
- Note on how the pistachios will be used:
- 50% ground into fine meal for joconde sponge batter
- 25% chopped to be sprinkled on top of joconde sponge before baking
- 25% chopped for use in decorating (multiply this quantity by 3 if intent to coat the entire sides of the cake with chopped pistachios)
Pistachio Joconde Sponge
| Step-by-Step Photos | |
|---|---|
 |  |
| 1) Whip egg whites, sugar and salt until stiff peaks. | 2) Whip whole eggs, pistachio meal and pistachio praliné. |
 |  |
| 3) Whip in melted butter. | 4) Sift and mix in the dry ingredients. |
 |  |
| 5) Fold in the egg whites. | 6) Divide the batter among the tins and sprinkle chopped pistachios on top. |
 |  |
| 7) Bake until golden and edges start to shrink away from the tin. | 8) Use the assembly ring to cut out the joconde. |
| 14-cm | 18-cm | |
| 60 grams | 120 grams | egg whites |
| 40 grams | 80 grams | caster sugar |
| 1 pinch | 2 pinches | salt |
| 100 grams | 200 grams | whole eggs |
| 60 grams | 120 grams | pistachio meal |
| 35 grams | 70 grams | pistachio praliné |
| 25 grams | 50 grams | unsalted butter, melted |
| 15 grams | 30 grams | all-purpose flour |
| 5 grams | 10 grams | cornstarch |
- Preheat the oven to 180C (conventional) / 160C (convectional). If using metal tins, grease and line the bottom with parchment paper. If using silicone tins, no treatment is required.
- Place egg whites, sugar and salt in a clean, dry and oil-free bowl. Immediately whip on high speed with an electric mixer until stiff peaks form. Set aside.
- Place whole eggs, pistachio meal and praliné in a separate mixing bowl. Using the same beaters, whip on high speed for 3 minutes until well-mixed and airy. Whip in melted butter on medium speed. Sift in flour and cornstarch mix on low speed until incorporated. Fold in egg whites gently with a wire whisk then use a spatula to fold a few times, scrapping the sides and bottom of the mixing bowl to ensure batter is even.
- Divide batter among 3 tins. Tilt the tin for the batter to spread to the edges, then use an offset spatula to spread out the batter evenly. Drop the tins twice on a countertop to eliminate excess air bubbles. Sprinkle chopped pistachios evenly on each layer.
- Bake for 12 to 14 minutes until the top is golden, cake sides start to shrink away from the edges of the tin, and the top bounced back when touched lightly. Let cool completely on a wire rack.
- Notes:
- Joconde can be made a day in advance. Wrap well with cling film to prevent the joconde from absorbing flavours.
- Keep the wrapped joconde in the refrigerator for a day, or freeze for up to 3 months. Assemble chilled or frozen.
Pistachio Chocolate Feuilletine
| Step-by-Step Photos | |
|---|---|
 |  |
| 1) Melt chocolate. | 2) Stir in pistachio praliné. |
 |  |
| 3) Stir in feuilletine. | 4) Spread an even layer at the bottom of the assembly ring. |
| 14-cm | 18-cm | |
| 25 grams | 50 grams | dark chocolate, minimum 60% cocoa solids |
| 25 grams | 50 grams | pistachio praliné |
| 25 grams | 50 grams | feuilletine |
- Melt dark chocolate and mix well with praliné. Stir in feuilletine.
Pistachio White Chocolate Crémux
| Step-by-Step Photos | |
|---|---|
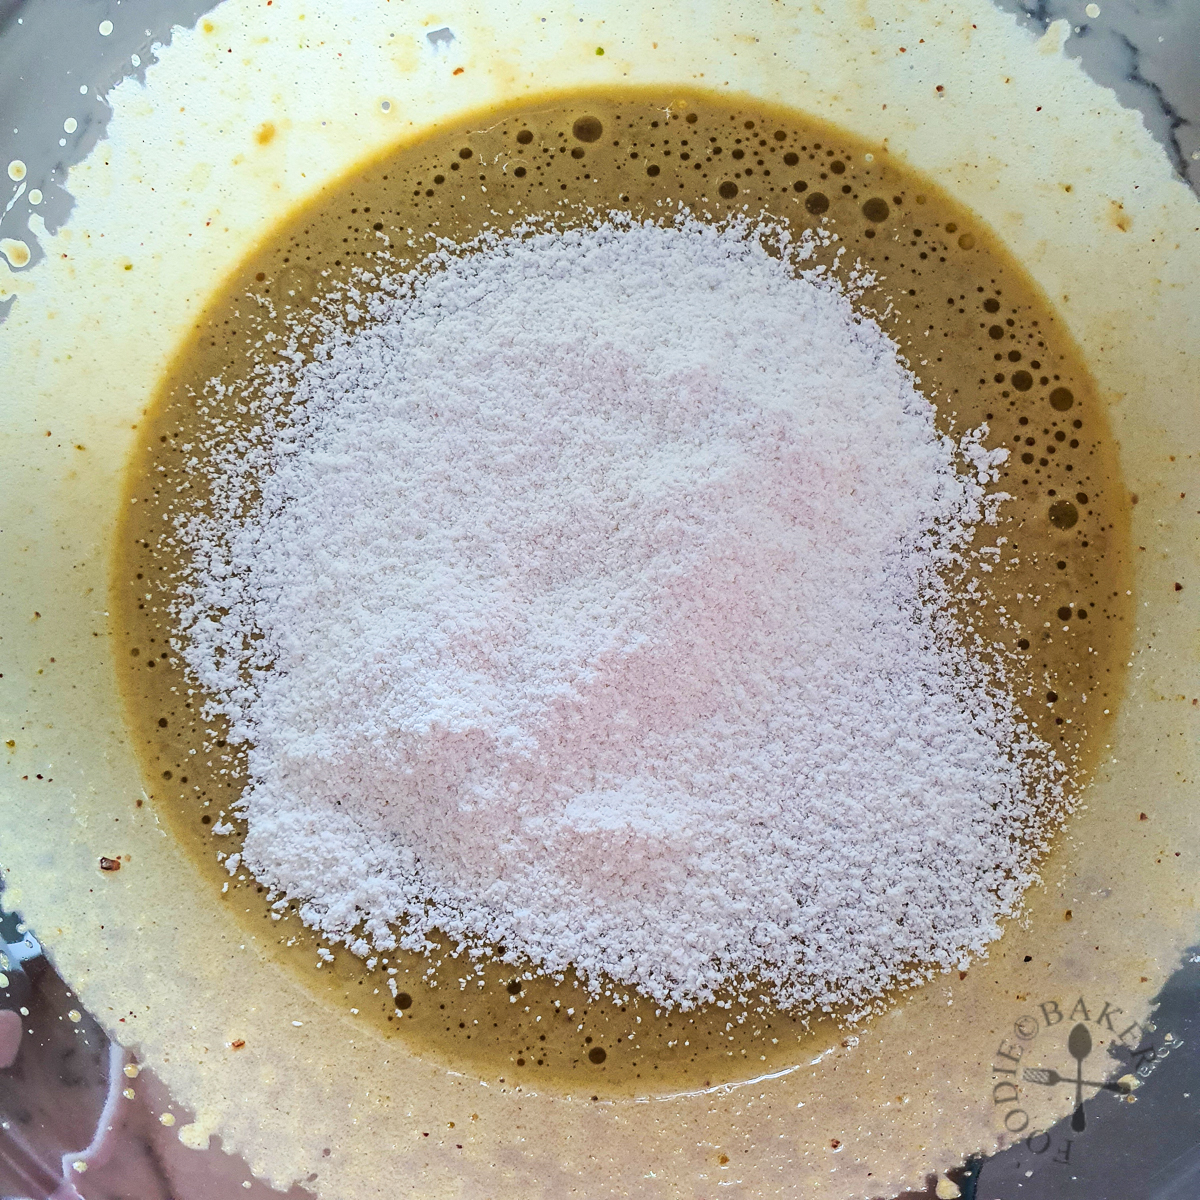
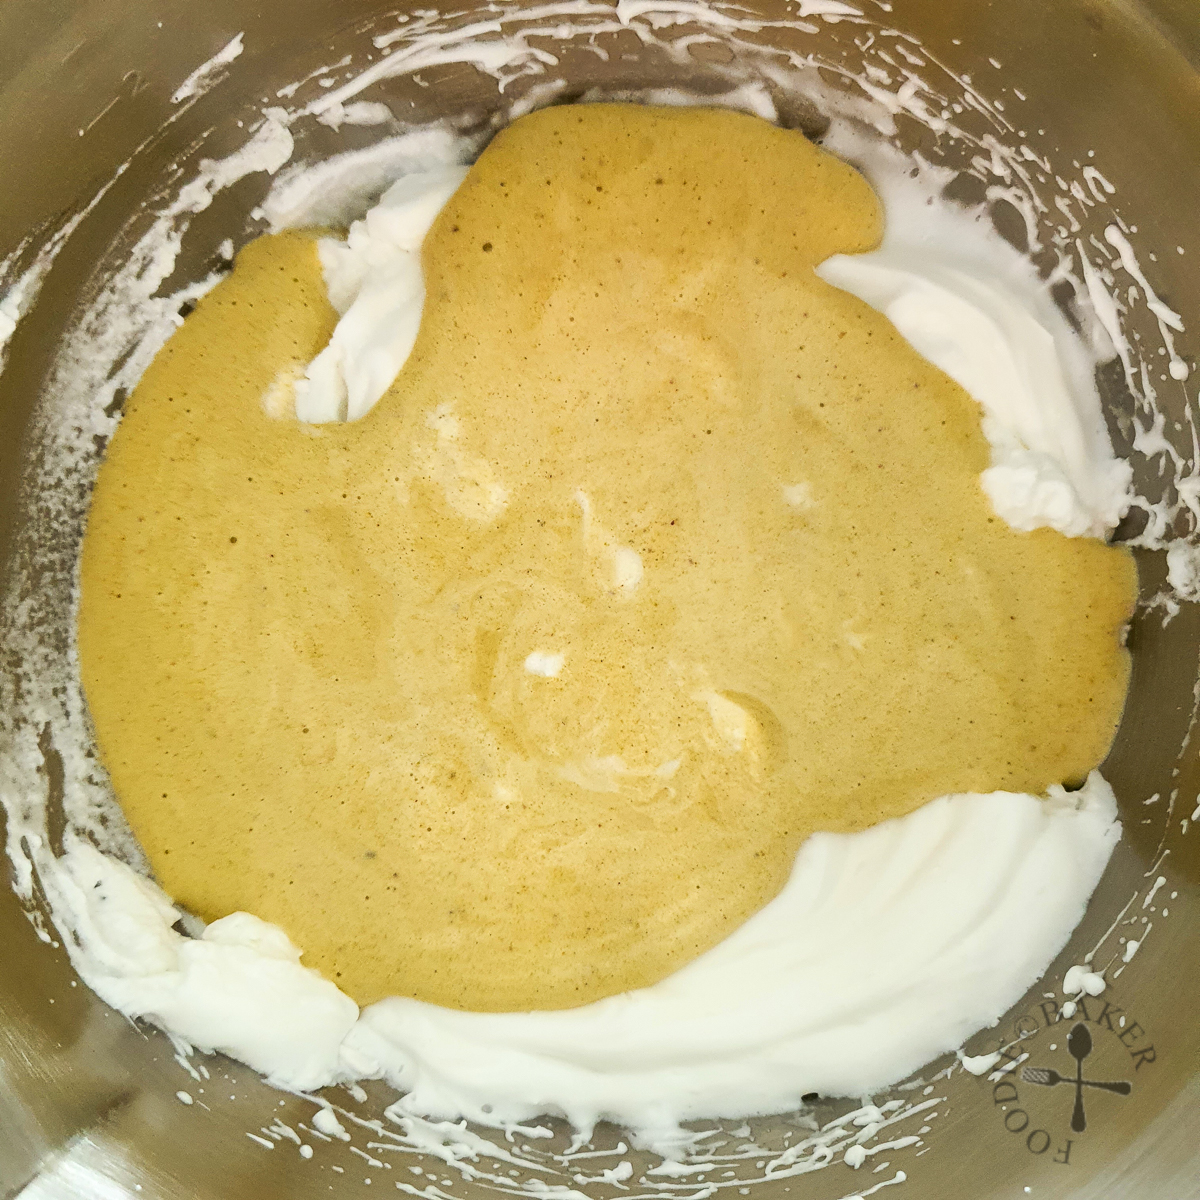
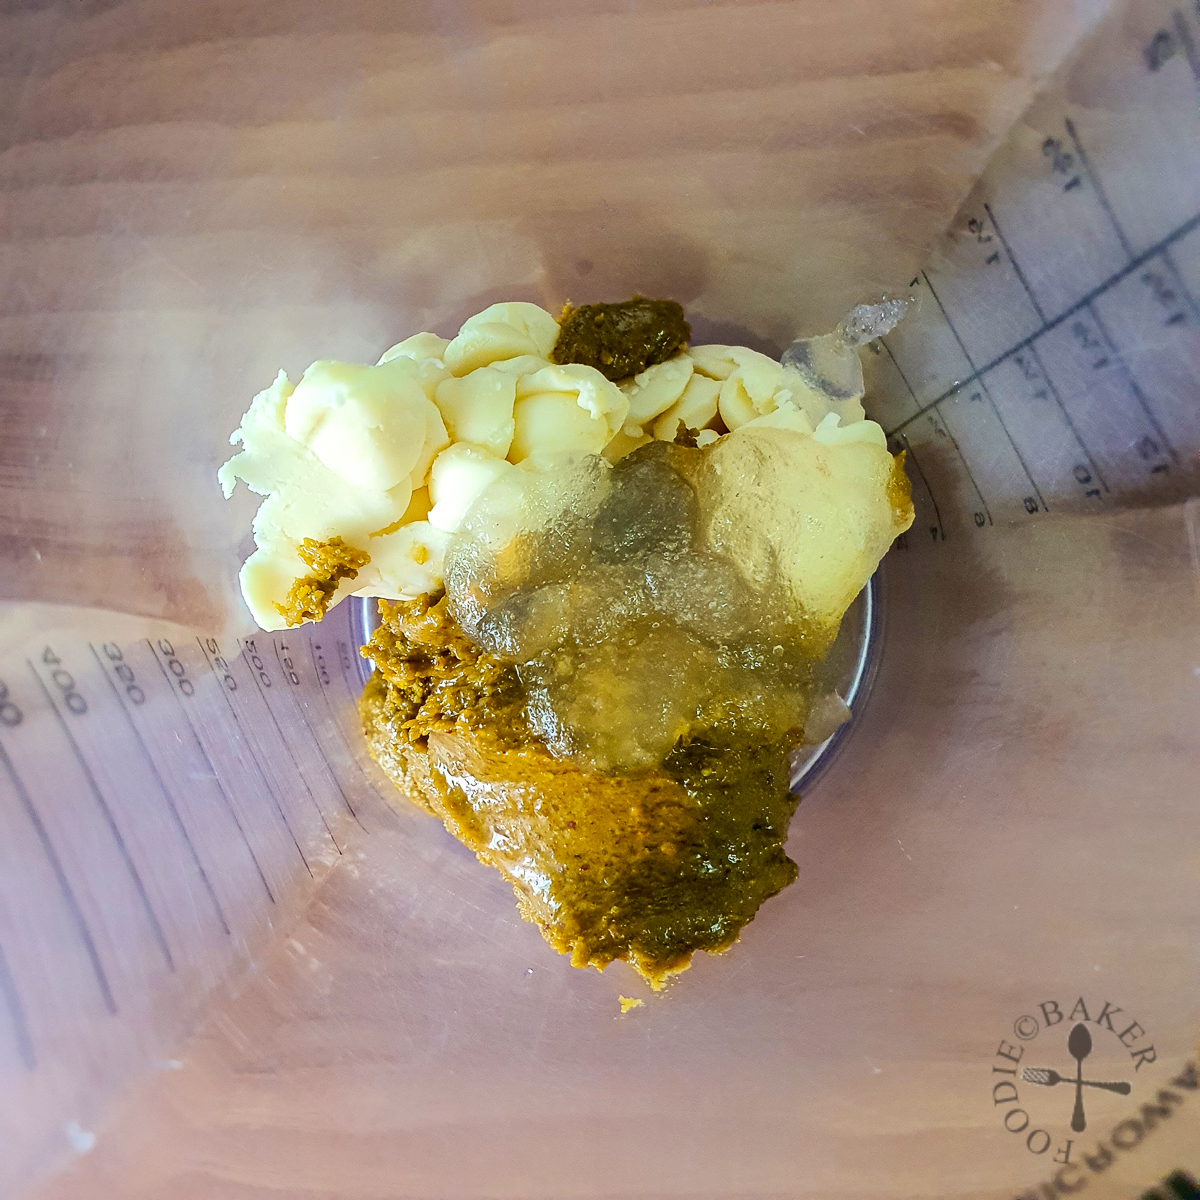 | 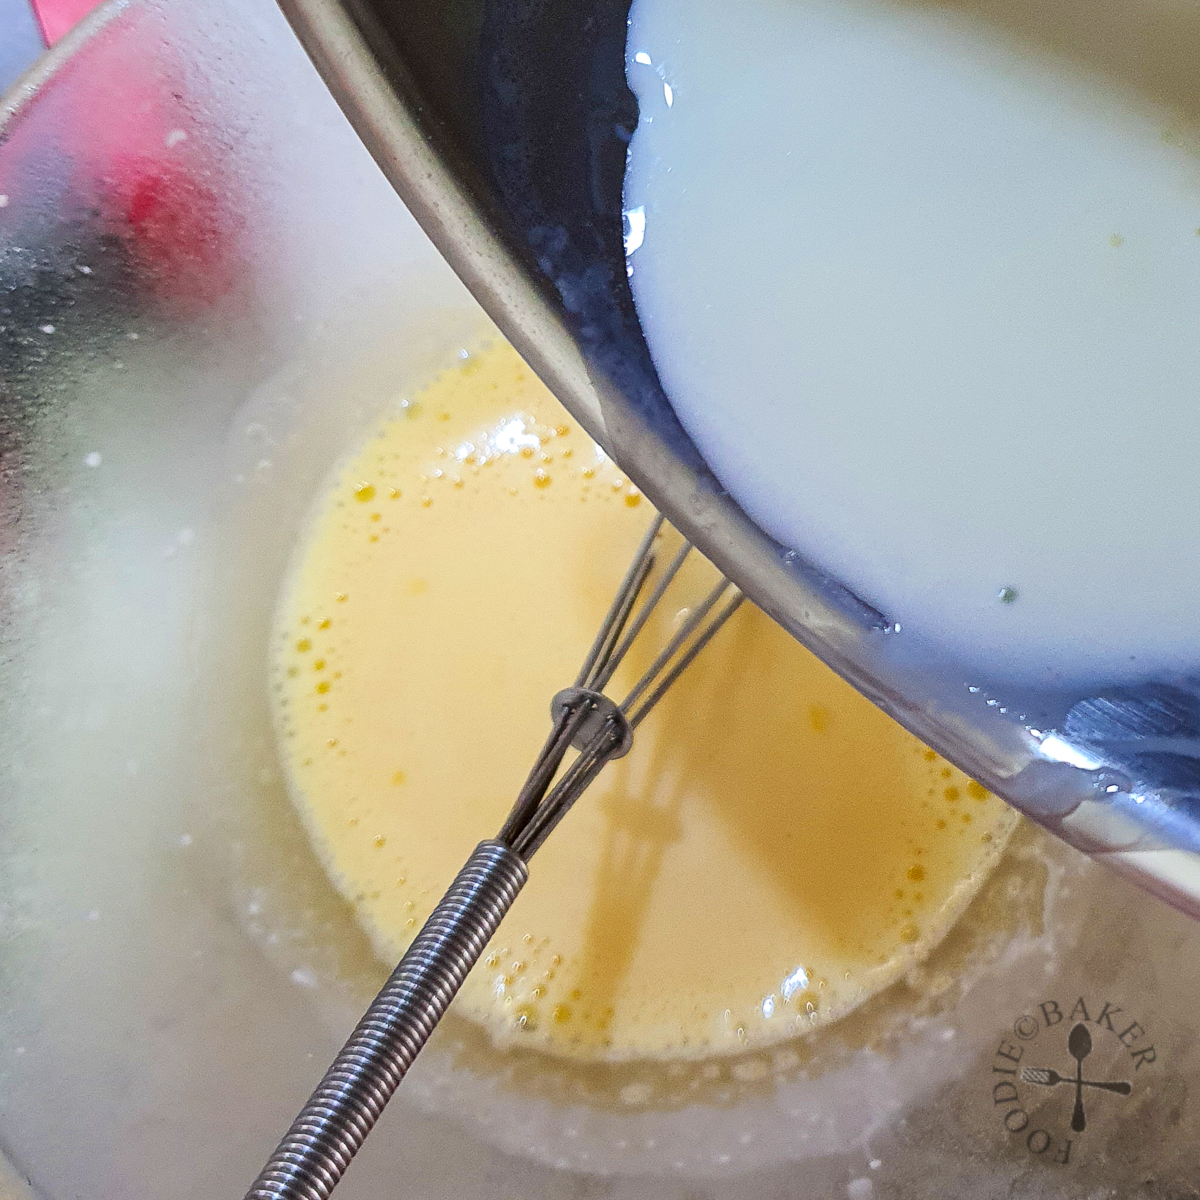 |
| 1) Place bloomed gelatin, pistachio praliné and white chocolate in a measuring jug. | 2) Whisk egg yolks and sugar, then temper with hot milk-cream mixture. Cook until it reaches 82C. |
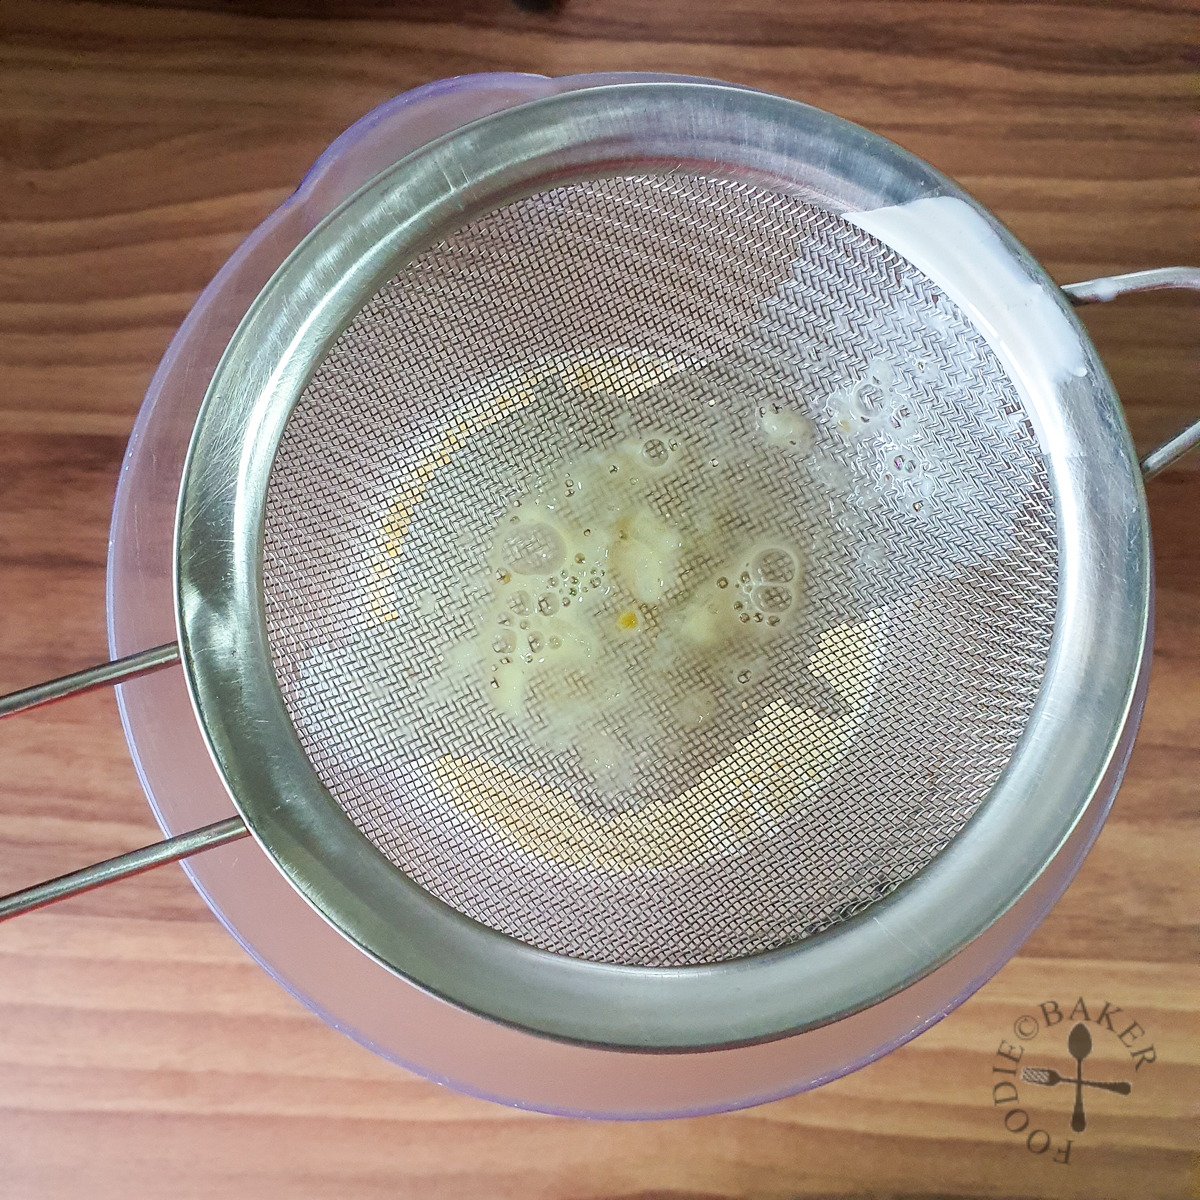 |  |
| 3) Immediately strain it into the measuring jug, then use an immersion blender to get a smooth mixture. | 4) Let cool to room temperature before using it for assembly. |
| 14-cm | 18-cm | |
| 2.5 grams | 5 grams | gelatin |
| 15 grams | 30 grams | water |
| 50 grams | 100 grams | pistachio praliné |
| 50 grams | 100 grams | white chocolate, chopped |
| 40 grams | 80 grams | egg yolks |
| 20 grams | 40 grams | caster sugar |
| 80 grams | 160 grams | cream, minimum 35% fat content |
| 80 grams | 160 grams | whole milk |
- Place gelatin in a small bowl. Pour water evenly on top to soak the gelatin. Set aside to bloom for 5 minutes.
- Place praliné, white chocolate and bloomed gelatin into a tall measuring cup (the kind to be used with an immersion blender). Set a sieve on top of the measuring cup. Set aside.
- Whisk egg yolks and sugar in a mixing bowl. Heat cream and milk in a small pot over medium-high heat just until simmering (bubbles begin to appear on the side), all the while stirring the mixture to prevent a film from forming on top. Temper the yolks with ⅔ of the mixture. Pour the yolks back into the pot and cook over medium-low heat until the mixture reaches 82C. (Do not let crème anglaise exceeds 85C else the eggs will curdle).
- Immediately strain the mixture over the sieve (to get rid of lumps) into the measuring cup. Let sit for 1 minute then use an immersion blender to process everything until smooth. Make sure the blender head is fully submerged under the mixture so no air bubbles are whipped into the crémux.
- Transfer the crémux into a metal bowl and cover the top with a plastic film. The film must be touching the crémux. Place the metal bowl into a larger bowl of ice water until crémux cools to room temperature. Use half immediately (see assembly) then keep the other half covered in the refrigerator until ready for the next assembly.
Chocolate Ganache
| 14-cm | 18-cm | |
| 30 grams | 60 grams | cream, minimum 35% fat content |
| 30 grams | 60 grams | dark chocolate, minimum 60% cocoa content, chopped |
- Heat cream in a small pot until simmering then pour over chocolate. Let sit for 1 minute then stir until smooth. Let cool to room temperature before using.
- Notes:
- This amount is enough to coat the top and drip down the sides, with a little leftover. Multiply the quantities by 3 if you want to coat the entire cake with ganache.
What are you thinking?