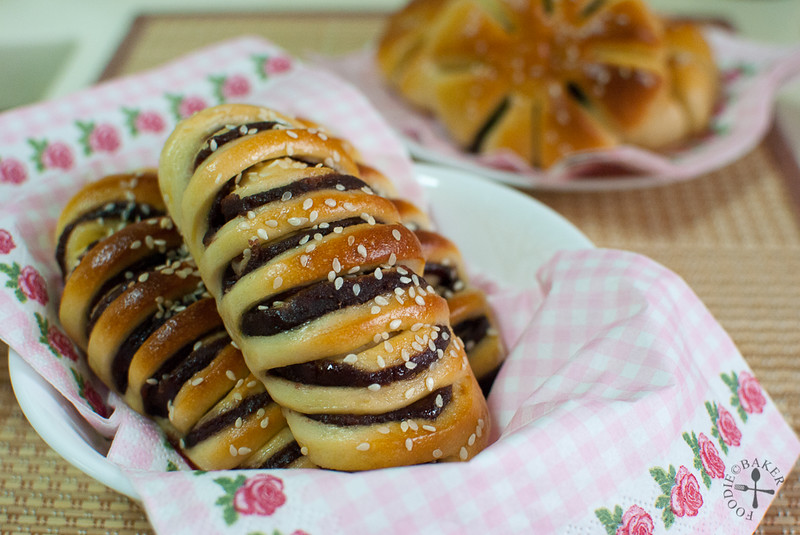
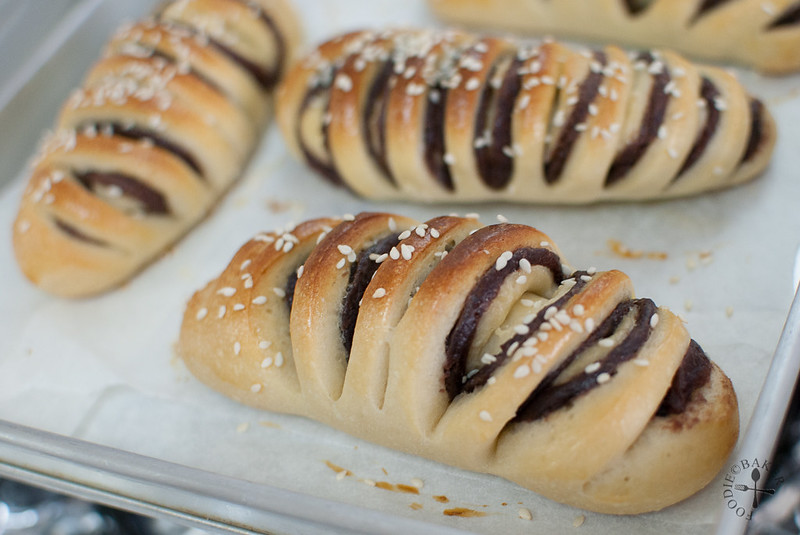
Red bean bread have always been my favourite since young – the soft and fluffy bread; sweet red bean paste filling and the crunch of sesame seeds all come together to create an awesome treat that I can munch away as breakfast and as snacks!
Bread baking has always been in the “I-don’t-think-I-can-do-it” category, until I was sort of “forced” to bake theDanish Bread for The Home Bakers. And I found out that it’s not very difficult, there are only a few techniques that you need to know when baking bread so that you’ll end up with a good loaf. For those who are new in bread-baking, these are two of the most important techniques:
1) Kneading
Kneading is perhaps the most important step in bread baking. Kneading helps to develop gluten strands in the dough, so that it will be able to hold the tiny pockets of gas created by the yeast, yielding a soft and fluffy bread. It can be done by hand or with a mixer. So far I’ve not tried the mixer method as I don’t think my handheld mixer can withstand kneading the dough for so long. So far I’m still not an expert in kneading, so I don’t have any step-by-step photos on them, but there are plenty of YouTube videos out there to teach ya! There are a few methods of kneading bread by hand, choose one that’s your favourite and stick to it!
2) Proofing
Proofing the dough means the dough is left aside to allow the yeast to leaven the dough. The ideal condition for dough to rise is in a warm (about 30 degrees Celsius), moist and draught-free (no circulation of air) environment. I’ve tried placing on top of the oven, next to the stove when I was cooking, and on the table counter… but the dough just won’t rise as well as I wanted it to. So after some researching on YouTube, the method that I’m using and loving is this: Preheat the oven at 100 degrees Celsius and switch it off 15 minutes before the dough is ready (oven door remains close). Place the dough in a lightly oiled / greased bowl. Cover loosely with tea towel and place it in the oven. Place 2 cups of boiling water next to the bowl and shut the oven door. Let the dough rise for 1 hour until double in size. So far this method has not failed me!!
This recipe itself is adapted from Happy Home Baking, and it uses a method called “Tang Zhong” (烫种). Literally, this meant “scalded dough”, made by mixing hot water with bread flour and then refrigerating the dough for 12 hours before mixing it with the main dough. Apparently this helps to increase the water-binding capacity of the dough, allowing the dough to suffer less moisture loss during baking and remain softer for a longer period of time. I’m not sure whether it really is more effective, but so far a lot of bakers have sworn by this method, so it can’t be that bad, right?
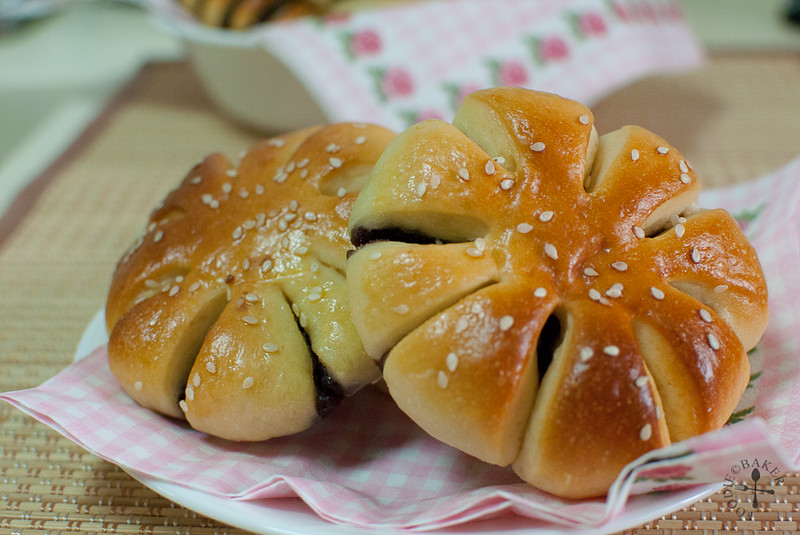
I’ve changed the recipe a little by using milk + water instead of water + milk powder as I don’t have milk powder on hand. I’ve also made another design of the bread, after seeing it in Aeris Kitchen. Both designs look really pretty, don’t you think? 😉 If you prefer a steamed version of the bun, check out these at Yum of China – steamed red bean buns are my childhood breakfast food!

The bread is really soft fresh from the oven but sadly it still became tougher the next day – woes of a homemade bread. Luckily for me, I wrapped and froze most the buns, warming them up for 15 minutes in the oven before serving – and they became soft and delicious again! This is a wonderful tip that I learned from Amy from Melbourne Food Snob that I think everyone should try out. Thanks Amy! 🙂
I shall stop talking now and let you head to the step-by-step photos!
Step-by-step Photos | |
|---|---|
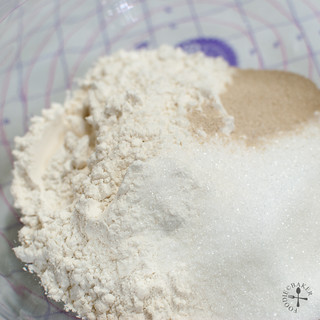 | 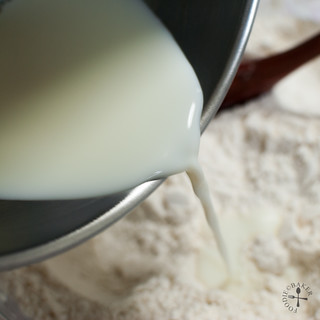 |
| 1) Mix flour (using both bread flour and all-purpose flour here), sugar and instant yeast together. | 2) Pour in warm milk + water mixture. |
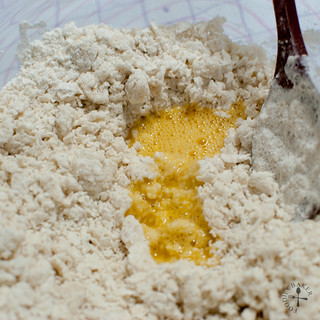 |  |
| 3) Add in a little beaten egg and mix to form a dough and transfer the dough out onto a floured table counter. | 4) Add in the scalded dough made the previous night. |
 | 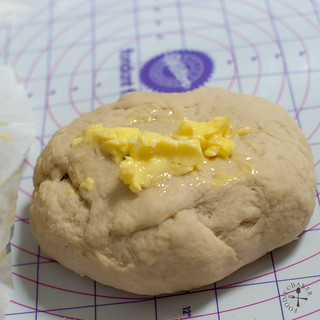 |
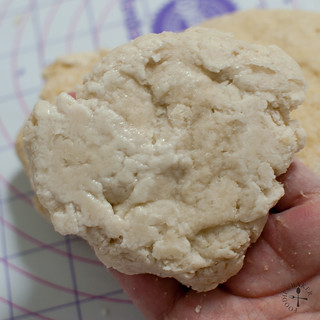
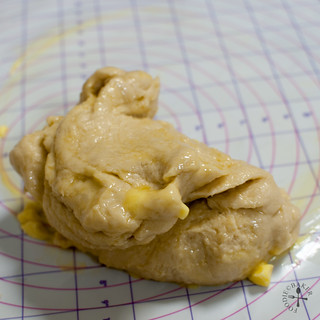
| 5) Knead until the dough is smooth, about 10 minutes. The dough is not very sticky, so I didn't need to flour my hands much. | 6) Knead in butter in several batches (really wishing I have a huge mixer to do the kneading for me!) |
 |  |
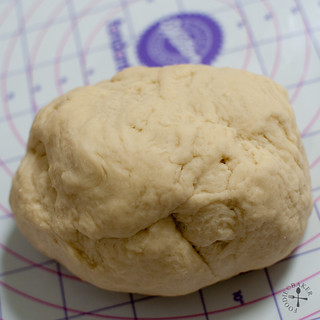
| 7) The dough will be very slippery at first, but as you knead, the dough will come together and form into a smooth dough. Continue kneading until the dough is elastic. | 8) Transfer the dough into a lightly oiled / buttered bowl. Cover and let it proof in a warm place for 1 hour or until double in size. I proof my dough by placing the bowl, together with 2 cups of boiling water, in a switched-off oven (previously preheating at 100 degrees Celsius). |
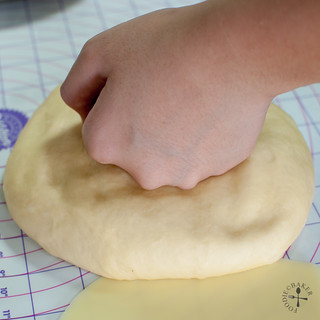 | 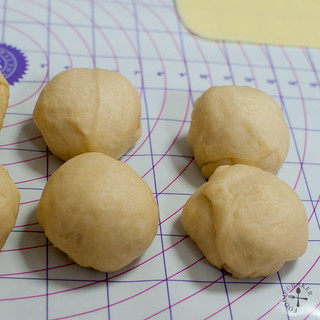 |
| 9) Punch down the dough a little to remove the excess air. | 10) Divide the dough into 8 portions (weighing approximately 60 grams each). Roll into a ball, cover loosely and rest for 10 to 15 minutes. |
 | 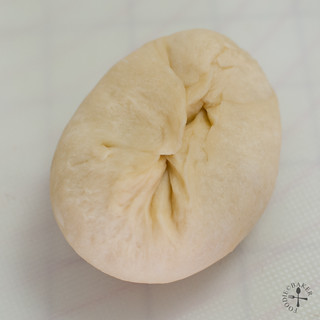 |
| 11) Flatten the dough and place a ball of red bean paste (weighing approximately 30 grams) in the middle. I use the red bean paste used for mooncakes, available at most baking supplies stores (e.g. Phoon Huat, Sunlik). | 12) Enclose the red bean paste, pinching the dough tightly to ensure the dough doesn't show. |
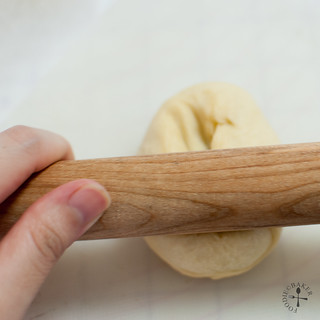 | 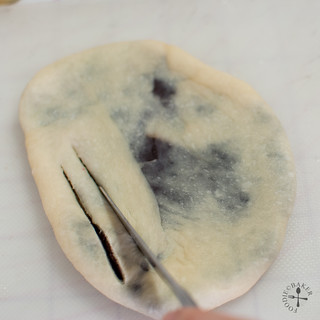 |
| 13) For design 2, roll out the dough with a rolling pin until about 1/4-inch thick. | 14) Using a pizza cutter or a small, sharp knife, cut the dough as above. Leave the top 1-inch uncut and make sure you don't cut all the way through (see picture 15). The closer the cuts, the more spirals your bread will have. |
 | 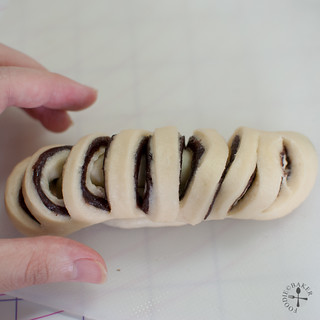 |
| 15) Roll the dough up from the top. | 16) Press down the dough slightly to ensure it doesn't unravel later on. |
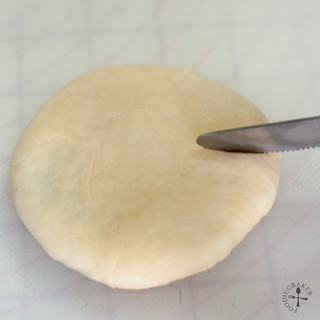 | 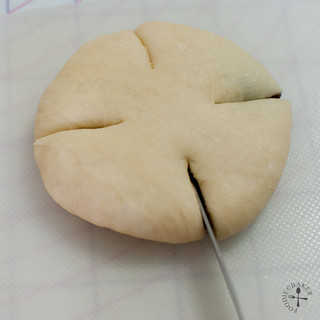 |
| 17) For design 2, flatten the dough into a round, about 1/2 to 3/4-inch thick. | 18) Cut four slits first. |
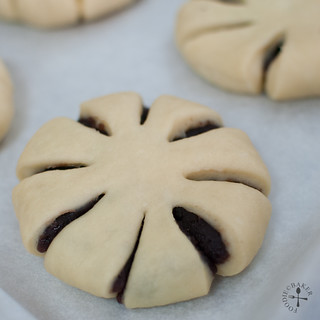 |  |
| 19) Then cut another 4 slits to make a flower shape. Transfer the dough onto a parchment paper-lined baking sheet and let it proof for another 45 minutes, or until double in size. | 20) Brush the dough generously with egg wash (made by combining 1/2 egg + 1 tablespoon milk). This will give the bread a shiny finish. |
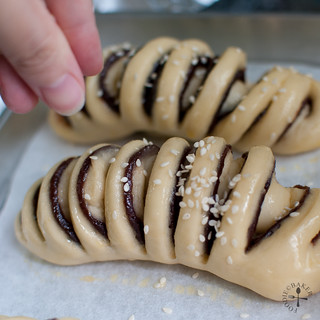 | 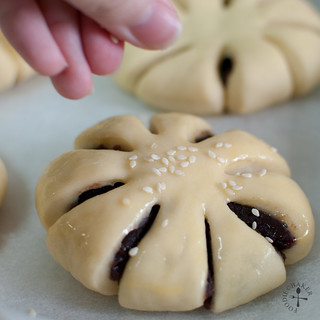 |
| 21) Sprinkle sesame seeds generously all over the dough. | 22) Same for the flower dough! Bake for 15 to 20 minutes at 180 degrees Celsius until the bread is golden brown in colour. |
Fresh from the oven!
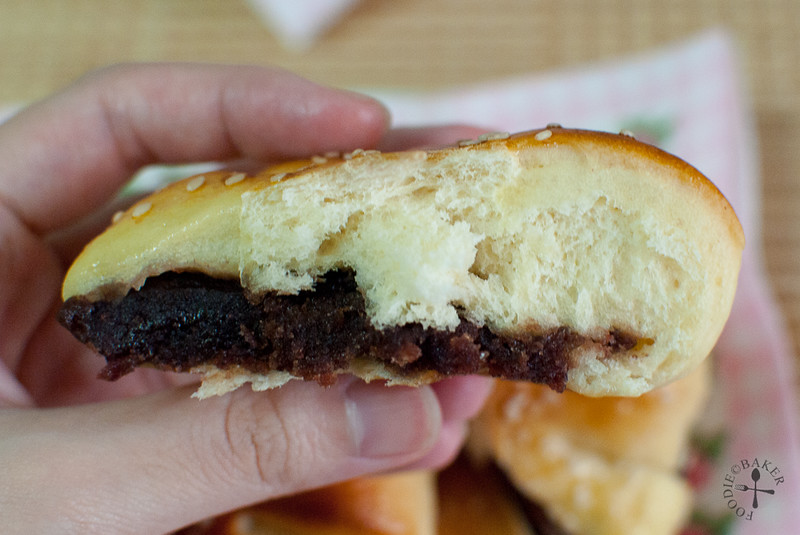
Omnomnom!

Red Bean Bread
INGREDIENTS
Scalded dough / Tang Zhong
- 50 grams bread flour
- 35 grams boiling water
Dough
- 44 grams milk
- 44 grams water
- 150 grams bread flour
- 50 grams all-purpose flour
- 40 grams sugar
- 3 grams salt
- 4 grams instant yeast
- 30 grams egg, about 1/2 beaten egg
- 30 grams unsalted butter, cubed and at room temperature
Filling
- 240 grams red bean paste, divide into 8 balls
INSTRUCTIONS
- Scalded dough: Combine the ingredients together. Stir with a wooden spoon until a dough forms. Cover and refrigerate for 12 hours (overnight).
- Dough: Combine the milk and water in a small pot, bring the mixture to a simmer and let cool till lukewarm.
- Mix the bread flour, all-purpose flour, sugar, salt and instant yeast together. Pour in the lukewarm milk-water mixture and mix with a wooden spoon to form a dough. Add in the egg and mix well.
- Turn the dough out onto a lightly floured tabletop. Add in the cold starter dough and knead for 10 minutes. Knead in the butter in 3 batches and knead for another 15 minutes until the dough is smooth and elastic.
- Grease a bowl lightly with oil/butter. Smooth the surface of the dough and place it in the bowl. Cover with a tea towel and let the dough rise in a warm and draft-free place for 1 hour until double in size.
- Punch the dough a few times to release the gas. Divide the dough into 8 portions (about 60 grams each) and roll into a ball. Cover and let rest for 15 minutes.
- Filling: Flatten the dough and wrap a ball of red bean filling inside. Shape the dough whichever way you like.
- Place the buns on a tray (preferably lined with parchment paper), spacing them at least 2 inches apart. Cover loosely with tea towel and set aside in a warm and draft-free place for another 1 hour to let it rise.
- Finishing: Preheat the oven to 180 degrees Celsius.
- Whisk the 1/2 egg and milk together. Brush the dough with egg wash and sprinkle with sesame seeds. Bake for 15 to 20 minutes until the top is lightly golden. Serve warm.
NOTES
Super Naggy:
[1] When the butter is first added, the dough will be very slippery and looks as if it cannot come together, but it will eventually, just keep kneading!
[2] When I want to let the dough rise, I will first preheat the oven to the lowest setting then turn it off 15 minutes before I put in the bowl/tray of dough. I will also put in 2 cups of recently boiled hot water into the oven, next to the dough. (The oven door is closed during the whole rising process.)
[3] To freeze leftover bread: place the buns in a tray and stick the tray into the freezer until the buns are frozen, 2 hours. Wrap the buns individually with aluminum foil and keep it in the freezer. Just before serving, stick the buns (still wrapped) into a preheated oven for 15 minutes at 150 degrees Celsius. Open the aluminum foil, let the bread cool slightly and serve warm.
Red Bean Paste Steamed Buns | Daily EZ Cooking says
[…] Red Bean Bread […]
Polo Buns | Food Is My Life says
[…] Red Bean Bread (foodismylife.wordpress.com) […]
suzaku24 says
They look so beautiful. I’m going to make these.
Marnelli says
It looks wonderful! I always ate this kind of bread in uni. I really really have to try this now 😀
Jasline says
Thank you Jeannie! Then you really should freeze the bread, they can keep very well in the freezer for months! When you want to eat them just reheat them in the oven, they taste just like fresh ones and you can eat them whenever you want 😉
jeannietay says
That looks beautiful! I have made these type of bread buns before and love the taste but unfortunately my boys do not like red bean paste…so it’s only me eating for the whole week! 😛
Michelle says
Omnomnom indeed! I do so love bean paste and your breads are so pretty.
ChgoJohn says
These are fantastic, Jasline! You may not have a lot of experience in bread baking but what you do, you do well. Thank you for not just sharing the recipe but for sharing the technique, as well. Not being much of a baker, seeing how the “log-shaped” loaf was prepared was really interesting.
kitchen flavours says
Hi Jasline,
Gorgeous buns! Looks so perfectly baked! Nobody would have thought that it is not often that you make bread! I am glad that you’ve got that push to start on bread making! 🙂
Now you will find it sort of addictive! 🙂
Have a great week!
johnnysenough hepburn says
Both of those are amazing. And I love that you’ve told us about the proofing method in the oven. As my flat is literally minutes from the sea even with double glazing it tends to be too cold and damp to even try yeast type breads. Yay! I can now try them out. As for the red bean paste I’ve never heard of that. Will Google for alternative fillings 🙂
Choc Chip Uru says
Beautiful my friend, a definite recipe keeper 🙂
Cheers
Choc Chip Uru
apuginthekitchen says
Beautiful bread, not only can you do it but you succeeded in making an amazing and delicious bread. It looks so good.
theoddhourkitchen says
Such a lovely bread! Sure must taste great too 🙂
Darya says
So pretty and sounds delicious!