
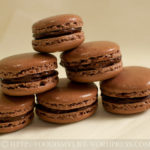
After 16 egg whites, 500 grams almond flour, 1,000 grams of icing sugar, and countless hours of whipping, folding, piping, waiting, baking and filling, I finally whipped up some decent macarons!
This month’s theme for Aspiring Bakers is none other than macarons! To be honest, I’m not a huge fan of them – I had tried them in Paris and they were good, but they didn’t blow me away. I guess that’s mainly because they are extremely sugar-loaded – too sweet for my liking.

When I found out this month’s theme is macarons, I went on a research frenzy – from videos to websites to books. I decided to settle on Helene Dujardin‘s macaron recipe – I’m sure most of us out there have heard of her – she’s the Queen of Macarons! I’ve followed her blog since a very long time ago and she makes so many of these sweet, little treats. Her photography skills are also superb – how I wish I can fly over to U.S. to attend one of her photography workshops…

The technique to make macarons can be a bit tricky – there are several important things to master while making macarons: making a good meringue; getting the right macaronage (this is the process of mixing in the dry ingredients into the meringue), and baking them.
Many sites have helped me in baking these successful macarons – videos are excellent sources because they show you the consistency of the meringue and the final batter; websites provide step-by-step photos and a thorough explanation of the ingredients and steps taken to make good macarons.
Here are the top most useful links for me:
- Video 1 – shows the consistency of the meringue and the final batter – the egg whites mustbe deflated, though I don’t use this method to get the consistency of the final batter, it’s a good reference material.
- Video 2 – shows the consistency of the meringue and the final batter – though I fold in all my dry ingredients at once, not batch by batch.
- Video 3 – a very good step-by-step video and clear images of a meringue and final batter. I obtained the macaronage using this method – fold several times then flatten the batter against the bowl. My final batter is more liquid – hence the top smooths out better than this video’s.
- Video 4 – video’s in French but shows a good consistency of the final batter. I used this method to pipe the macarons onto the baking sheet.
- Tartelette – the original chocolate macaron recipe that I used from Helene Dujardin.
- Use Real Butter – she uses the same recipe as Helene, I like it because it shows the consistency of the final batter (the photo where she’s piping out the macarons)
- Bakerella 1 – step-by-step photos by Bakerella
- Bakerella 2 – step-by-step photos by Bakerella
- French Pastry School Experience – step-by-step photos and explanation on the steps involved
- Food Nouveau 1 – step-by-step photos and instructions (the author of this post creates Video 3)
- Food Nouveau 2 – a very extensive troubleshooting and FAQ guide that everyone must check out before making macarons!

Chocolate Macarons
INGREDIENTS
Chocolate Ganache
- 115 grams chocolate, finely chopped
- 125 ml heavy cream
- 15 grams unsalted butter, diced
Macarons
- 110 grams almond flour
- 190 grams icing sugar
- 10 grams cocoa powder
- 100 grams aged egg whites, at room temperature
- 50 grams granulated / caster sugar
INSTRUCTIONS
Chocolate Ganache
- Stove method: Place the chopped chocolate in a heat-proof bowl. Place the heavy cream in a small pot and heat over medium heat until the heavy cream comes to a simmer (small bubbles appear on the sides of the pot). Pour the hot cream onto the chocolate and let it stand for 1 minute. Stir the mixture until all the chocolate has melted and the mixture is smooth. Add in the butter and stir until all the butter has melted. Let the mixture cool at room temperature until the ganache has thickened. You can place it in the fridge to speed up the process.
- Microwave method: Place the heavy cream in a microwave-safe bowl (glass or ceramic). Microwave the cream on medium for 30 seconds until the cream is hot. Add in the chopped chocolate and stir - the chocolate will start to melt. Place the bowl back into the microwave and microwave for 10 seconds. Stir the mixture and if there's any remaining un-melted chocolate, repeat the process (do not microwave for too long at one go unless you want to burn your ganache). Once all the chocolate has melted, add in the butter and let the mixture cool.
- If making the ganache a day in advance, cover and refrigerate it. Take it out of the fridge 15 - 30 minutes to let it soften before filling the macarons.
Macarons
- Sift the almond flour, icing sugar and cocoa powder in a large bowl. Alternatively, place it in a food processor and blitz for several seconds to break up any lumps. It is essential to remove the lumps so that there will not be any bumps on top of the macarons.
- In a clean, dry, oil-free bowl, add in the egg whites. Using an electric mixer, turn the speed to low and whisk the egg whites for 10 seconds. Increase the speed up to high and whisk for another 30 seconds, until the egg whites and foamy and white in colour. Add in the caster sugar - 1 tablespoon at a time - and whisk for 30 seconds (on high speed) before adding the next tablespoon.
- Continue whisking on high speed until the meringue is white, shiny and forms stiff peaks. To check for stiff peaks, turn off the electric mixer and lift it up and turn it upside down. If the meringue remains vertical and did not droop down, the meringue is ready. If not, continue whisking and check frequently - you don't want to overwhisk the egg whites.
- Once the meringue is ready, add in the almond flour, icing sugar and cocoa powder all at once. Using a large rubber spatula, fold in the dry ingredients until no streaks of dry ingredients remained. Do scrape the sides frequently to incorporate all the dry ingredients. The batter should be shiny, sticky, thick but liquid (this is what they like to call "lava" like batter): scoop up some batter and drop some it on to itself, the dropped batter should slowly sink and merge back with the remaining batter in more than 5 seconds but less than 20-30 seconds. If it sinks and merge back within 5 seconds, it is likely that you have over-mixed the batter. If it doesn't sink back, fold a few more times, and test again. It is a tricky balance - you can't under-fold and you can't over-fold either.
- Line several baking sheets with baking parchment. Transfer the batter into a large piping bag with a plain tip. The batter should flow out easily. Pipe small rounds of batter (about 1-inch in diameter) onto the baking sheets, leaving a 1.5-inch spacing in between.
- After piping, bang the sheets on the table counter to release air bubbles and to flatten the shells. Use a tooth-pick to poke the air bubbles (especially the big ones) and a small spatula to smooth out the tops. This step is optional but it does help to give you prettier macarons.
- Let the macarons rest for 45 minutes (weather in Singapore is humid, hence I let them rest longer, if the weather is dry, you'll only need to rest them for about 20 to 30 minutes). Touch them gently (top and the sides) - they should not be tacky / sticky and they will not be shiny anymore.
- Preheat the oven to 150 degrees Celsius.
- Bake the macarons, one sheet at a time, for 10 minutes, then rotate the sheets 180 degrees and bake for another 8 minutes until the top is crisp and the feet do not wobble - touch the top gently and if you see the feet shaking, they are not ready yet - bake and check every 1 minute.
- Place the baking sheet on a wire rack. Let the macarons cool for 5 minutes. Slide the parchment paper of macrons onto a damp tea towel. The thermal shock (hot from the macarons and cold from the damp tea towel) will help to release the macarons from the baking parchment. Remove the macarons from the baking parchment and cool completely on a wire rack.
- Pair the macarons so that the same size ones are matched together. Place a heaping teaspoon of chocolate ganache (more if desired) in the middle of a macaron. Sandwich with the other macaron - gently twisting and pressing it down until the ganache extends to the edge of the macaron.
- Do not eat the macarons immediately!
- Place the macarons in a container and refrigerate them for 24 hours to help the flavours meld together - the ganache will help soften the macaron to achieve the crispy exterior, chewy interior texture. Take them out of the fridge 15 minutes before serving so that they will be at room temperature.
- Consume them within 1 week.
NOTES
- Ganache adapted from Use Real Butter
Super Naggy:
[1] You can use any type and combination of chocolate – milk chocolate, dark chocolate, mixture of 70% with 50% etc. I used all 70% because I don’t really like sweet macarons and I want the dark chocolate to offset the sweetness of the macarons.
[2] Almond flour = almond meal = almond powder = normal almond grind into powder. A fine almond flour will give you a smooth macaron top.
[3] Icing sugar = powdered sugar. It is essentially a mixture of finely ground sugar and corn starch. Buy a good quality brand of icing sugar – it will have a higher sugar and lower corn starch content than those cheaper brands. Apparently corn starch is essential in a macaron recipe, so don’t try to make your own icing sugar, just get a good quality brand will do (I like to use the SIS brand).
[4] Cocoa powder – I used Dutch-processed cocoa, but it’s perfectly fine to use natural cocoa as well.
[5] Egg whites – Aging the egg whites reduces the moisture content, which makes it easier to get a good meringue. Cold eggs separate more easily – crack the eggs and place the egg whites in a container. Make sure their is no trace of yolk or water in the container. Cover and refrigerate them for at least a day, up to a week. Let the egg whites rest at your table counter for at least 30 minutes until it has returned to room temperature before using. Cold egg whites will not whip well – making it harder to get a stiff meringue. I used fresh egg whites, so I aged them by microwaving them 20 seconds on medium. To freeze the egg yolks, place the egg yolks in an ice-tray (one egg yolk per compartment) and add in 1/4 teaspoon of sugar to each yolk. Stir with a small spoon until the sugar has been incorporated and freeze the yolks. Unmould and wrap them with plastic wrap. Store in a ziploc bag in the freezer.
[6] Meringue is very sensitive to fats, and liquid. The bowl needs to be clean, dry and oil-free. Apparently stainless steel bowl works best but I used my plastic mixing bowls and the results were not too bad.
[7] This video shows you what it means to whisk egg whites into stiff peaks. The videos mentioned above are good references too.
[8] The figure-of-eight method of folding will not work here. I used a cut, fold and turn method. It’s essential to know the consistency of the final meringue – so you’ll know how much to fold. Check out the videos mentioned above.
[9] Use only baking parchment / baking paper to line the baking sheets. You can use a silicon mat if you have one (some say it’ll stick, I’m not sure since I don’t have one). Do not use aluminium foil or try to butter the sheets. If you are having problem with the baking parchment not staying in place, place a small drop of meringue batter on all four corners of the baking parchment and press it down on to the baking sheets. This will keep the baking parchment from moving about.
[10] The meringue batter will be liquid and flowy, To prevent the batter from flowing out while you’re filling it, twist the bottom of the piping bag and place the piping bag into a tall glass before filling it. Some suggest piping the macarons at a 90 degrees angle – I find that a bit hard because the batter is quite liquid, so I like to pipe them at a 45 degrees angle with the piping tip very close to the baking parchment. Then I press gently and count to three then lifting it up in a flicking motion. Practice makes perfect! The macarons will spread a little while resting, so it’s essential to leave some space in between.
[11] I learned this the hard way – under-baked macarons will stick terribly onto the baking parchement and the macarons will sink into their feet.
[12] Macarons can be stored in an air tight container for 2-3 days before filling them. Once filled, they need to be stored in a refrigerator.

Do you know that March 20 is Macaron Day? Happy Macaron Day in advance!
I’m submitting this to Aspiring Bakers #17 – March Macaron Madness! (Mar 2012) hosted by Alan of Travellingfoodies. (:
Happy baking!
The Home Bakers #15: Orange Sponge Cake | Food Is My Life says
[…] definitely have the longest and strongest love-hate relationships with them. They’re not like macarons – macarons already have that level of difficulty there, so it’s kind of expected to not […]
Green Tea Cookies « Food Is My Life says
[…] previously picked up some macaron baking tips from Jen and I actually managed to bake some pretty successful macarons. So I’m very certain that these cookies would be just as delicious as the […]
Jasline says
You’re welcome Ruby! 🙂 I’m using a Nikon D3000 with a Nikkor 35mm lens. It’s an entry level camera, so it’s quite easy to learn and be familiarize with the functions. I’m actually considering upgrading the camera, but that will be in the far future as they are really expensive!
Ruby says
Jasline – Thank you for the links! The deflector sounds like an excellent idea. Unfortunately my kitchen is tiny, and the only place that is ideal for taking photos. I have bookmarked the site you provided for Helene’s book. I will certainly get a copy once I’ve bought my DSLR! One more question if you don’t mind. What camera are you using?
Thanks again Jasline 🙂
Jasline says
Hi Ruby,
You are most welcome! I’m sorry I can’t provide a better reason for shiny macarons…
If you are getting a DSLR for food photography, I recommend getting Helene Dujardin (Tartelette)’s book, Plate to Pixel, on food photography, it’s a great book to learn about DSLR and food photography.
When you mention deflector, do you mean this? It really depends on what is the mood of the photo you are trying to bring across. I like to use it as it helps to get more light on the food, making the photo brighter, cleaner and prettier.
I hope the above helps! 🙂
Ruby says
Hi Jasline,
Thanks for your detailed reply. My chocolate macarons are not any shiner after being refrigerated. I have seen chocolate macarons in the stores that are matte, just like mine, so that is why I question all the dark and super shiny chocolate macarons I see on other blogs.
I’m not that experienced with photography and I don’t have a dslr for taking pictures for my blog (I will buy one soon though). Do you find the deflector makes a huge difference for food shots?
Ruby
Jasline says
Hi Ruby! I’m glad you tried them and I’m so thrilled that yours turn out well. 🙂 I’m not very experienced in macarons baking, but from what I’ve research and read online, the macarons are shiny when you pipe them, and after drying them they would become matt. The macarons that I’ve baked came out matt, and they’re only a teeny weeny little bit shiny when light is shone on them.
I think I have a theory why most macarons that you see are shiny in photos – most macarons are refrigerated for the flavours to develop, hence when they are taken out of the photos to be photographed, condensation might have occurred on the surface of the macarons, causing it to reflect the light shone on them during their photoshoot, making then more shiny in photos – I think that’s what probably happened to mine. When I took these photos, I held a reflector to eliminate shadows around the macarons, this resulted in more light shining onto the macarons (very common in food photography), maybe making them more shiny they should have been.
Have you tried tasting macarons from your local bakeries? Are theirs very shiny to you? I’m sure your macarons still tasted delicious! 🙂 And I hope the above answer helps. Happy baking and take care!
cravingthis says
Jasline – I just made the chocolate macarons and they came out well, but my baked shells were dull and matte. I wonder if others are using enhanced photo software? I’ve made these many times and they’ve yet to come out shiny? Any ideas?
Thanks
cravingthis says
Hi Jasline – very detailed recipe with helpful links. Thank you so much!
Macarons are a pain to make, it took me 4 tries. They’re time consuming and when I’m finished, I always say I’d rather buy them, but making them is fun, especially when they come out right!
Jasline says
You’re welcome, Lucy! I think everyone needs all the help one can get when making these finicky little treats! (:
Quay Po Cooks says
A wealth of information on macarooning in this post. Jasline, really appreciate your genreosity in sharing your experience. Those tips and notes are precious and will definitely help anyone who wants to try making these temperamental beauties. Your macarons look perfect.
Aspiring Bakers #17: March Macaron Madness!!! (March 2012) [ROUND-UP] « travellingfoodies says
[…] (15) Hazelnut Opera Cake with Chocolate Hazelnut Macarons by BeeBee from HoneyBeeSweets (16) Chocolate Macarons by Jasline from Food Is My Life (17) Strawberry Milk Macarons from Janine from Not the Kitchen […]
Jasline says
Thank you! I hope the notes will help! 🙂
biscuitsandbobbins says
Beautiful macarons! And thanks for sharing all your notes!
Lemon Macarons « Food Is My Life says
[…] baked these lemon macarons on the same day I baked the chocolate ones. I used up all my lemon zest on the previous batch (which failed) so this batch doesn’t have […]
Strawberry Oatmeal Brown Sugar Cupcakes « Food Is My Life says
[…] it requires the use of an egg yolk, which helps to clear the stash of egg yolks I have from all the macaoron baking. It’s a very light cake, perfect for breakfast and […]
Jasline says
It pains me when a baking attempt failed! All the money and ingredients down the drain and trash can… 🙁 all these references are really helpful, it’s all thanks to them I managed to make successful macarons! 🙂
Janine says
gosh this is definitely going onto my BOOKMARKED posts! loved that you summarized where to get resources from and all your useful notes! i too went through a similar phase of wasting tons of almond flour and eggs until i finally realized what was wrong. and i wish i were in US to attend Helene’s workshops too! 🙁
Jasline says
Thank you for your encouraging compliments (: Seeing all the wonderful and varied flavours they can offer is tempting me to make them again!
Jasline says
Hi Korena, I had fun gathering all these resources.. They will be my future reference when I make macarons again (: thanks for the compliments! (:
Jasline says
Yum! Ice cream and creme brûlée sounds good! Haven’t tried making kueh lapis before… But I know it’s super tedious!
delicio8 says
Your macarons are beautiful. Good job. Once you get the hang of it they are not so bad and they are so versatile with all the different things to fill them!
Korena in the Kitchen says
What a great resource you have put together! I finally tackled macarons after doing similarly extensive research and found that I almost psyched myself right out of making them… but then I did and I was so glad 🙂 These chocolate macs look wonderful – I want one right now!
Alan (travellingfoodies) says
ice-cream, cream brulee, custard pudding, bread and butter pudding…. and good o’ kueh lapis!!!
Jasline says
Hi Lena thanks for the compliments! I really learned a lot from all the macarons baking. Yea I can’t wait to try out some yolk base recipes.. Maybe ice cream? Haha.
Jasline says
Wow salt and pepper macaron? That’s such a unique flavour! I hope you will be able to recreate it soon, can’t wait to see how yours turn out! (:
Jasline says
Thank you (:
lena says
hi jasline, thanks for sharing all of your notes and experiences. There’s really so much to learn and explore, yes, really tricky, it seems that every step in making macarons have to be so careful and precise too. congrats on your successful macarons!! though i cant get to taste them, i’m pretty sure they taste lovely just as how they look! 16 egg whites? so the next challenge would be thinking what to make out of the egg yolks…LOL!
CorkAndSpoon says
I am so happy to see these! I’ve been researching macarons, too. I tasted a delicious salt and pepper macaron at the wine expo (my very first macaron to boot!) and I’ve wanted to recreate it ever since 🙂 ~Ruth
Baking with Sibella says
These are lovely lovely macarons! Great photos! 🙂
Jasline says
Thanks Villy (: Yea I’m so glad this batch finally turned out presentable and good looking! (:
Jasline says
Thank you! (: hehe i did piped some that are of odd shapes and sizes… But they didn’t get to be featured! :p
Jasline says
Thank you so much for your compliments. (: Oh Bobbi I chose the prettier ones to take photos of. Hehe. I guess having to pipe 5 batches of these improved my piping skills! And Wow you whipped your egg whites by hand? That’s amazing! I’m not sure if I can ever do that! You should check out Helene’s (Tartelette) site. My skills are only a fraction of hers! (: take care Bobbi!
Villy says
Wow! Sounds like hard work! But they look so professional and shiny and delicious!!
filingawaycupcakes says
These are such pinnable and gorgeous pictures! I am so impressed with how uniform they turned out!
Bam's Kitchen says
Wow Jasline how did you get these macaroons in such symmetrical shapes? All the same size. You have very steady hands! I have made them once before and I can remember is my arm going numb from getting the peaks in my egg whites to form! Your photos look like something that should be starred in a cookbook….so when is that coming out? LOL Take care, BAM
Jasline says
Thanks Alan, I’m glad these turned out alright (: thanks for hosting this months Aspiring Bakers! (:
Jasline says
Thanks Anqing! Oh no need to be sorry, thanks for dropping by! (:
Jasline says
Thank you! (: many of my friends love macarons too, hope I’ll have the chance to try baking new flavours in the future (:
Jasline says
You’re welcome! I hope they’ll be of some help to you (: all the best in macaron making!
Jasline says
Thank you! It’s all thanks to all the videos and websites that helped me make these little finicky things! I hope you get your chance to make yours soon! (:
Jasline says
Thanks!! Can’t believe I did it too. I was so near to giving up.. Haha. Ooh I hate the sifting also! I wish to get a food processor soon haha!
Alan (travellingfoodies) says
Lovely macarons and thanks for sharing your experience and tips on macaronage!
anqing says
woah, jas! 😀 they look amazing! hahaha..i’m sorry to come here without asking if you’re alright with it but i saw this on facebook and it’s awesome! jiayou jiayou!
Ann@Anncoo Journal says
So pretty! I’m not a fan of macarons too but definitely love to make them for friends 🙂
whisksandchopsticks says
Thank you for all the detailed notes and tips. I have been looking at several bloggers’ posts on macaroons…I think I am almost ready to try them myself. 🙂
girlinafoodfrenzy says
Brava!!! I’m so impressed my our macaroon finesse and skills! I’ve yet to make these babies, it’s a challenge I was hoping I might encounter at culinary school with some decent tutoring! Brava!!! V inspirational!!!
Joli says
YUMMY jas! you did it. and I think sifting the almond flour is the worstttt part of making macarons. I’m waiting for those babies of yours! :DD