Sep 2020: Updated the post and recipe with air-fryer steps
Chinese Roasted Pork Belly (Siu Yuk / 烧肉) is one of my favourite foods. I like ordering it together with char siu and rice. My maternal grandparents will stir-fry leftovers with leek (so yum!) My mom will add pieces of them into this fermented beancurd, yam and vegetable stew (I need to get hold of this recipe soon.) With ready-to-eat roasted pork belly so easily available in Singapore, making it from scratch is something that didn’t cross my mind until I was living overseas.

No Blanching, No Skewering, No Charring
My method of making roasted pork belly is from this YouTube video. There’s no blanching of meat required; no skewering required to keep the pork straight; and no charring of pork skin which needs to be scrapped off. I like it because it’s simple, straight-forward and delivers the kind of roasted pork belly I want.
Poking and Drying are the Keys to Crispy Skin
When living overseas, I used a fork (a fork!!) to poke holes / scratch the skin. I bought a skewer tool online recently for only SGD5 and it definitely made life much easier. I would love a wood-handled tool but mould loves wooden tools too, so I opted for a plastic one instead. The one I’m using has kind of a guard design, which helps preventing the needles from puncturing too deep into the pork. The aim is to poke and scratch the skin so that the skin can blister during roasting, creating that crispy skin that siu yuk lovers love.
After marinating the meat and fat portions of the pork belly, it is wrapped up with aluminum foil, leaving the skin exposed. The pork belly then goes into the fridge for at least 8 hours so that the skin can dry out, which is another key factor in getting that crispy skin. The long resting time also allows the seasoning to penetrate into the meat. So I usually start making roasted pork a day earlier, so that I don’t have to rush and worry that the skin won’t be crispy.
Oven or Air Fryer?
Both oven and air fryer work in making roasted pork belly. I don’t like dealing with an oil-splattered oven so I am definitely gravitating towards the air fryer. However, my air-fryer is small, so I will not be able to make a huge batch of roasted pork belly for parties / gatherings. Both methods work, it depends on the equipment you have at home and how big is your slab of pork belly. Make sure you check that your slab of pork belly can fit into the air-fryer basket before proceeding with marinating!
Conclusion
Now that I’m back in Singapore, will I still make roasted pork belly from scratch? Once in a while I guess, whenever I have a huge craving for it. A slab of 500-gram fresh pork belly costs SGD 10, so it’s definitely more economical to make it myself when I want to gorge myself silly with roasted pork belly. 😉
Chinese Roasted Pork Belly (Siu Yuk / 烧肉)
INGREDIENTS
- 500 grams pork belly, about 1-inch thick
- 1/2 tablespoon Chinese Shaoxing wine
- 1 teaspoon salt
- 1/4 teaspoon five-spice powder
- 1/8 teaspoon ground white pepper
- 1 teaspoon white vinegar
- Coarse salt, see Note 2
- Water
INSTRUCTIONS
One Day Before
- Rinse the pork belly and tweeze out any pig's hair you see/feel. Rinse again and pat-dry pork belly thoroughly with paper towels. Using a meat tenderiser needle tool, skewer or a fork, poke holes and make scratches all over the pork skin, making sure not to poke all the way through to the fats (see Note 3).
- Turn the pork belly skin-side down. then rub Shaoxing wine lightly all over the pork meat and fat, making sure to leave the skin dry. Mix salt, five spice powder and white pepper in a small bowl. Rub the dry rub all over the pork meat and fat.
- Place a large piece of aluminum foil on the table and place the pork belly, skin-side up, in the middle. Fold the aluminum foil to form a tin, making sure the meat is snugly fit inside the tin. Place it in the refrigerator, uncovered, overnight for at least 8 hours, up to 18 hours to dry out the skin.
The Day
- Take the pork belly out from the refrigerator (no need to let it come to room temperature). Brush the skin with vinegar.
- Combine plenty of coarse salt and a little bit of water so that the salt can pack together. Spoon the damp salt onto the pork skin. Press the aluminum foil against the meat and push the damp salt to the side, so that the salt covers the skin but don't fall into the aluminum tin. Repeat until all the skin has been covered with coarse salt.
(A) Oven Method
- Preheat oven to 200°C.
- Place the pork belly in the middle rack and bake for 45 minutes. Remove the pork belly from the oven. Preheat the broiler.
- Carefully lift off the salt crust and brush off any remaining salt. Transfer the pork belly on a wire rack over the aluminum foil. The aluminum foil will catch the fat drippings, making cleanup easier.
- Place the pork belly on the highest rack and broil until the skin is bubbly (like tumors) and crispy, which will take about 10 to 15 minutes.
(B) Air Fryer Method
- Place pork belly in the air fryer basket. Air fry at 180°C for 35 minutes.
- Carefully lift off the salt crust and brush off any remaining salt. Remove the aluminum foil and place the pork belly back in the air fryer basket. Air fry at 200°C for 10 to 15 minutes until the skin is crispy, checking every 5 minutes to make sure it's not burning.
Rest and Serve
- Once the skin is crisp to your liking, remove the pork belly from the oven/airfryer. Let it rest on top of a rack anfor at least 15 minutes before chopping it.
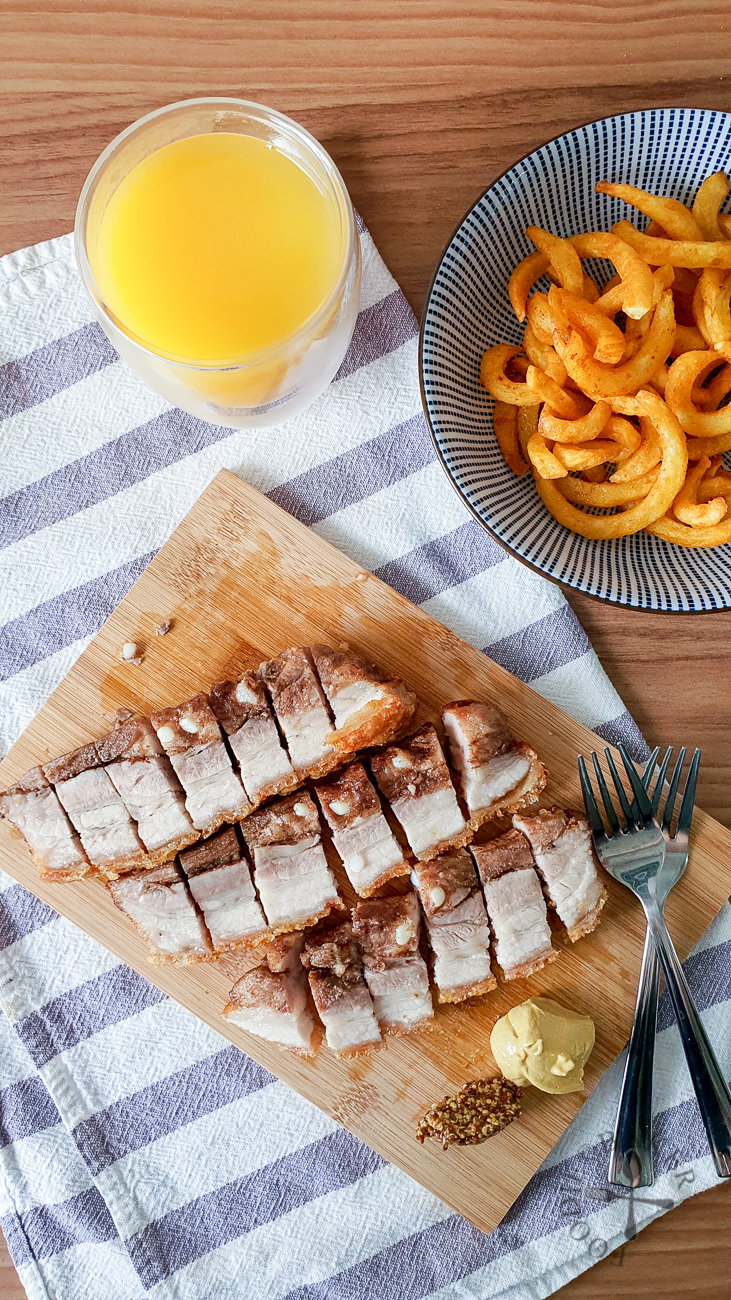
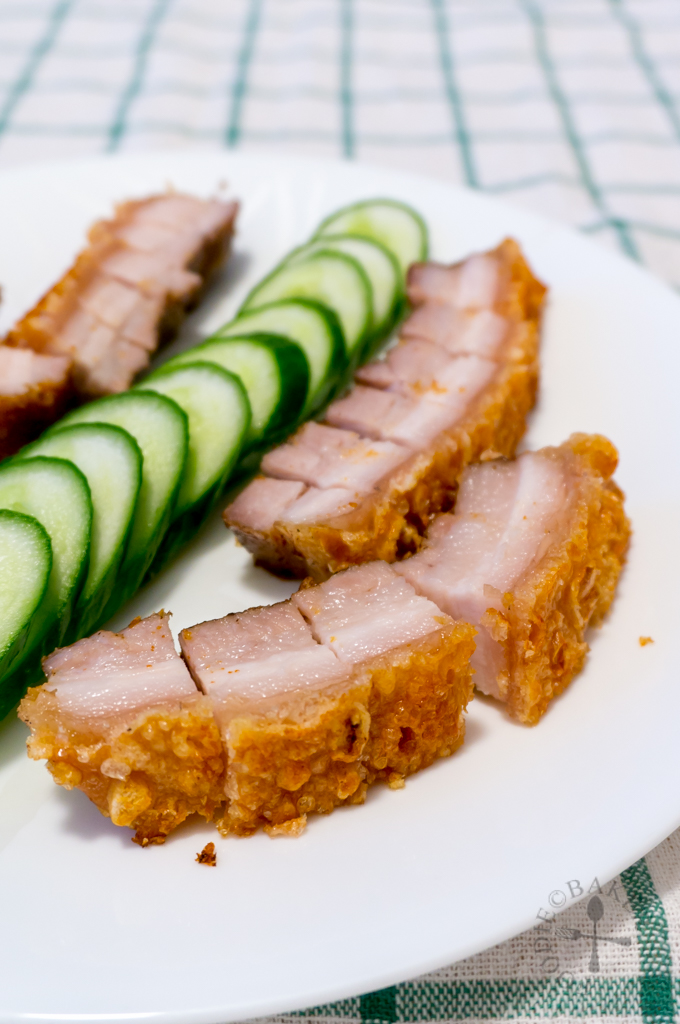
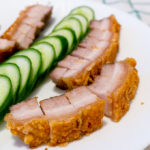
- Once cooled enough to handle, chop the pork belly into chunks (savour the moment when the skin cracks!) and serve with whatever you fancy!
Video
NOTES
- Try to get a piece of pork belly of even thickness throughout from your butcher. I like to request for one that has slightly lesser fat.
- Fine salt / fine table salt cannot be used for the salt crust.
- Do not poke all the way through to the fats, otherwise the salt might seep through during baking, making your pork belly unpalatably salty. You just want to scratch the surface of the pork belly to encourage blistering during broiling. This step will take quite some time as you should try to poke as many holes as possible. Be patient and endure!
- X and I can usually finish off the whole 500 grams of roasted pork between the two of us in one meal, (update in 2020: not anymore, our stomachs have shrunk!) but if you are going to serve it with a lot of other side dishes, this amount may be enough to feed 4 people.
- When making a big batch, I would recommend cutting the meat (not the skin!) halfway before rubbing with Shaoxing and seasoning rub. This is so that the seasoning rub can penetrate into the meat better.
- Recipe adapted from food4444lyfe
Suzie from Perth says
Hi,
Thks for your time and putting your master skill on to a video clip. Absolutely love it! Definitely will give a go!
Jasline N. says
Hi Suzie! You flatter me, I think there are a lot of improvements that can be made to the video 🙂 Hope this helps in your attempt in making Siu Yuk and let me know how it goes for you!
Charmaine says
Oooh…tis really looks so crispy…i can imagine the cracking sound of it as you bite n chew it…my hub would love this.. 😉
Jasline N. says
Thanks Charmaine! Hahah yea it was really fun to bite into the pork and make a loud cracking sound, let me know when you’ve made it!
Zoe (@bake4happykids) says
Hi Jasline,
Your video is awesome! Wish that someone can help me to make a video of my bake and food… It is always me and only me that does the baking, cooking and photos. Must tell X that the both of you did a good job!
Now more poke poke poke the pork? LOL!
Zoe
Jasline N. says
Hi Zoe! Hahaha maybe you can try asking your son to help you? Train him to be your personal videographer 😉
Lorraine @ Not Quite Nigella says
My family absolutely love this dish! Maybe I should make it for Christmas! 😀
Jasline N. says
Glad your family loves a good crispy pork belly! Making this for Christmas sounds perfect, a delicious change from the usual turkey!
bentodays says
The roasted pork looks amazing! I have yet to try making this myself even though hubby loves it, always seems like too much work! Shall try out your simplified recipe soon!
Jasline N. says
Same here! I also always thought that making it is too troublesome, it’s so much easier to just buy it. I guess only when you have no access to it then you will have the urge to make them yourself haha.
Luvswesavory Karen says
Jasline, I can’t make roast pork belly …. becos I’ll “chop off” the crunchy crispy skin and eat the lean meat. But seeing this so delicious looking 烧肉 of yours …. maybe I will try “fatless skinless roast pork” … ha ha !
Jasline N. says
Oh no! If only I’m your neighbour, I’ll go over and help you eat up all the crispy skin!
Raymund says
Wow that looks so crispy! I so want that crunchy skin
Jasline N. says
Thanks Raymund. Yes I’m really surprised by how crispy it turned out!
Sharon D. says
Yummiest ever, Jasline! I love that you did a video – that’s going to help me a lot. Thank you! =D
Jasline N. says
You are welcome Sharon! If photos can speak 1,000 words, videos will be able to speak infinity number of words (though I know I never say anything in the video haha) 😉 Have fun making the siu yuk!
Susan says
Great video, Jasline! I’d love to try this recipe too, it sounds delicious.
Jasline N. says
Thank you so much Susan! This dish is very well-loved in many Asian countries and I hope you will love it as much as I do! Let me know how it goes for you 🙂
Bam's Kitchen says
Jasline, I love love love this recipe!!!! The video is amazing! love that crunch of the crispy crackling. Sharing every where my dear!
Jasline N. says
I’m in love with this recipe too Bobbi! Hearing the crunch of the crackling is really satisfying, thanks for sharing! 🙂