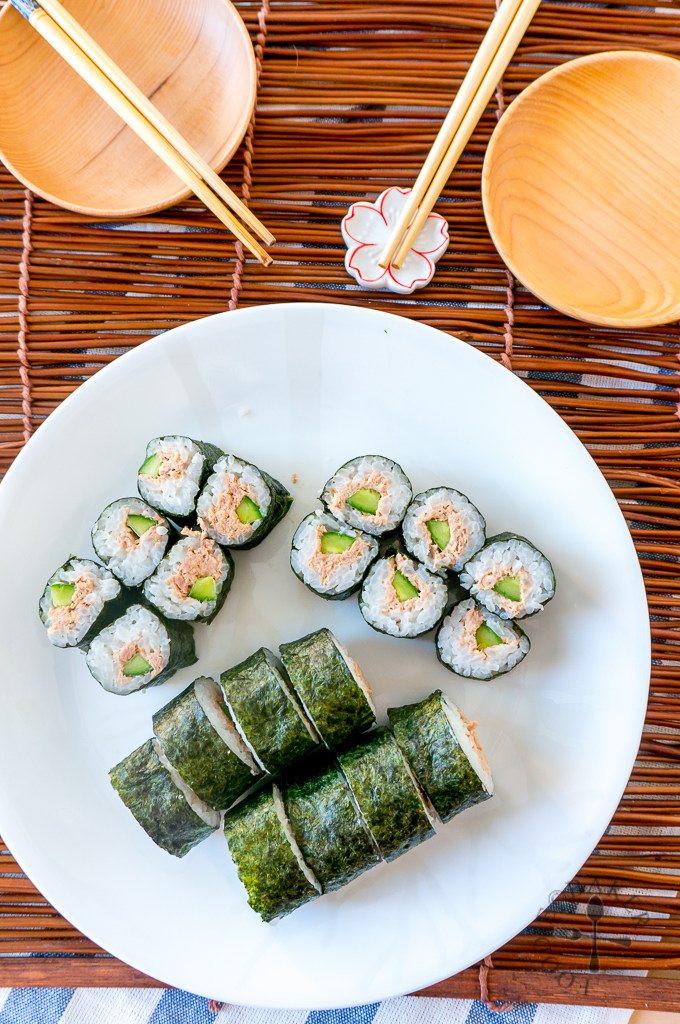
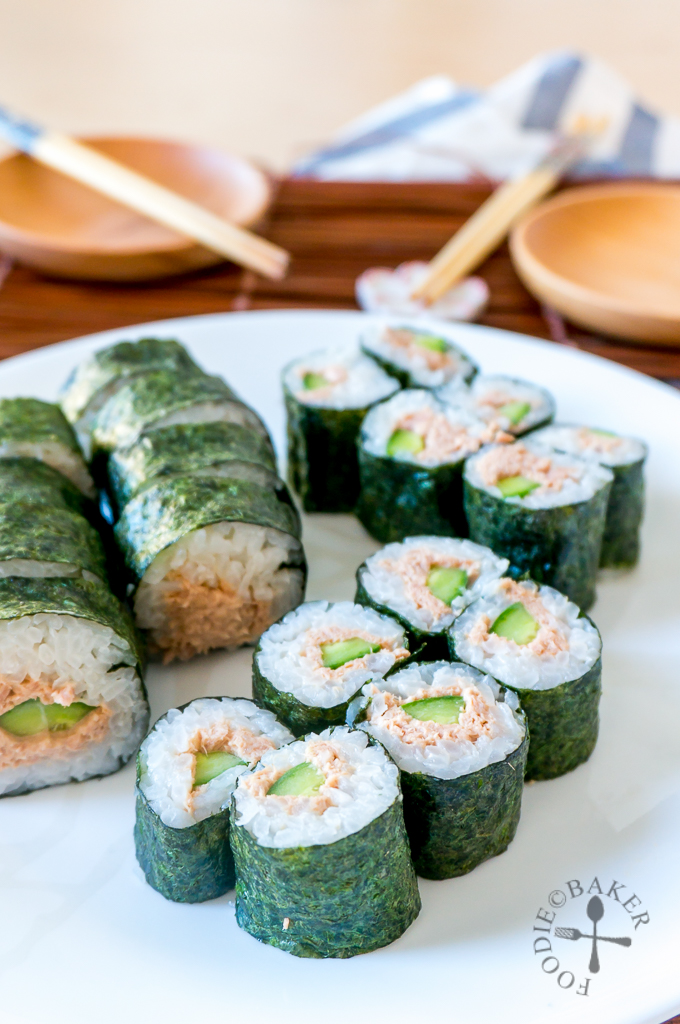
After going to Korea for gimbap, let’s head to Japan for sushi! Okay, not really sushi, but sushi roll! Sushi rolls have a variety of names in Japanese – makizushi (巻き寿司, “rolled sushi”), norimaki (海苔巻き, “Nori roll”), makimono (巻物, “variety of rolls”) and futomaki (太巻, “thick, large or fat rolls”). Today I’m sharing one with the easiest filling ever – Tuna Sushi Roll.
P.S. This is a scheduled post as I’m currently away on holiday in Eastern Europe!
Thank you for visiting and my apologies as I won’t be able to visit your blogs during this period.
Do follow me at Instagram and Facebook to see what I am up to (I swear I am up to some good)!
The main difference between sushi roll and gimbap lies in the rice. In sushi, the rice is flavoured with vinegar, sugar and salt and has to be cooled down quickly. ON the other hand, the rice is gimbap is simply flavoured with sesame oil and sesame seeds. Personally I like the taste of sushi rice more but it is a bit more troublesome to make. However, the filling for this tuna sushi roll is many times easier than the ones for gimbap!
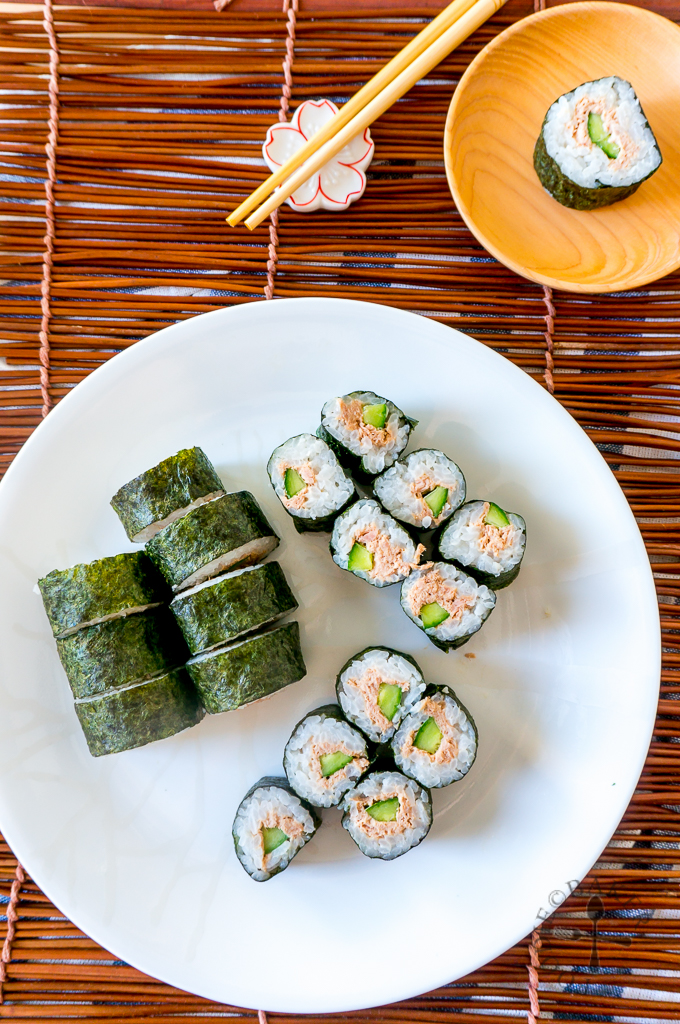
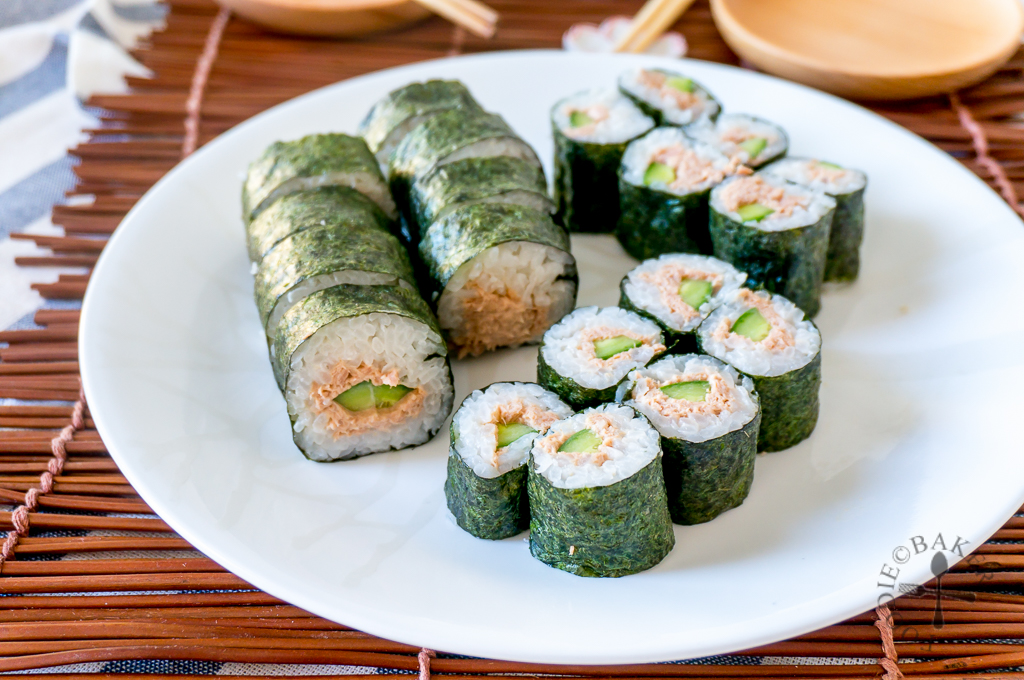
The tuna filling is a very simple 3-ingredient filling – canned tuna, mayonnaise and wasabi. I prefer to use canned tuna in water so that it does not lend a greasy feel in the sushi roll. I tried to make mini rolls as well but was not able to roll them perfectly because I used a bit too much rice.
This tuna sushi roll will be good as a main on its own, but you can make a more complete meal with miso soup, chawanmushi or chicken karaage!
Step-by-step Photos | |
|---|---|
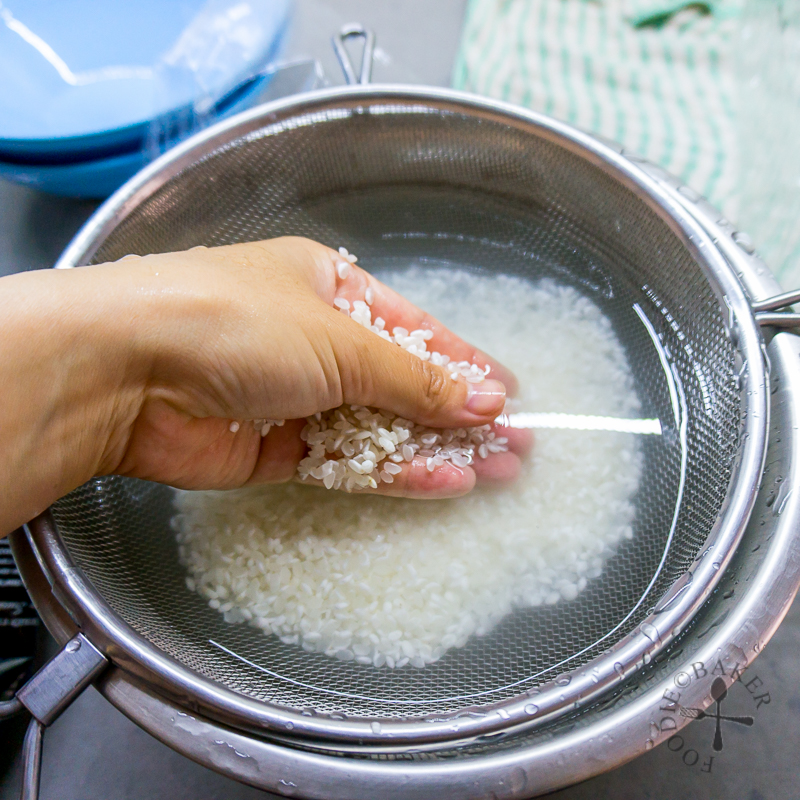 | 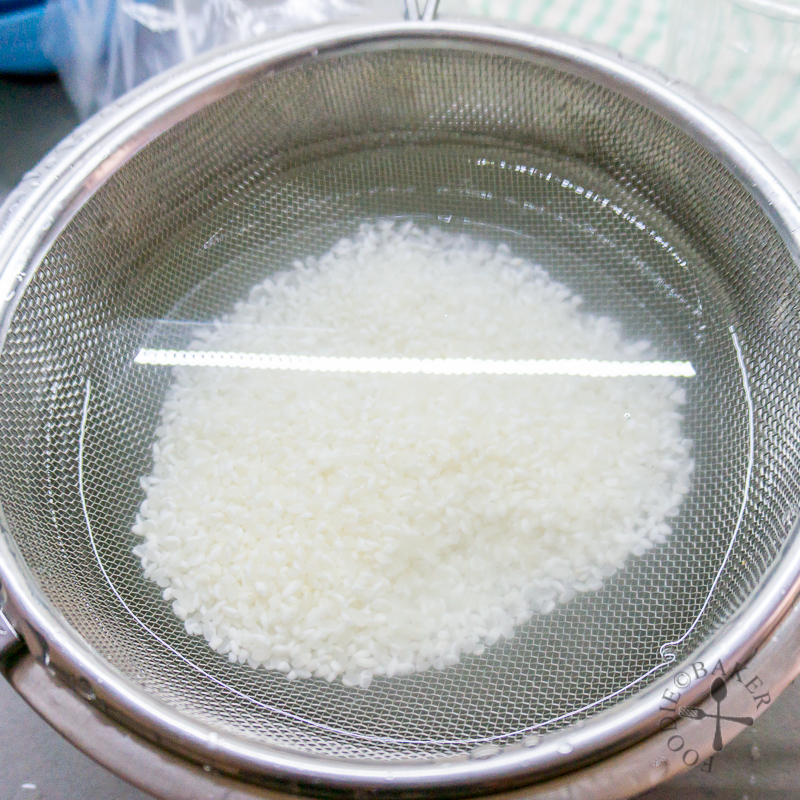 |
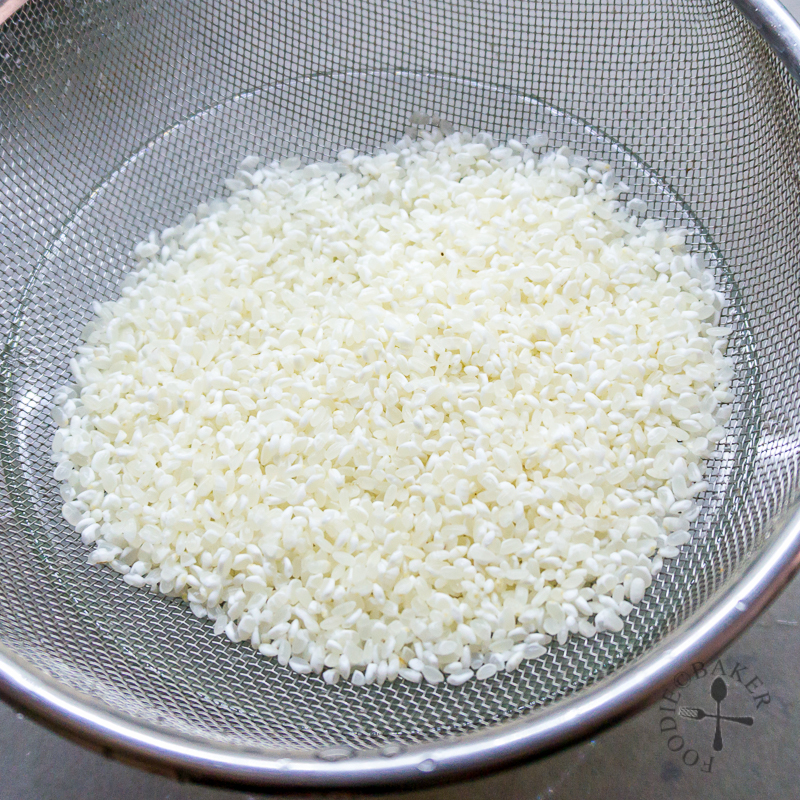
| 1) Place the rice in a sieve and set the sieve in a bowl. Add water, then gently rub the rice between your hands. | 2) Discard the water and repeat until the water becomes relatively clear. |
 | 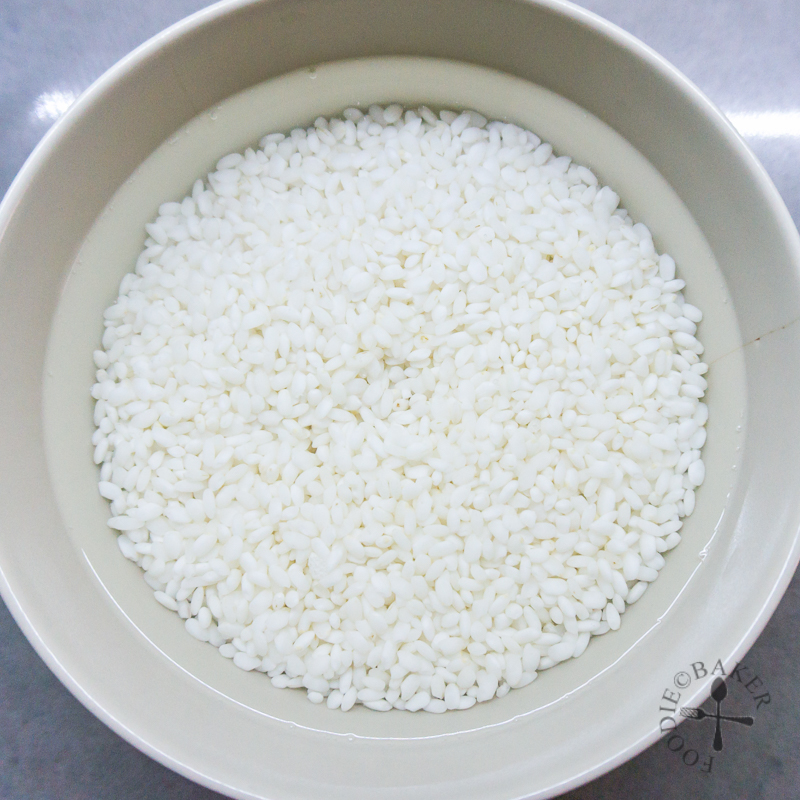 |
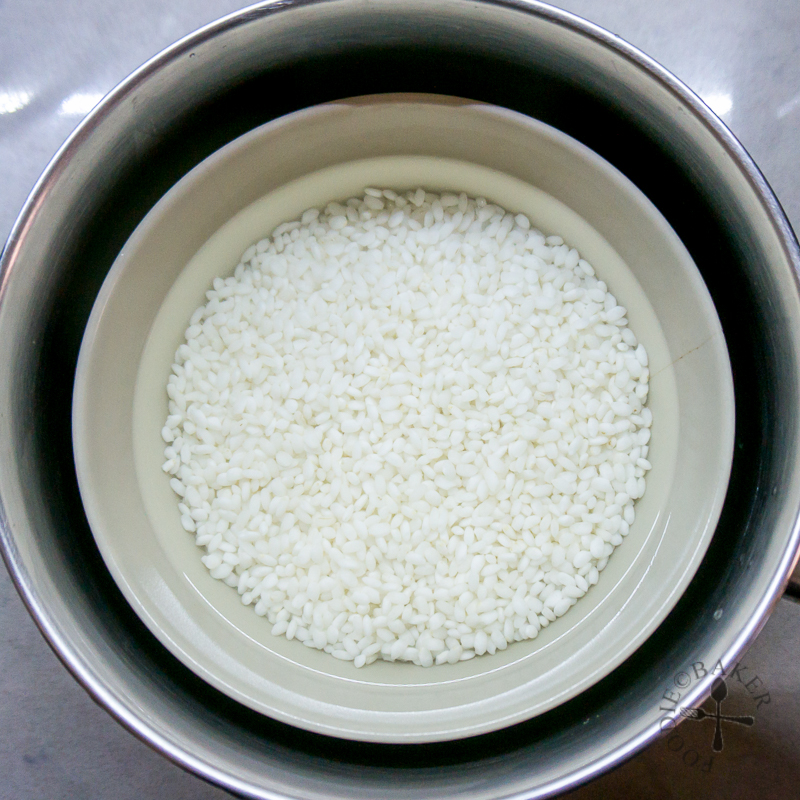
| 3) Drain the rice for 30 minutes. | 4) Transfer the rice to a heatproof bowl (preferably metal as ceramic may crack over time) that can be fitted in a pot. Add water and let the rice soak for at least 30 minutes. |
 | 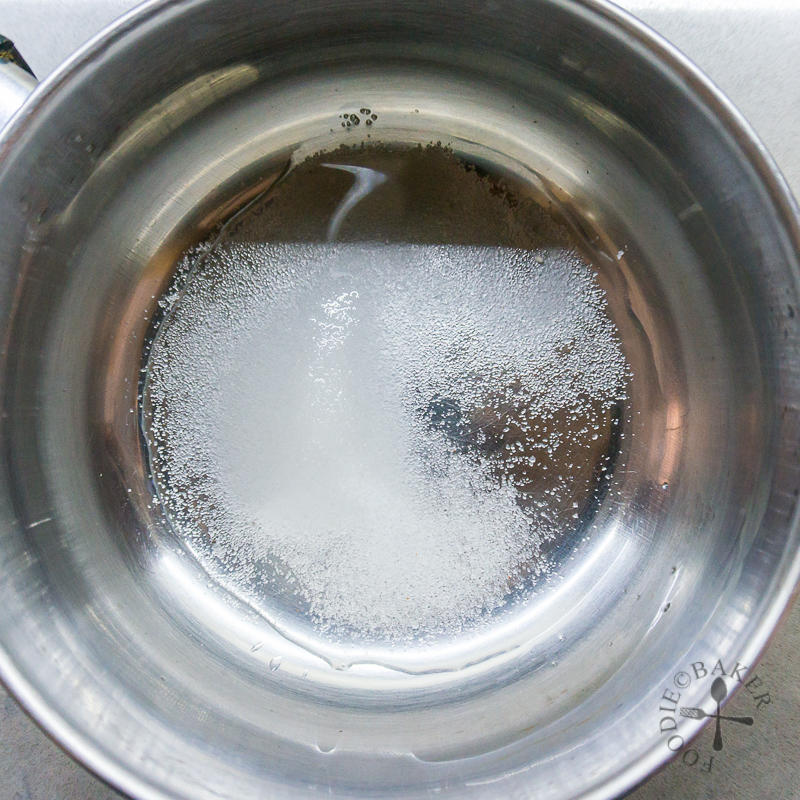 |
| 5) Fill the pot with a bit of water and place the bowl of rice inside. Cover the pot with a lid and bring the water in the pot (not in the rice)to a boil. Reduce to low and simmer for 15 to 20 minutes until all the water has been absorbed. Turn off the heat and let the rice steam for 10 minutes. | 6) Combine rice vinegar, sugar and salt in and large small pot or small bowl. Heat up / microwave until the sugar has dissolved. |
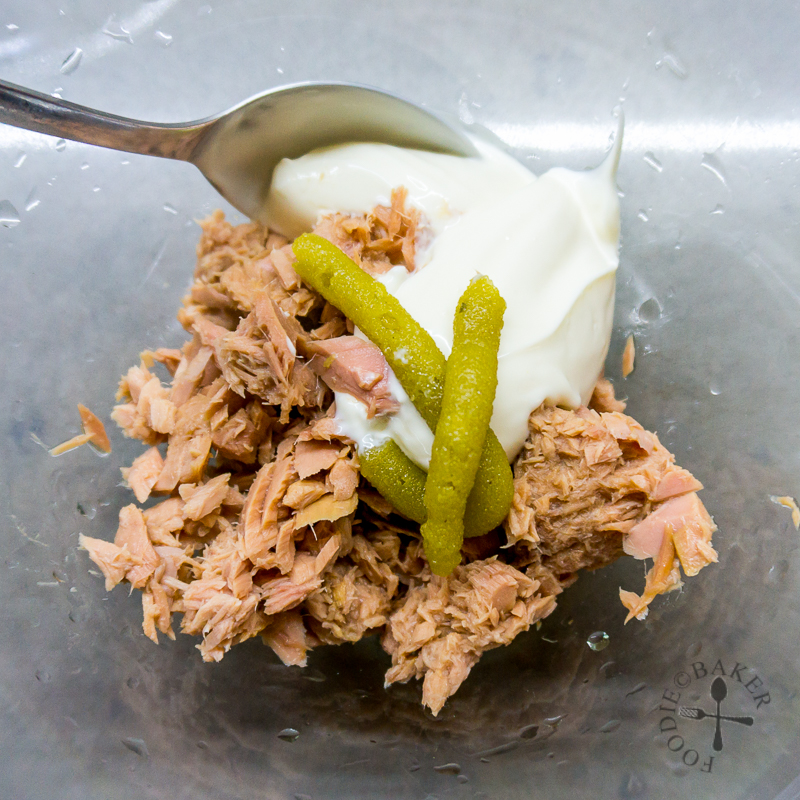 | 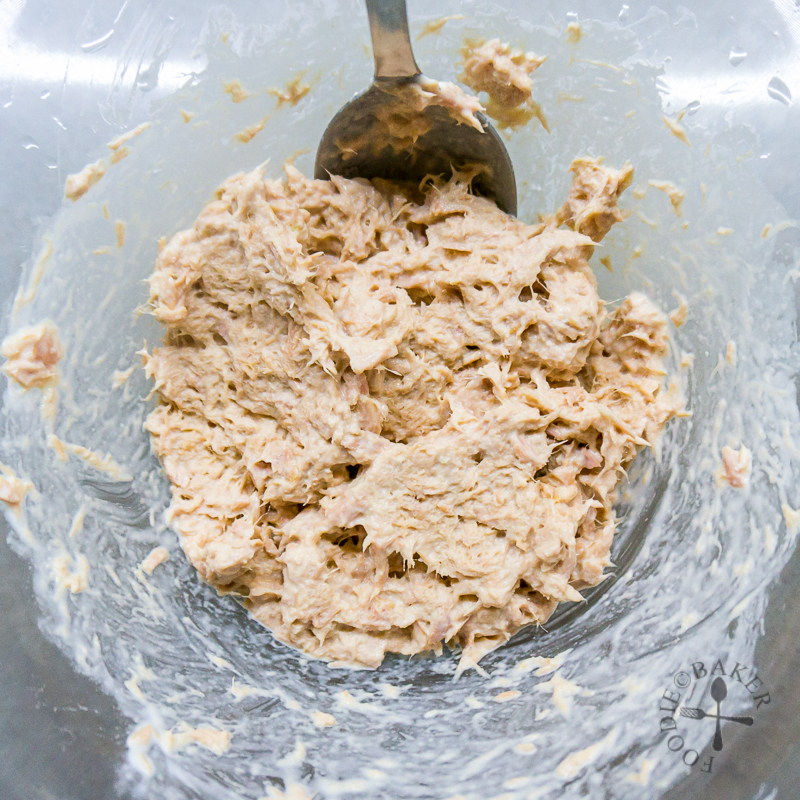 |
| 7) Tip the canned tuna into a sieve and drain well. Flake the tuna into small pieces. Add in mayonnaise and wasabi and stir to mix them together. | 8) Promise you won't try eating straight from it! |
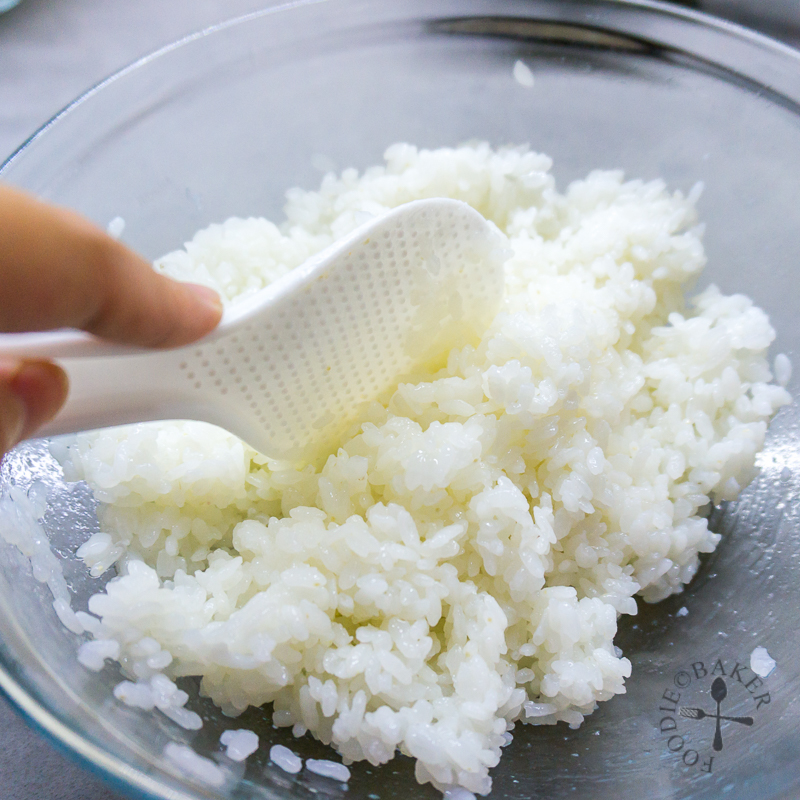 | 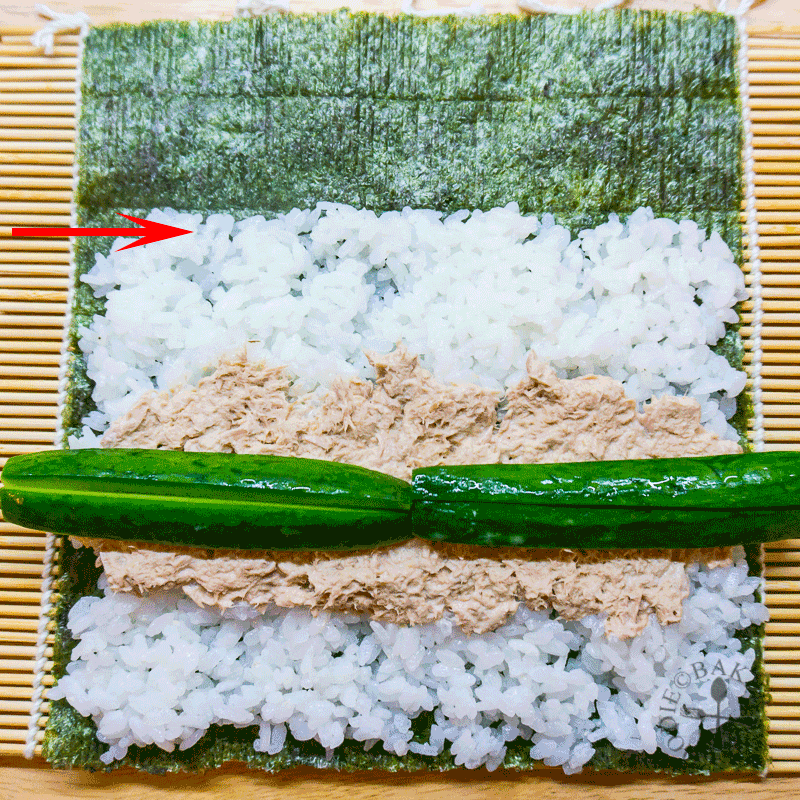 |
| 9) Mix the rice with the vinegar, while fanning to cool down the rice quickly. | 10) Assemble the sushi roll - don't spread rice all the way to the end so you have a nicer-looking roll. Also, when rolling up, make sure the start of the rice meets the end of the rice (red arrow) to make a nicer-looking roll. |
Tuna Sushi Roll
INGREDIENTS
Sushi rice
- 1 rice cooker cup short-grain rice, 160g
- 185 ml water, 3/4 cup, plus extra for rinsing
Rice Vinegar Sauce
- 3 tablespoons rice vinegar
- 2 tablespoons sugar
- 1/2 teaspoon salt
Tuna Filling
- 1/2 Japanese cucumber
- 1 can tuna in water, about 100 grams drained weight
- 2 tablespoons mayonnaise
- 1 to 1.5 teaspoon wasabi
Sushi Rolls
- 2 pieces of nori, seaweed for sushi
INSTRUCTIONS
Sushi Rice
- Place the rice in a sieve and set the sieve in a bowl. Add water, then gently rub the rice between your hands. The water should become milky. Discard the water. Repeat until the water becomes relatively clear. Drain the rice for 30 minutes.
- Transfer the rice to a heatproof bowl (preferably metal as ceramic may crack over time) that can be fitted in a pot. Add the 185ml of water and set aside to let the rice soak for at least 30 minutes.
- Fill the pot with a bit of water, about 1/2 to 3/4-inch tall. Place the bowl of rice inside. Cover the pot with a lid and turn on the heat to high. Once the water in the pot (not in the rice) has come to a boil, reduce the heat to low and simmer for 15 to 20 minutes until all the water has been absorbed. Try not to open the pot cover while the rice is simmering.
- After all the water has been absorbed, turn off the heat and let the rice steam in residual heat for 10 minutes.
Rice Vinegar Sauce
- Combine rice vinegar, sugar and salt in and large small pot or small bowl. Heat up / microwave until the sugar has dissolved.
Tuna Filling
- Rinse and dry the cucumber. Cut into long strips. Set them aside.
- Tip the canned tuna into a sieve and drain well. Using a spoon, press down onto the tuna to get rid of excess water.
- Transfer the tuna into a bowl and flake the tuna into small pieces. Add in mayonnaise and wasabi and stir to mix them together. Taste and see if you want to add in more wasabi.
Back to Sushi Rice Again
- You will have to work quickly for the next few steps. Get ready a fan (electric or manual), a spatula and a large mixing bowl with and dust wide surface area.
- Place the mixing bowl on top of a damp bowl to prevent it from sliding. Tip the still-hot sushi rice into a large mixing bowl.
- Drizzle in the Rice Vinegar Sauce then using the spatula, gently combine the rice and vinegar using a cutting motion with the edge of the spatula, while fanning the rice using another hand. (See video here.) It's easier if you have someone helping you to fan the rice while you mixing the rice.
- When all the vinegar has been absorbed, the rice should have cooled down considerably. The rice should be a bit warm but not hot, continue mixing and fanning if the rice is still hot.
- Once the rice has cooled down, cover with and damp tea towel and get ready to roll!
Making the Sushi Rolls
- If desired, toast the nori on a non-stick frying pan over medium heat until warmed through.
- Place the nori on a bamboo rolling mat, rough side up.
- Spread half the rice on the nori, leaving some spacing at the top. Spread the Tuna Filling in the middle of the rice, then top with a few strips of cucumber. (See step-by-step photos for illustration.)
- With the help of the bamboo mat, roll up the sushi tightly, making sure the start of the rice meets the end of the rice to make a nicer looking roll.
- Stick a few pieces of rice on to the end of the nori (to help sticking) then roll it up. Use the bamboo mat to help to keep the roll tight - but don't squash it too hard until it goes out of shape.
- Repeat to make the second roll.
- Cut the rolls into 6 pieces each, wiping the knife with a damp cloth after before each slice. Serve immediately.
Raymund says
Nice simple and easy, the perfect lunch box food. Love it!
Amelia says
Hi Jasline, I’m not a fan of sushi but I do enjoyed looking at your very well taken pictures, very nice,
Have a nice week ahead,regards.
Amelia